Another XR Build Thead. This time with 1000% more Saab
Posted by MattWatson

MattWatson Matt Watson Infallible Moderator Location: Calgary Join Date: 04/17/2013 Age: Midlife Crisis Posts: 151 Rally Car: Merkur |
So, I thought I should actually post this here… I started the XR last September or so (a really really dumb time to start a car in Calgary without a heated garage.
I have always been a Saab guy, and own three right now: two 900 SPGs and a 99 EMS. I was talking with John putting forward a crazy plan to do a RWD conversion on a Saab 900 (there is a 99 undergoing the knife at saabrally right now…) and he mentioned the XR4Ti. I wasn’t keen since a. they are rare (read expensive) and as with the Saab, I know what a pain in the ass it is to get parts for rare cars sometime. He had a number for a guy locally that had a ‘few’ cars and said I should give him a call. I talked with the guy with the XRs, and he ended up have 8(!) with 6 that he was willing to sell for attainable money. I ended up picking up 2 for $800. 1 full runner, complete, and one roller with a spare block. 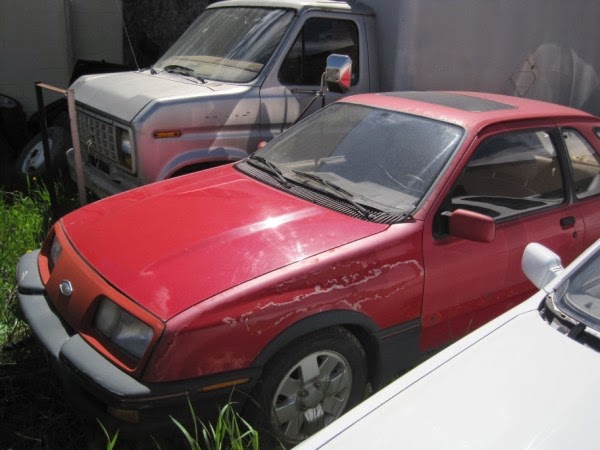

I have a bunch of these posts already put together, so there will be a lot quite quickly. We'll get to the Saab part later. |
MattWatson Matt Watson Infallible Moderator Location: Calgary Join Date: 04/17/2013 Age: Midlife Crisis Posts: 151 Rally Car: Merkur |
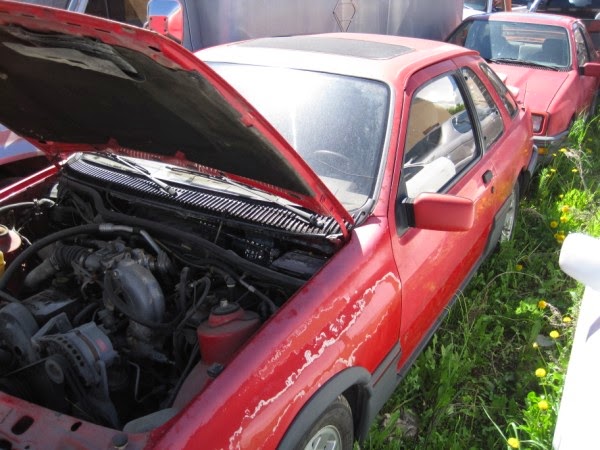
I ended up deciding to modify the silver car for a couple reasons:
1. The silver car is just a roller anyway, so it has less to take out to strip 2. The runner will be stored at my parents place, so its nice you can just turn the key and drive 3. I thought it was in better shape. So begins the build. I started by gutting the interior which smelled TERRIBLE. Obviously several mice had made a home, and it stunk. Really stunk. I took the harness out complete, but i'll likely rebuild and relocate it. No pictures of this process, since none of it is going back in. The class I will run in does not require stock interior, so it can go away. SUNROOF Finally on to pictures. I ended up doing the sunroof first, since I had the steel available and it was fairly easy. I did it with the 18ga that I bought for doing the cage re-inforcements, and I will NEVER do that again. Way too difficult to form. Enough so that I will have a couple areas that need some bondo since it ended up deforming the roof a bit in a couple areas. removing the framework from the car to get more headroom: 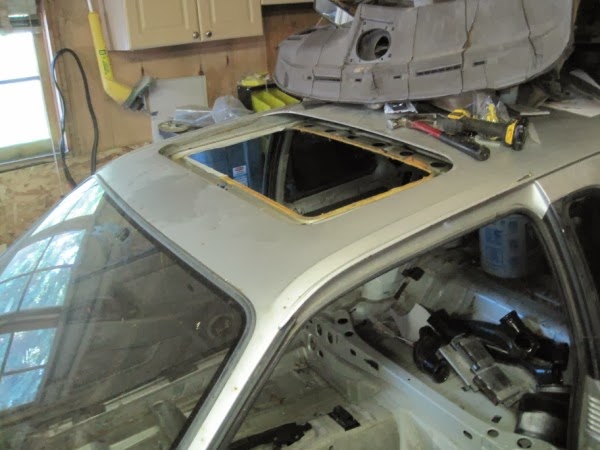

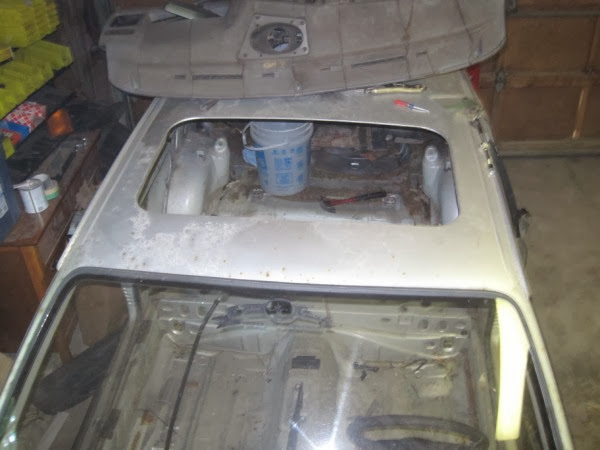
I used a tape form to get a proper size to cut out using the glass that was in the sunroof. This is an old metalworker's trick to get an idea of compound curves live fenders to reproduce them. You lay 1 layer of tape (usually fiberglass reinforced) at 90 degree offsets in layers, and then peel it off. It then has a perfect mould of the surface, with the added advantage that if you want to produce a mirror, you can turn it inside out. 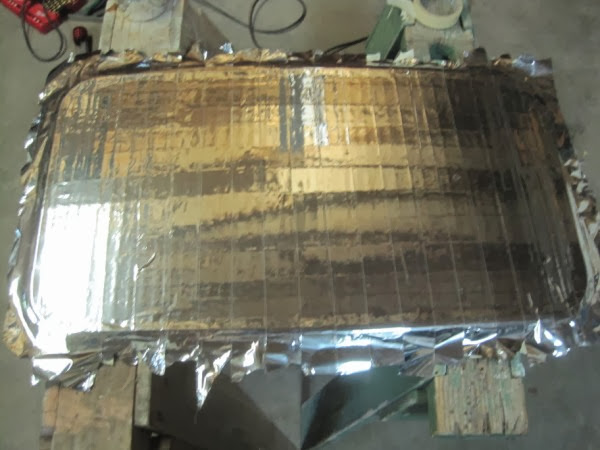
vicegrips and a piece of steel to make a pizza tray (this is much easier with a better thicknes... say 20ga: 
After hammer and dolly work: 
Slits to allow forming a bit better since it is so damn thick steel: 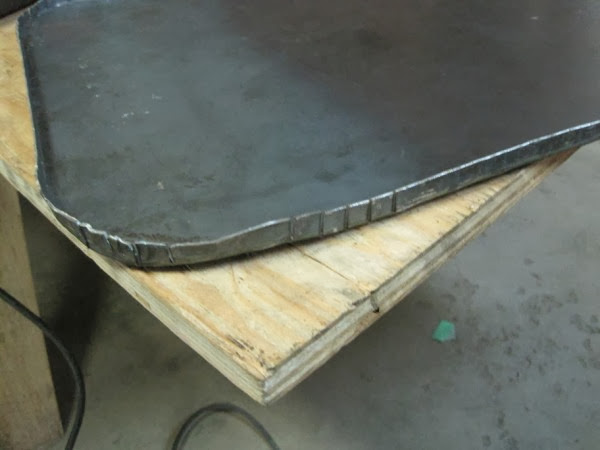
Dry fit: 
I didn't take a picture of it welded in, because it doesn't look as good  and it's going to be bondo'd over anyway. It looks way better with the above picture. I could have tacked it from the inside, sealed it and painted it and it would have been perfectly nice. and it's going to be bondo'd over anyway. It looks way better with the above picture. I could have tacked it from the inside, sealed it and painted it and it would have been perfectly nice.
|
MattWatson Matt Watson Infallible Moderator Location: Calgary Join Date: 04/17/2013 Age: Midlife Crisis Posts: 151 Rally Car: Merkur |
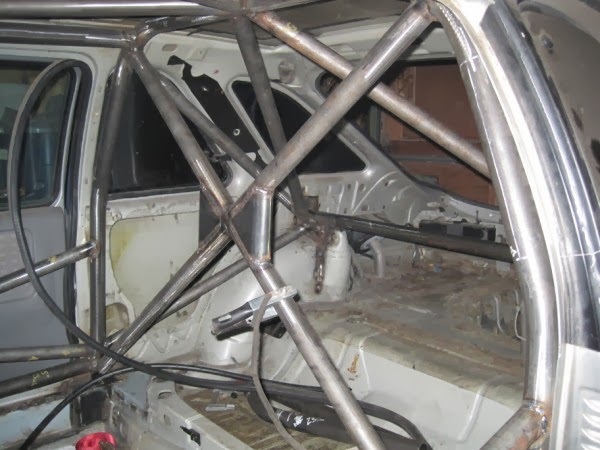
On to the roll cage...
Anyone see anything wrong with this? 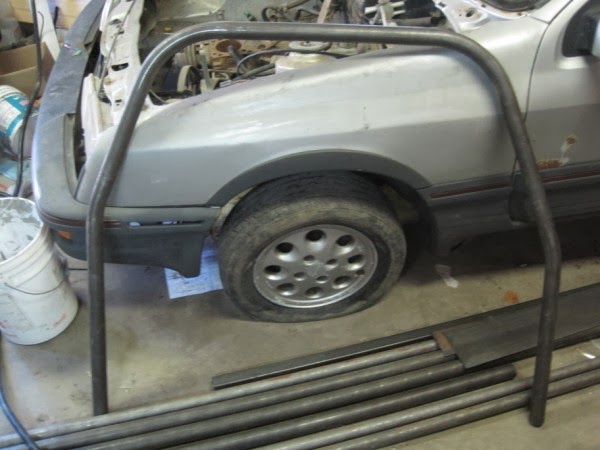
This is what happens when you measure to the wrong "center" that you marked on the roof of the car... 2" off center, which makes this 4" narrow. CRAP. Also you can see (its not an illusion) that one leg is longer than the other. Take 2: 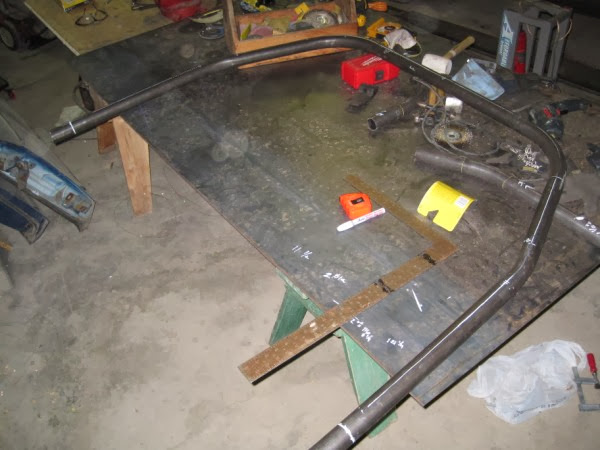
Much Better 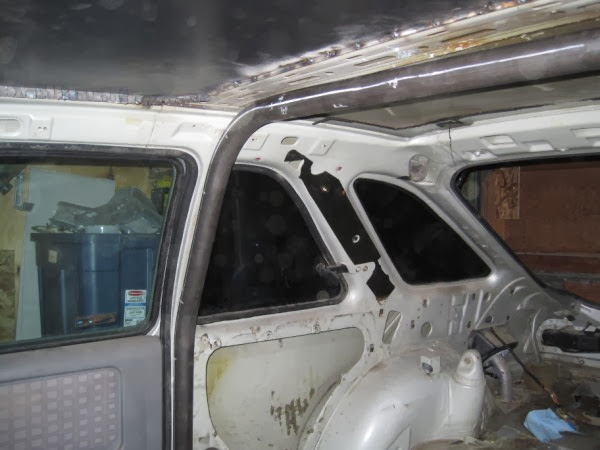
Next up were the 1/2 laterals. I ended up using some tricks for this that I don't know if they are common knowledge or not. Since they need to bend into the car to follow the a pillar, then back, the bends have to be offset from each other. In order to do this I came up with this: I marked a line down the center of the tube by putting the tubes side by side, then scribing them with a scraper. This is guarenteed to mark a straight line 100% on the highest point of the tube all the way down: 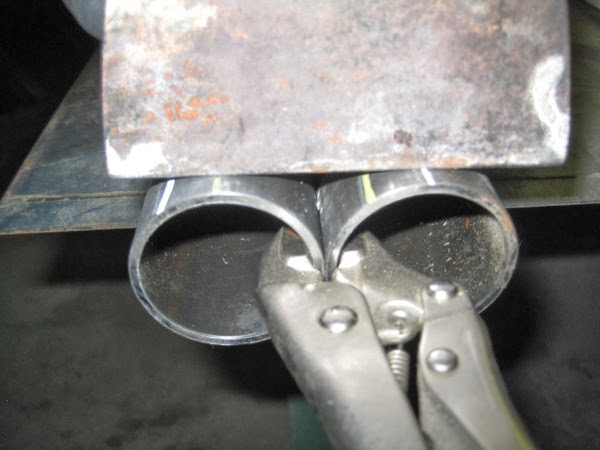
In that pic I had already scribed the line, then marked the offset, and was set to scribe that as well. Here is the result: 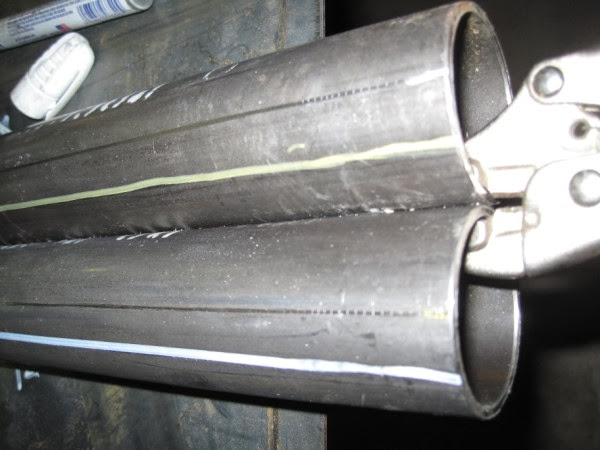
I then did the layout on both tubes. at the same time to make sure that EVERYTHING was mirrored right. One line was yellow and one was white mirrored. That way, you can 100% see which bend you are supposed to make where. The starting points of bends were marked, starting from the middle: 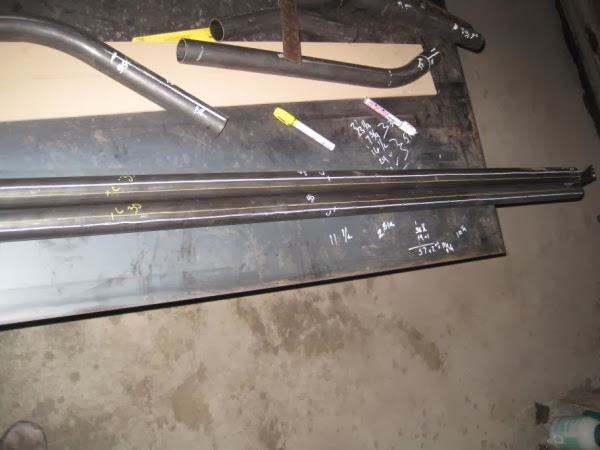
I then bent them up, marked the end of the bend using a straight edge to find where the gap started, and then measured and marked the next bend on each side. I like this bender. A couple quirks to deal with, but nothing hard once you know how to use it: 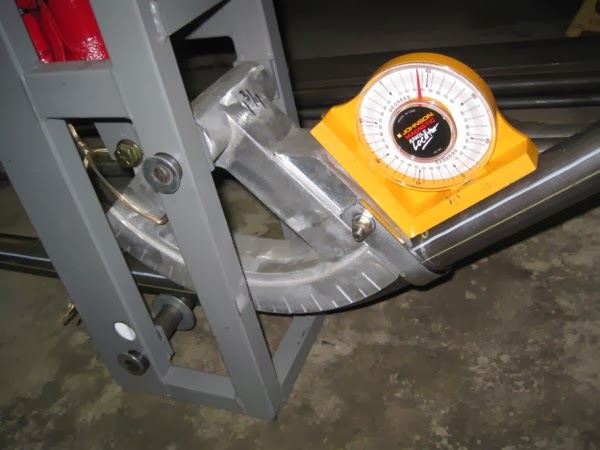
Drivers side finished: 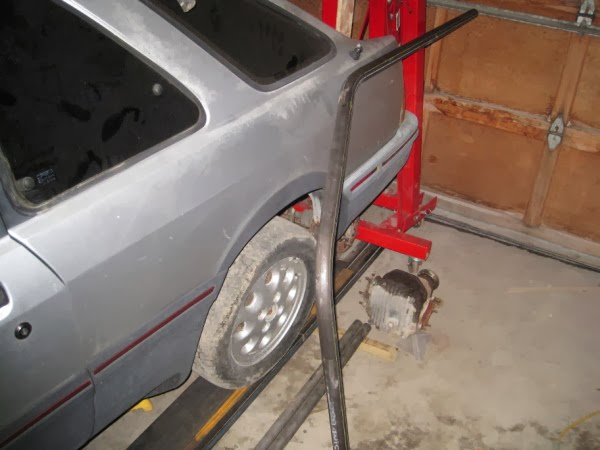
|
MattWatson Matt Watson Infallible Moderator Location: Calgary Join Date: 04/17/2013 Age: Midlife Crisis Posts: 151 Rally Car: Merkur |
|


MattWatson Matt Watson Infallible Moderator Location: Calgary Join Date: 04/17/2013 Age: Midlife Crisis Posts: 151 Rally Car: Merkur |
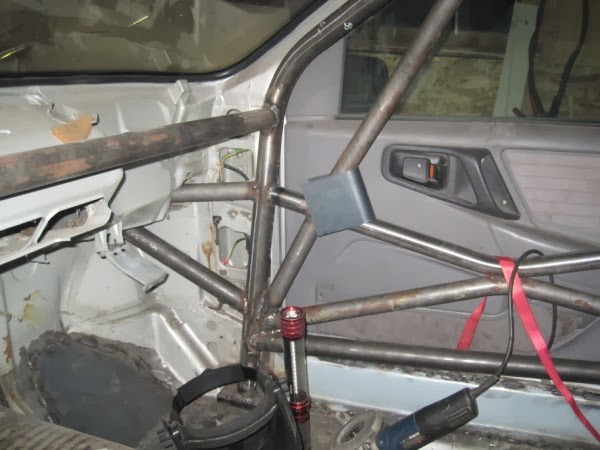
Door Gussets:
This was the method I used, probably better out there. 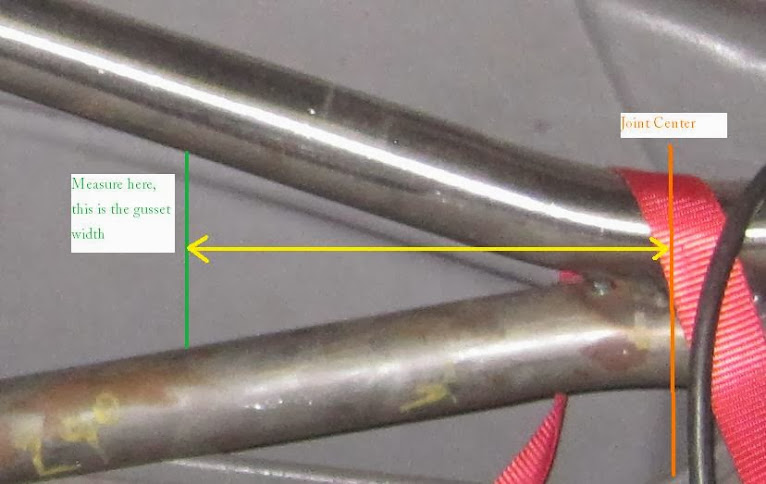
So your material width is the green width. The material length is 1/2 the circumference of the tube you are gusseting plus double the yellow measure. Cut out the square sheet of steel 
Mark the center, align that 90 degrees to a scrap piece of tube the same size as what you are gusseting, and use two vice grips to lock it there 
Start bending by hand. Keep your hands close to the tube to get a smooth bend. This is a bit more than 1mm thick steel (so thick) and it bends pretty easily. 

You will want to over bend it, which will help hold it it on the tube when you are trying to tack it in place 
Because the bars I am doing are such a low angle, I wanted to make sure they were properly gusseted. So instead of measuring between the closest points, I measured from the tube centers. So the gusset is too far out. 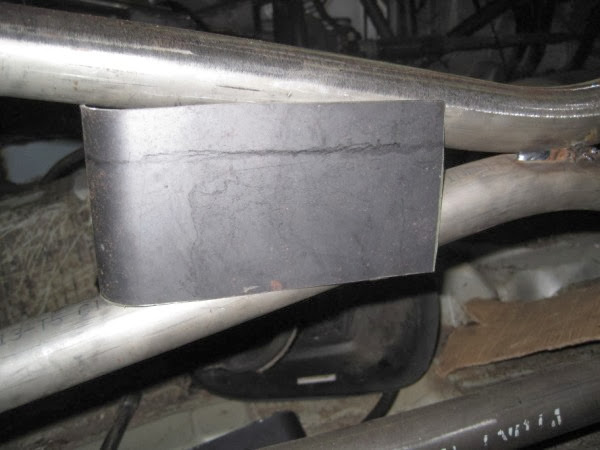
To fix this, I took the ends, and then notched them at 45degrees. I pre cut a tube to act as a template so I didn't ahve to mark this every time and cut them. 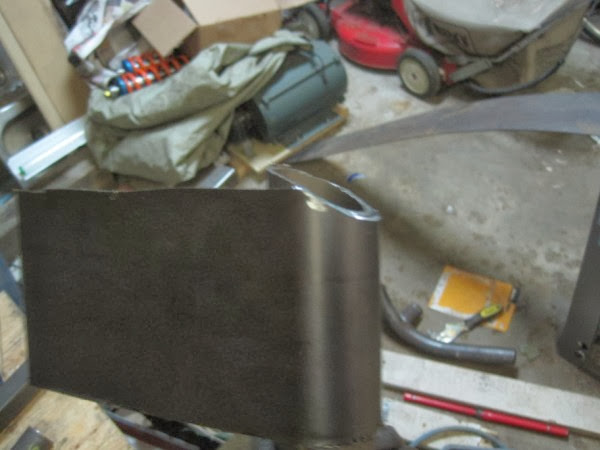
Still a bit off. Start to take a bit off the 45 to get them closer. Be careful, a small amount off on this moves it in a LOT 
Mark your trimming. On a straight joint, take a straight edge and draw a line from the tube center to the joint center. For these since they are bent tubes that joined, I used my fingers on the TOP of the tube and then held the pen at a constant distance. as you move it down the tubes, it marks the center of the tube for you 

Cut along the lines and clean it up a bit with a grinder cutoff wheel. 
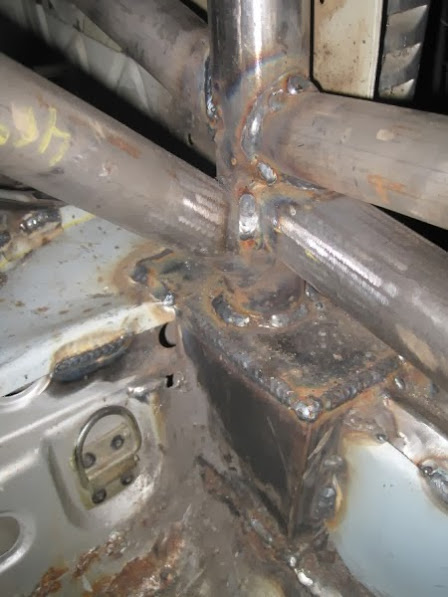
Clamp them on TIGHT. the less gaps the better. Tack then fully weld. I didn't do a great job on the welding on this one.. pretty uneven. Strong, but a bit ugly. I was having issues with the welder, and don't know why. I dont think it likes the hot rolled steel much. Could be the coating on it, since I didn;t take it off completely. 

|
MattWatson Matt Watson Infallible Moderator Location: Calgary Join Date: 04/17/2013 Age: Midlife Crisis Posts: 151 Rally Car: Merkur |
|

MattWatson Matt Watson Infallible Moderator Location: Calgary Join Date: 04/17/2013 Age: Midlife Crisis Posts: 151 Rally Car: Merkur |
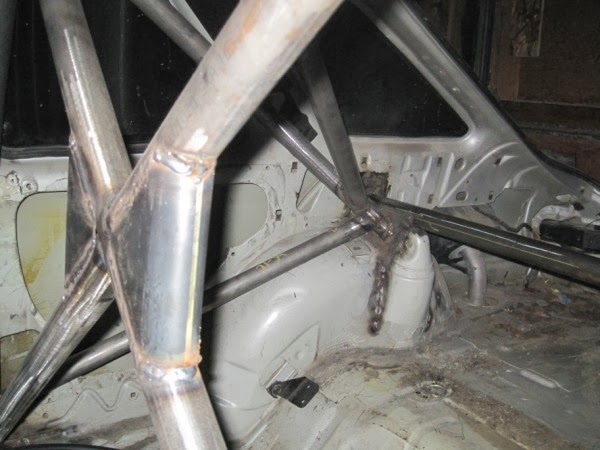
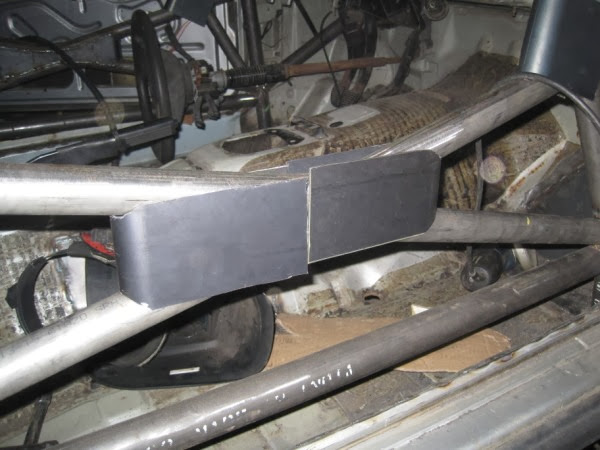
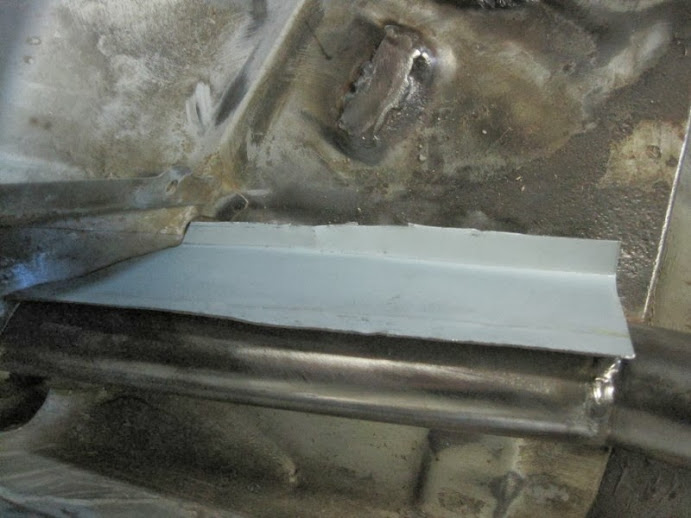
So, drivers side, I inlet the floor for the seat mounts, because I am tall so I'd like some headroom. On the passenger side, I decided to take a different route and did FIA 35mm square tube mounts that are more normal. (well mine are 1 1/2" since getting 35mm tube here is impossible.
I missed some pictures on this that didn't save into my camera, but the ends of tunnel side tudes are inlet into the tunnel so that I can put in the inserts very close to the tunnel. So without further ado: Sill side front mount, this is missing the bolts. The bars will be removable. 
Tunnel side front mount 
Measuring back for back mount with my high tech measuring stick: 
I ended up measuring the centers on the seat mounts to see how far apart the bars need to be. To find hole center to hole center. Measure from the close side of the hole to the far side of the hole, and that is your center

All Marked up: 
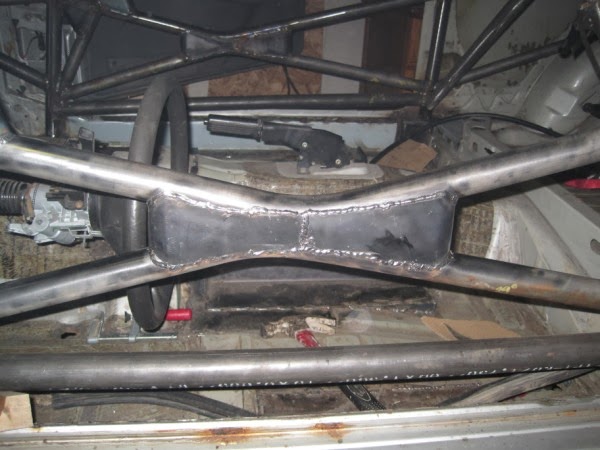
A box all bent up to be welded in... I did weld it in, but it ended up being crappy, so I cut it out: 
|
MattWatson Matt Watson Infallible Moderator Location: Calgary Join Date: 04/17/2013 Age: Midlife Crisis Posts: 151 Rally Car: Merkur |
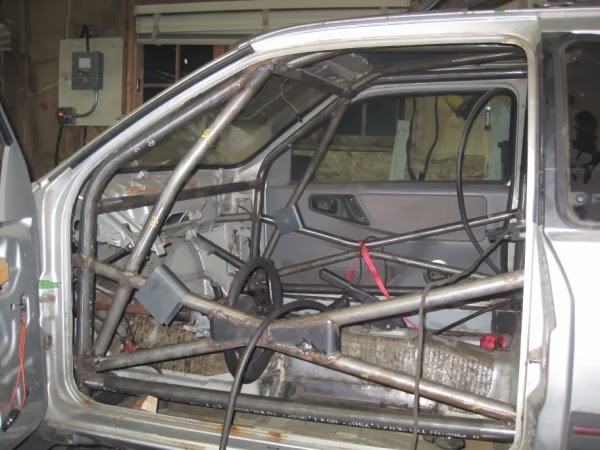
So a couple pictures need to be posted at least every day... so look its a seat in a car:
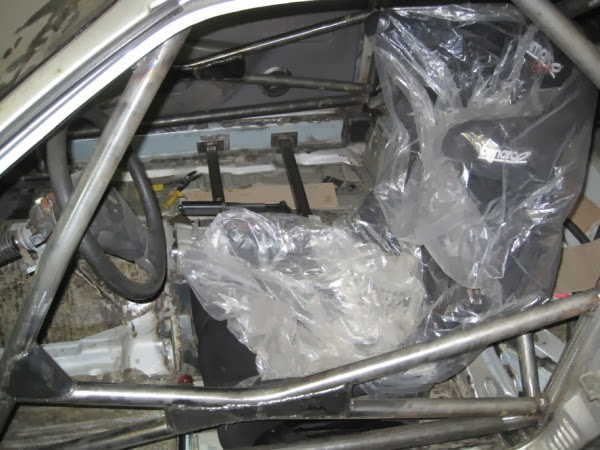
I sat in it, decided how far back it needed to be and then marked the front holes. I'll mark and drill the backs afterwards based on measures instead of tracing: 
Mocking up the shoulder straps to make sure they would reach the back harness bar and I didn't have to put something closer. They are all good to wrap around the bar. 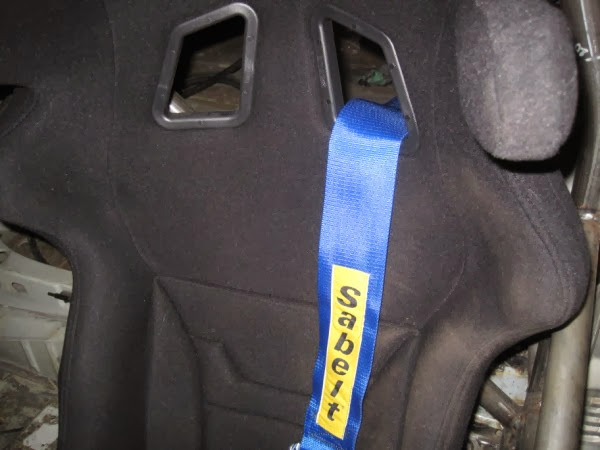 
When the seat was bolted in with the front two holes, I marked all the harness openings to try to figure out where I am going to mount the plates: 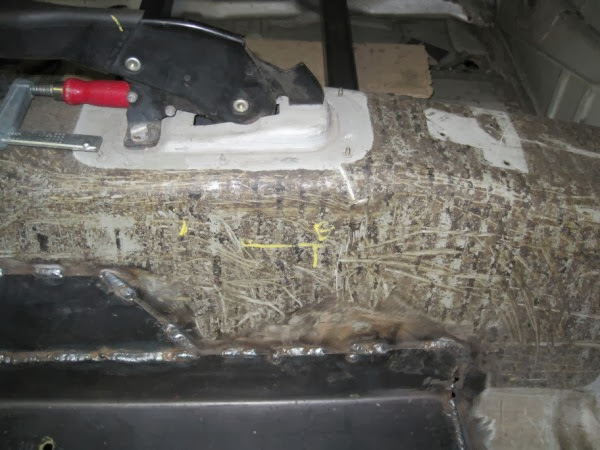 
Kinda where the plate is going, just on the other side of the body. The idea is that if the harness pulls that it will have to pull the plate through the floor... and if that happens then well... there's bigger things to worry about. 
|
MattWatson Matt Watson Infallible Moderator Location: Calgary Join Date: 04/17/2013 Age: Midlife Crisis Posts: 151 Rally Car: Merkur |
Seat mount inserts:
Cut a slug: 
Chuck it up, and clean up the face: 
drill through it (this dripp was just used to countersink it): 
Unplug the lathe and then put the end of the tap in the hole, and support the other with the tailstock. This makes sure it goes in straight. Lots of people will power tap (ie turn the part and let the tap draw in), but I only have 1 of these m8x1.25 taps, and need to make about 14 of these since a friend wants some too, and I don't want to break it.: 
Tapping by hand to avoid breakage. Its also easier when it;s vertical since it clears the chips ount of the bottom: 
Thread a bolt into it with a locknut on the shaft, tightend the locknut. 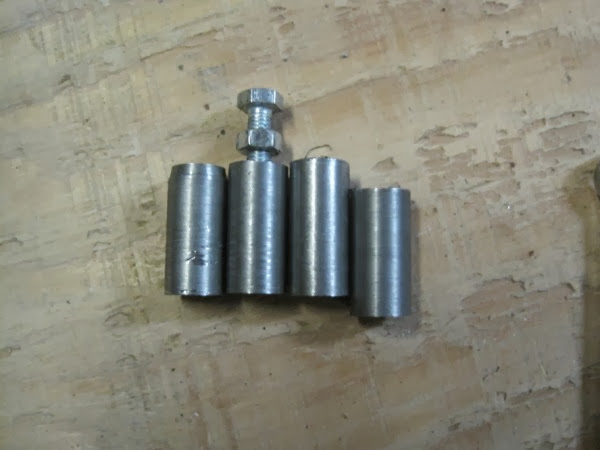
You can then chuck the bolt rather than the part. Make sure to support it with the tailstock since it isn't really all that stable: 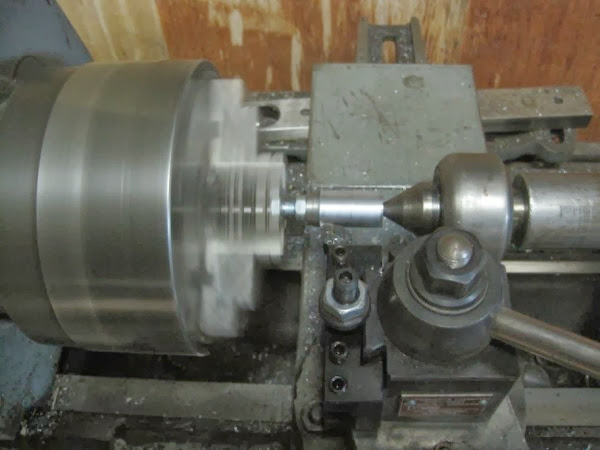
Clean up the OD:
Take out the bolt, reverse it and clean up the other end. You end up with something that looks liek this: 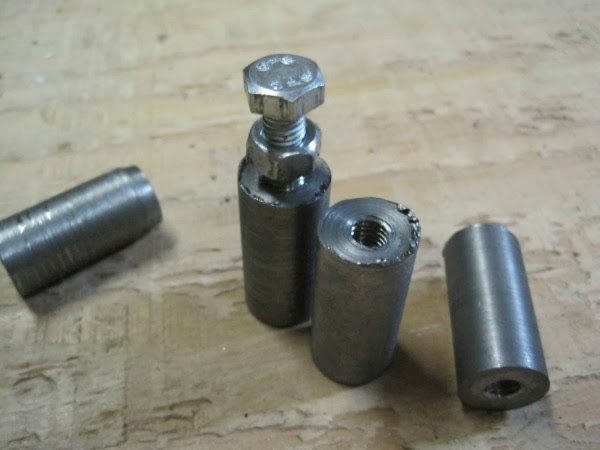
I then did a step so that it is only 2mm wide by 1/2" in diameter. This will let me seat it inside the tube so it doesnt pull through. I had pictures of this, but my camera didn't save them... |
MattWatson Matt Watson Infallible Moderator Location: Calgary Join Date: 04/17/2013 Age: Midlife Crisis Posts: 151 Rally Car: Merkur |
|
MattWatson Matt Watson Infallible Moderator Location: Calgary Join Date: 04/17/2013 Age: Midlife Crisis Posts: 151 Rally Car: Merkur |
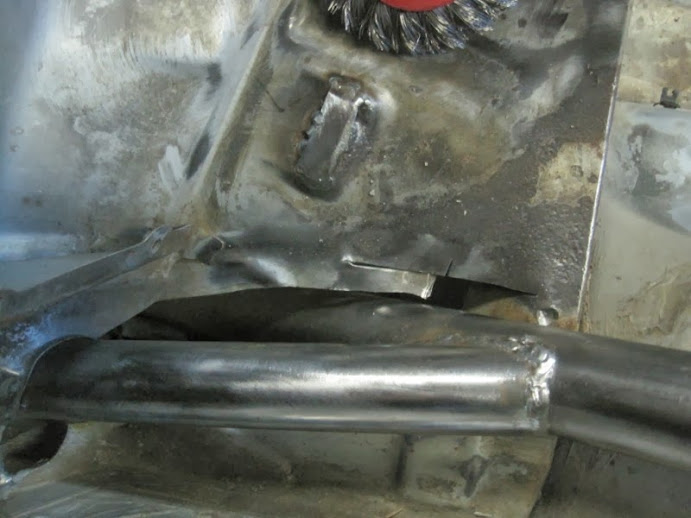
Just some misc tidy up. battery tray removal, and boxing in a section of tubing that came through the firewall that I did a particularly poor job of cutting (no finished pictures, though it is done...)
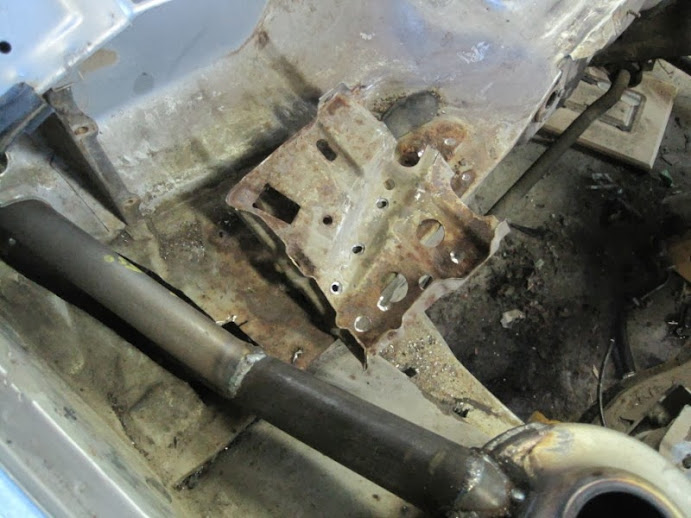
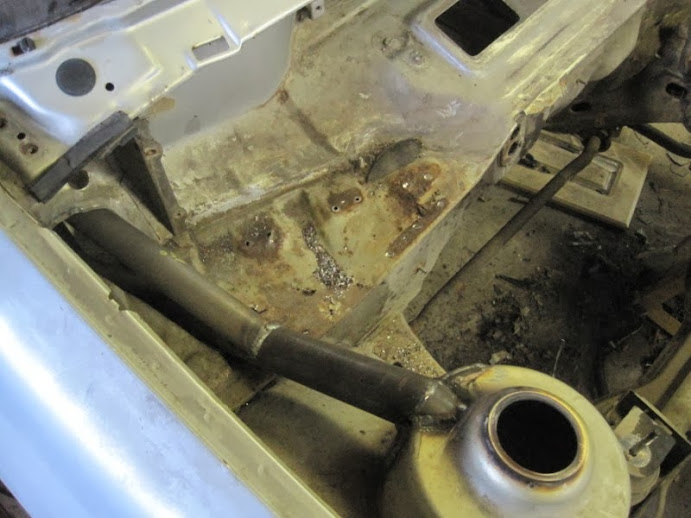
Spare block out and everything out of the engine bay except the steering rack: 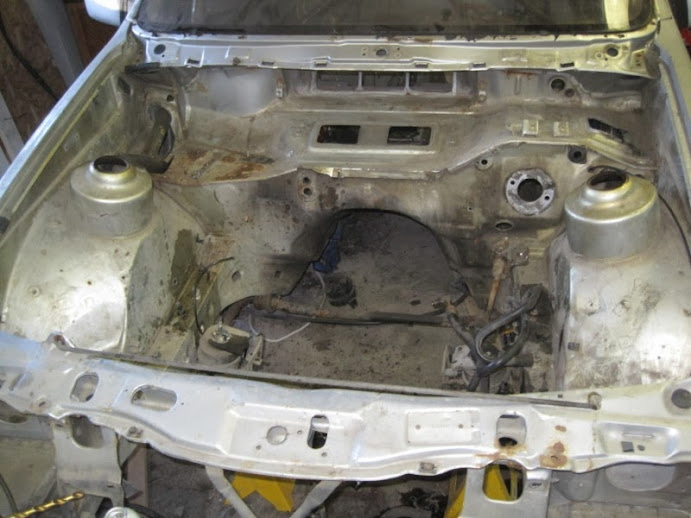
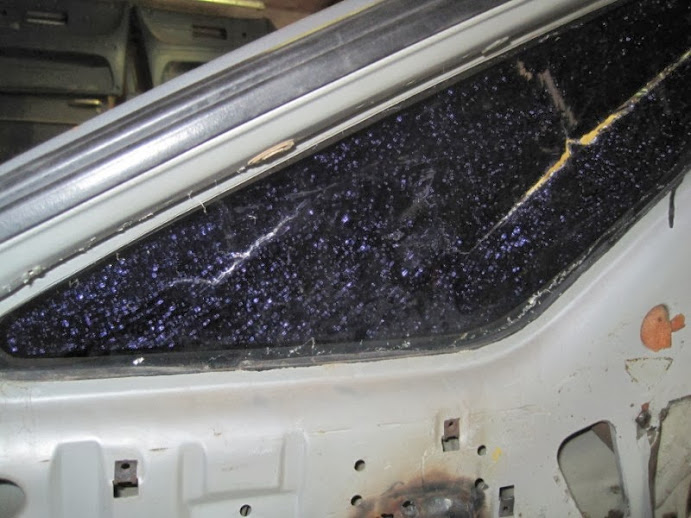
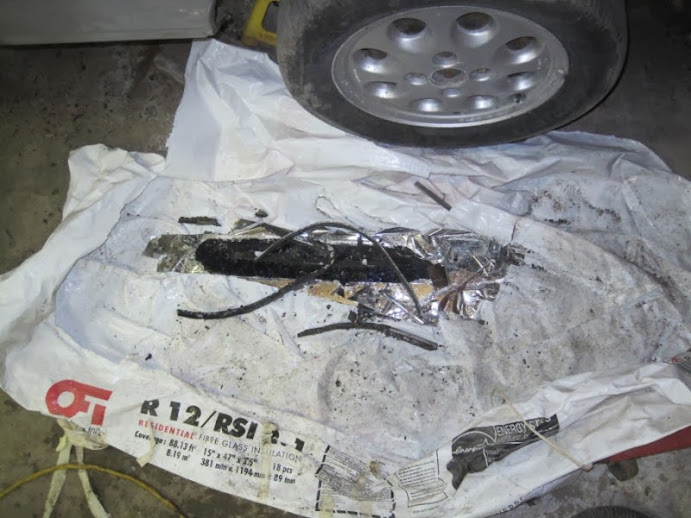
I also made the descision, these are coming out: The front is a pop out, the back is glued in. In true 80's german style (These were built in west germany...) they are held in with ungodly strong adhesive that does NOT come out. The best way to do it is sit it in the sun for a couple hours then cut it out if you want to save the window. I don't care, so it gets covered with packing tape so that glass doesn't get everywhere, then smashed: 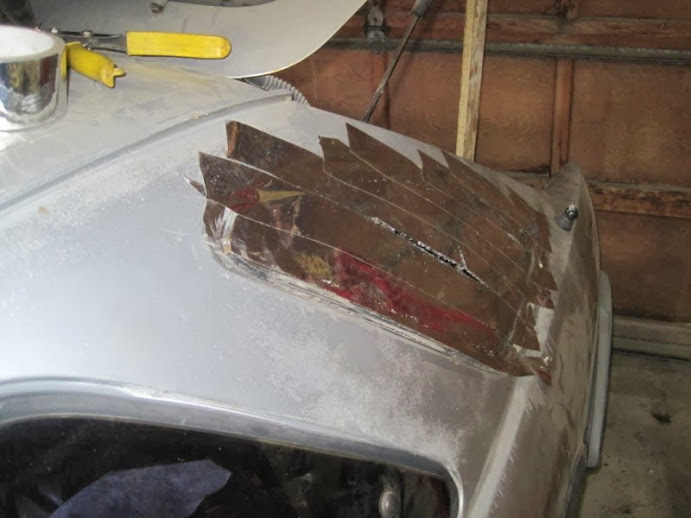
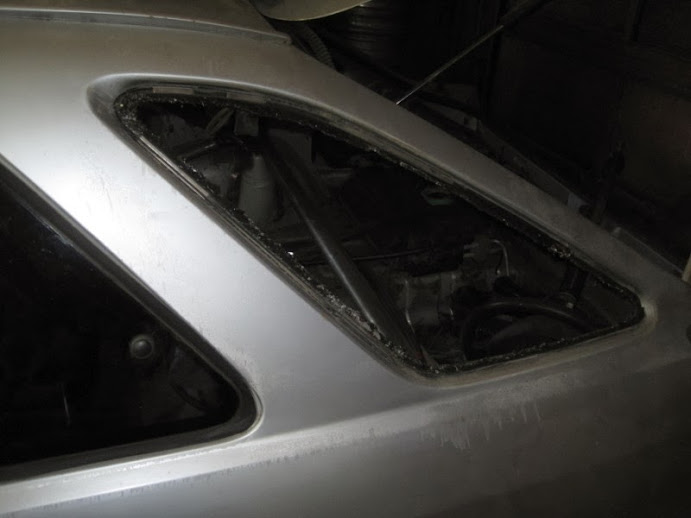
Then the painstaking job of getting the adhesive out: 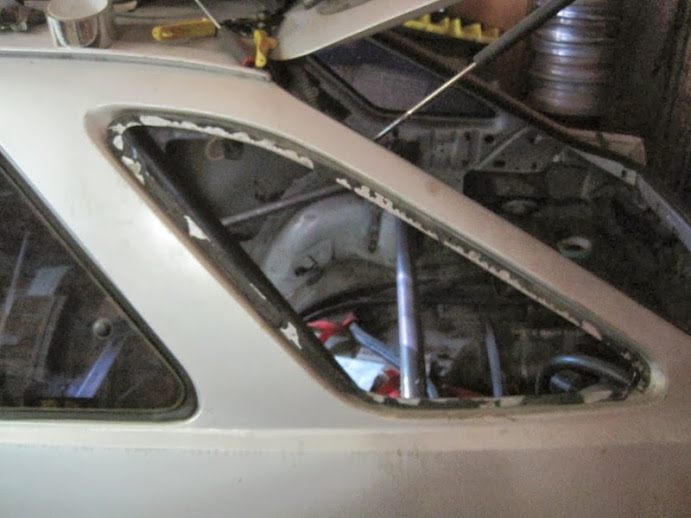
Done! 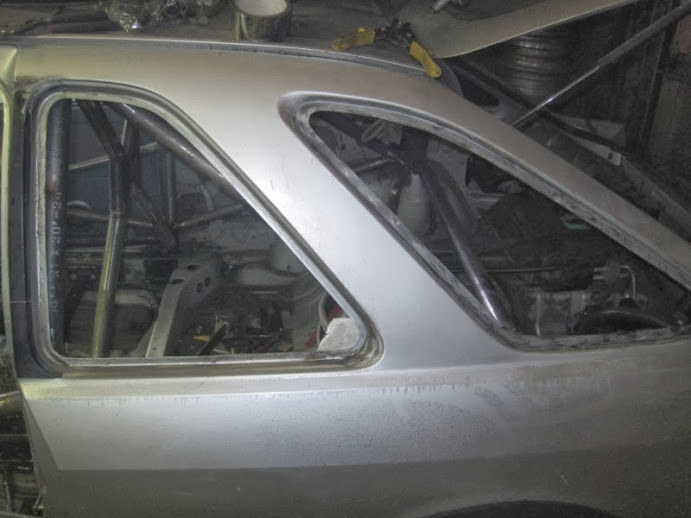
Now to cut out the divider of the window. This will make it almost the same as a Sierra Cosworth... they are slightly different, but I'm not concerned about 100% adherance to shape. It's going to end up being a lexan window anyway so it is easy. 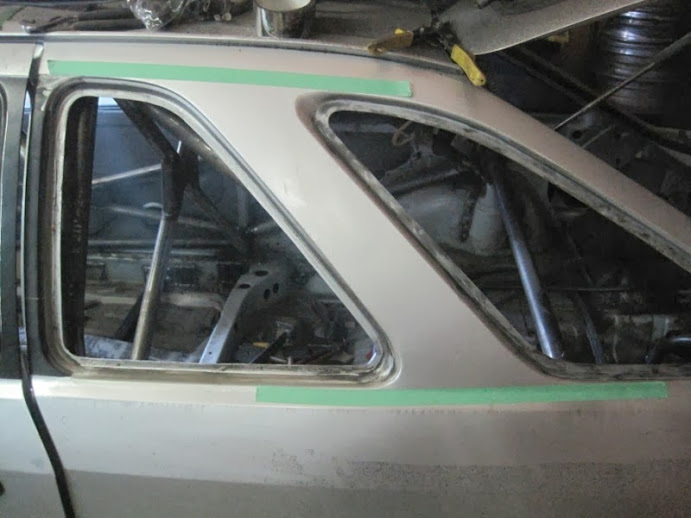
Now, I wanted to try to use the profiles on both sides of the divider to make up the parts I cut out on the window. If you are going to try this, DO NOT use the bottom the way I did. It is a pain and not that much of a time saver. DO however use the round profile (the other has a fillet in it) for the top patch. It fits almost exactly with a bit of tweaking. Cut em out like this: 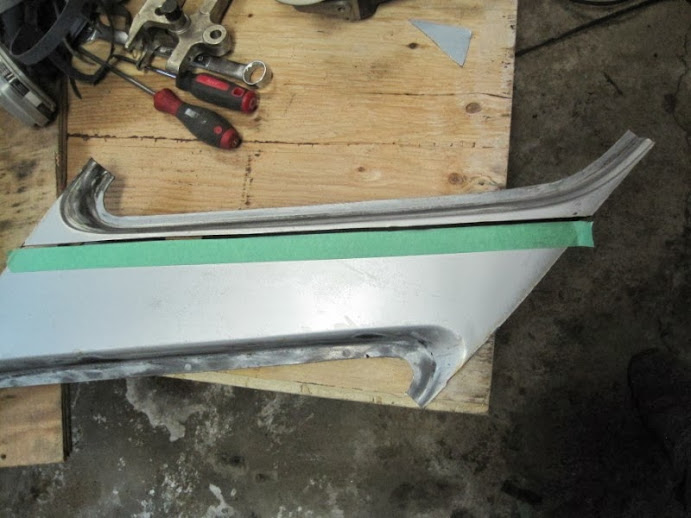

It's too curved for the bottom, I had to cut reliefs to get it to the right bend: 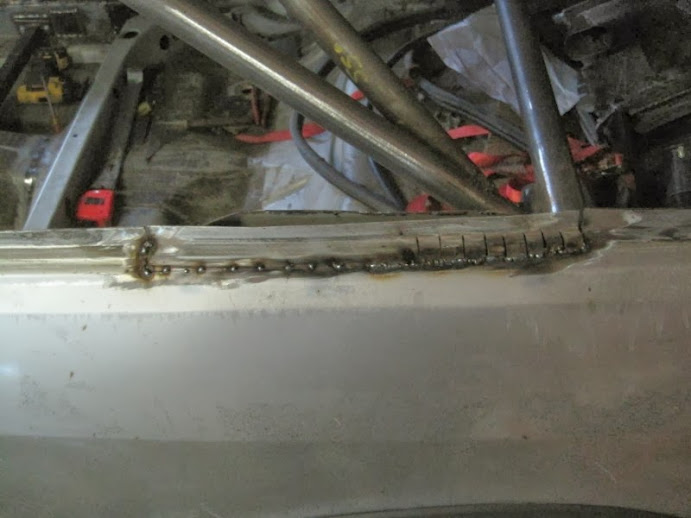
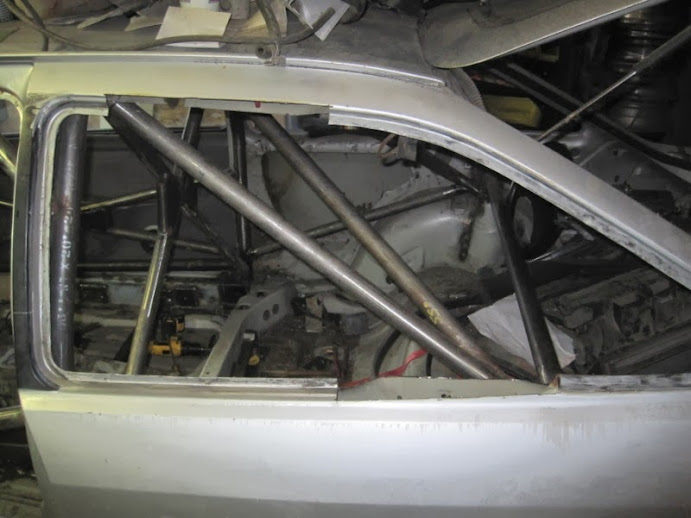
welded up with tacs: 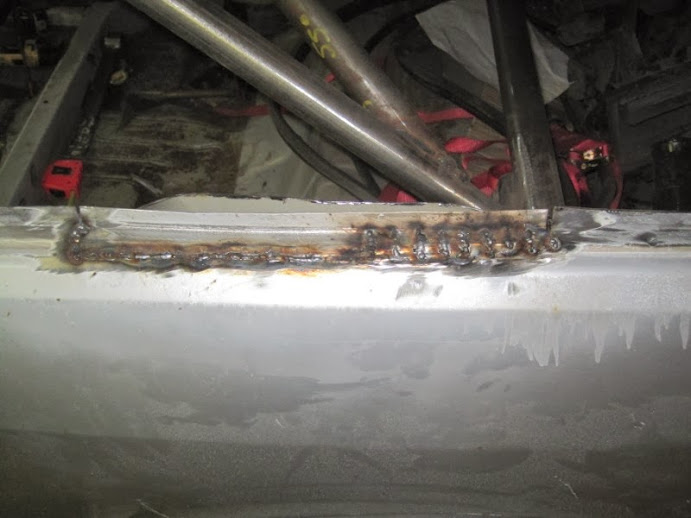
Ground back. This is a race car, so everything is below the level it needs to be in order to fill and paint. Not going to be concours, but meh: 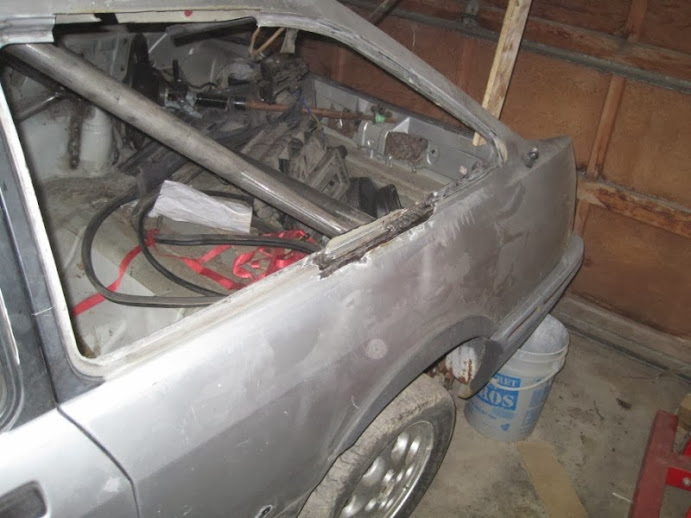
Top fits almost exactly. This was an overlap. The other side I butt welded it, and it was almost a 100% match: 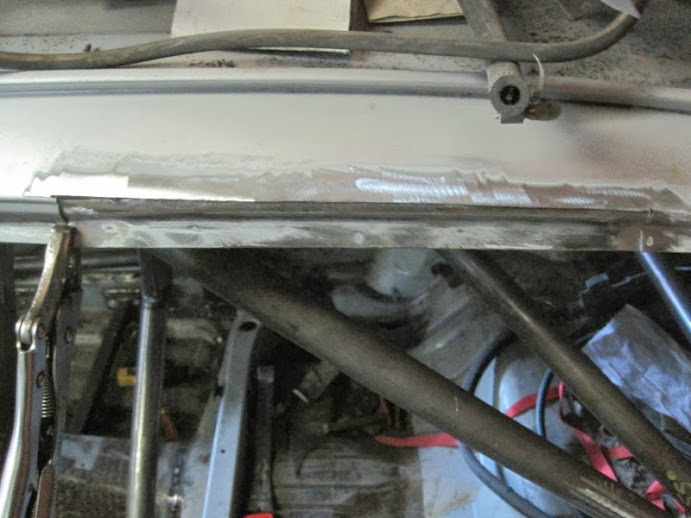
Opposite side bottome was done with a scratch built patch: 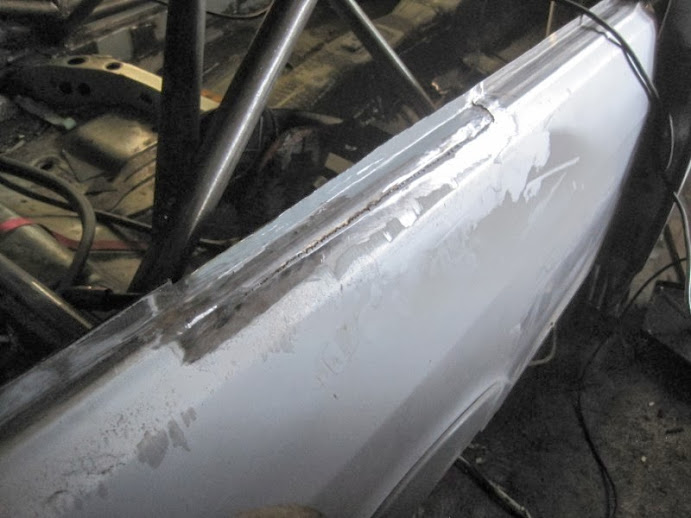
I finished off both sides exteriors, and one bottom of the interiors. Tommorrow I'll finish off the interiors, then on to patching the one sill. After that, I need to figure out where I am getting a windshield from. I have a friend in the US who can get them for $200 each, where the only place local I could find wanted 550 for 1... and they had to order it from the US. if I can get one, I'll pull the front windshield and then start sanding the body for paint and do a general cleanup. |
MattWatson Matt Watson Infallible Moderator Location: Calgary Join Date: 04/17/2013 Age: Midlife Crisis Posts: 151 Rally Car: Merkur |
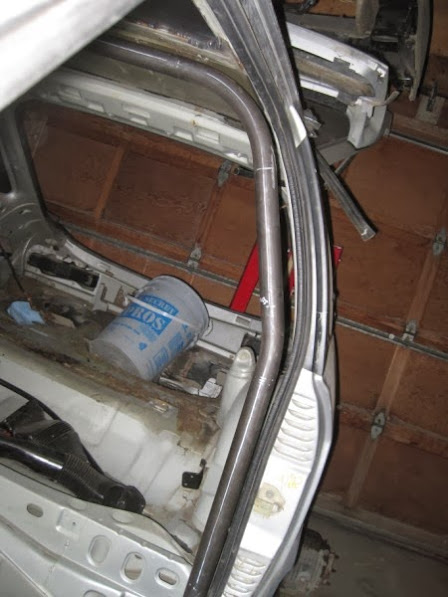
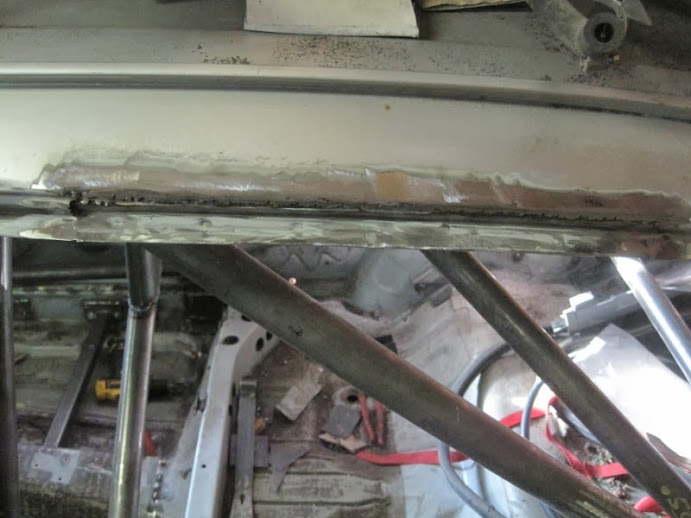
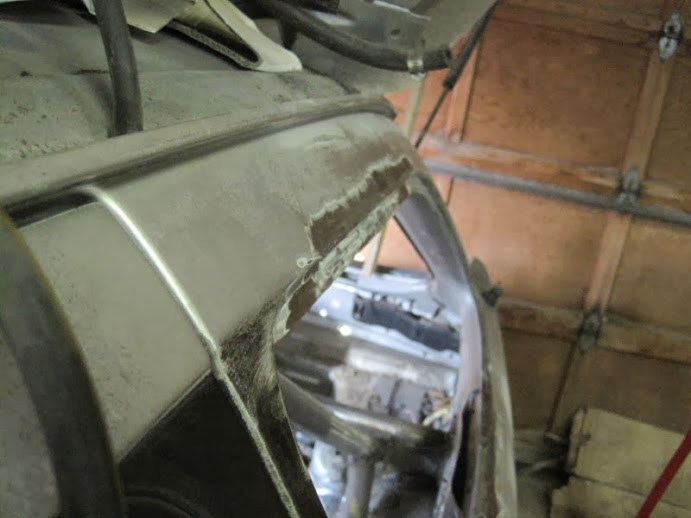
Finishing off the other side repair from where I took the XR's 3rd window section out:
My life on this project would be made exceedingly easier with the aid of a metal brake. I don't have one sadly, so a 4" vice is all I get 

Welded and done: 
It is incredible what doing that did for the strenght of the individual pieces of sheet metal. The can no longer be bent by hand, which is good
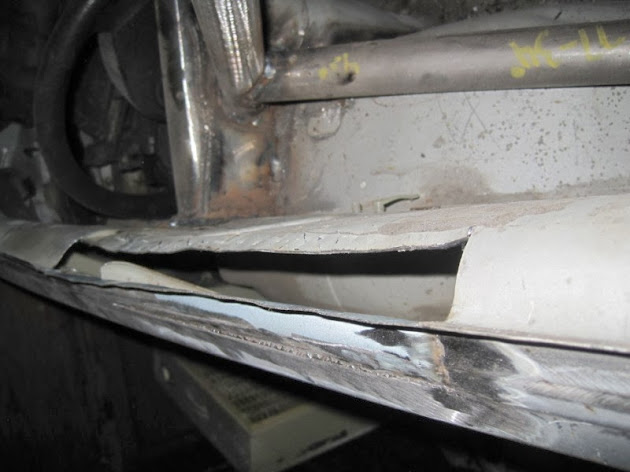
I also started the sill repair. Not looking good. I assume the other side will be similar, but the outside skin is fine, so I am going to forget about it until I hit a rock or something... Unfortunately, the inner sill is rotted out too, which means its not going to be even remotely strong... which sucks. I'll run it this way (the cage more than makes up for it) then when it either rots out, or I am bored (or I hit something) I'll re-inforce it by cutting it out, and welding square tube tied to the cage in it, then skinning it again. 
Rough cut patch and bend: 
Trial fit looking good: 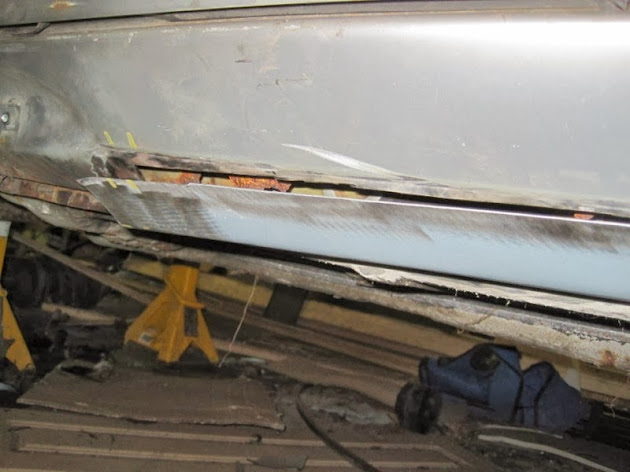
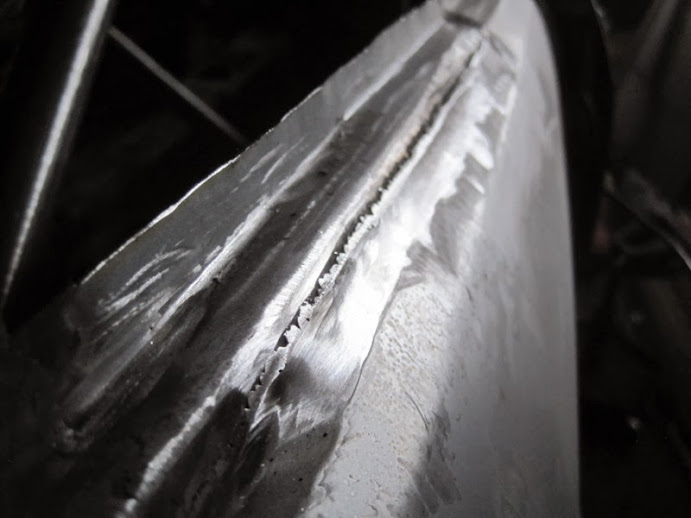
Marked the areas where it needed to meet the pinch weld, cut and notched: 
Tacked, and waiting for final welding tomorrow: 

We have a friend in town tonight, so have to quit to head out for supper Hopefully it will be nice tomorrow and I can continue the streak I am on right now of actually finishing things haha!
Also: Good news! A CARS tech inspector will be coming by tomorrow to see if my work is good enough for a logbook. I am really hoping it will pass. A friend who does tech at some events said I shouldn't have a problem, but we shall see. I need to get the seats and belts in before he gets here, which shouldn't take more than an hour or so. |
MattWatson Matt Watson Infallible Moderator Location: Calgary Join Date: 04/17/2013 Age: Midlife Crisis Posts: 151 Rally Car: Merkur |
|

MattWatson Matt Watson Infallible Moderator Location: Calgary Join Date: 04/17/2013 Age: Midlife Crisis Posts: 151 Rally Car: Merkur |
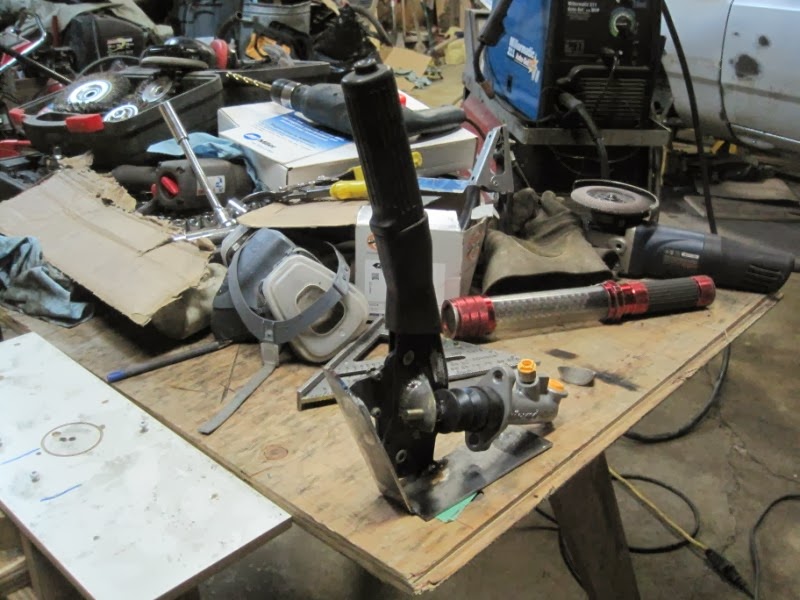
I finished off the e-brake, so it is now fully functional. I don't have anywhere close to 100% travel, but I doubt I will need it. I am thinking about picking up some carbon fiber tube and some derlin rod to make a handle and knob to replace the one here... maybe something a wee bit motorsports bling. Ill decide since I will need some for my shifter mod anyway.

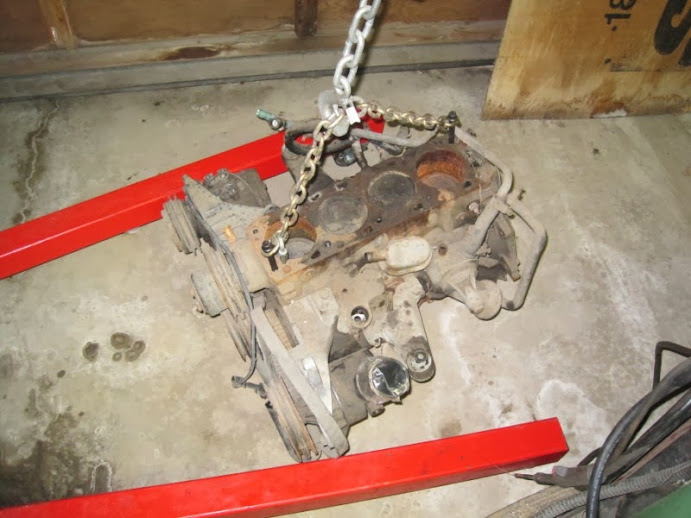
So, onto something to get me in the mood to paint. I decided that SOMETHING should be finished, so onto the differental. I thought I would pretty it up, get some lube and then button it up completely. Remember that this is from a '87 Supra, and has a really nice 4 pinion clutch type LSD in it. Perfect for rally and really strong. Even the off road guys discuss how to shove them into their stuff. So onto the work: Pretty crusty. Time to take a grider with a wire knotted cup to it: 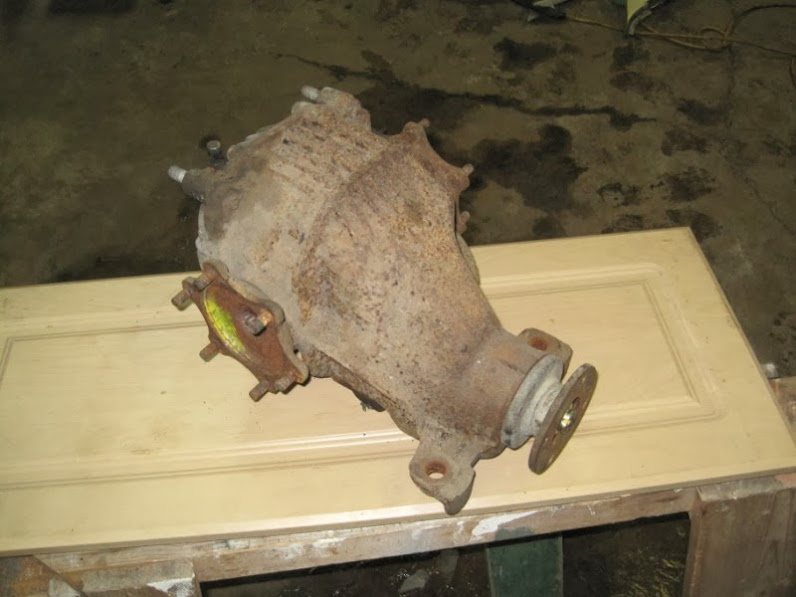
One thing that i LOVE about working on rear diffs is that they are soooo clean! Scale rust is easy to get off, what sucks is when you have to degrease everything too! Here it is all wire brushed off: 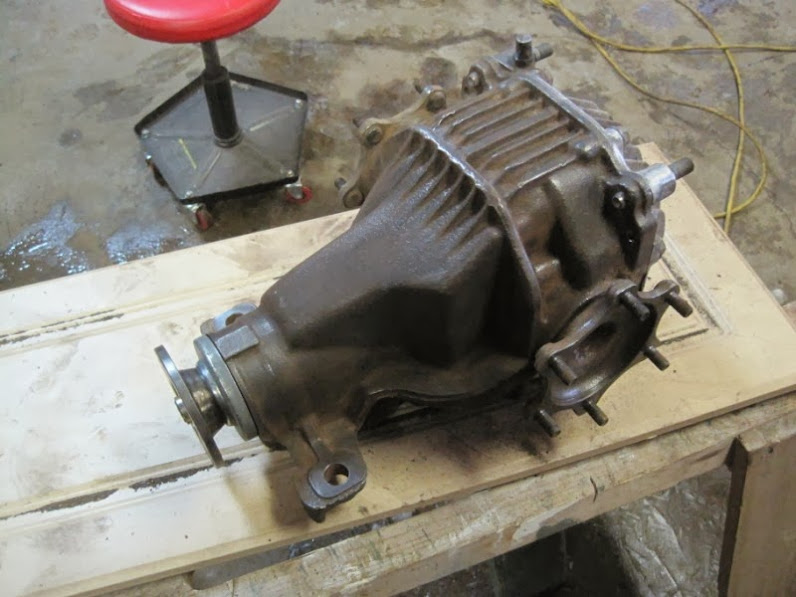

Cleaned up with laquer thinner: 
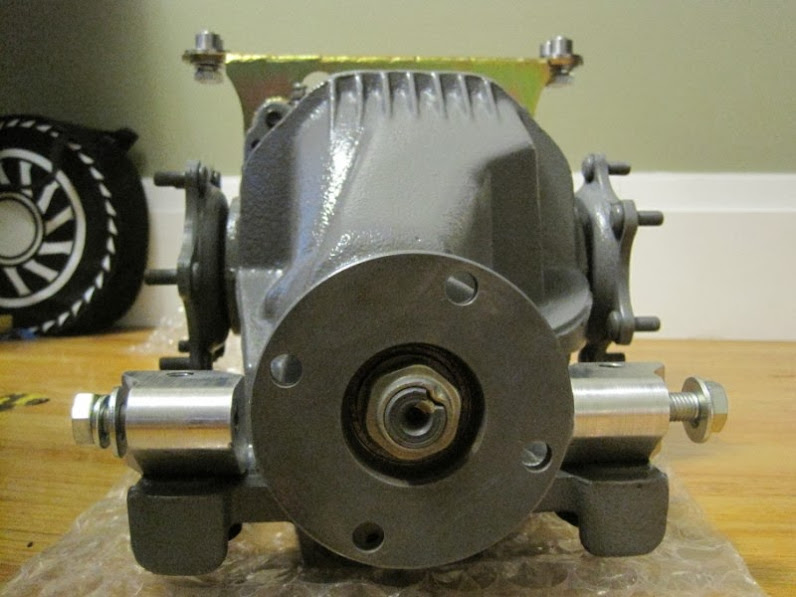
Two coats of primer (this is after 1 only): 

Two coats of grey: 
Aaaannnd done. I'll assemble the whole thing tomorrow and take pictures with all the adapter stuff on it. I didn't bother to mask the back cover since I have a 2nd that has been machined especially for the adapter kit. I'll likely bead blast this one anyway since it is pretty rough, so a little paint wont make any difference at all
I need to pick up some LSD rated gear oil... I hear that motul makes a good one with their Gear 300LS oil... but anyone have any favorites? |
MattWatson Matt Watson Infallible Moderator Location: Calgary Join Date: 04/17/2013 Age: Midlife Crisis Posts: 151 Rally Car: Merkur |
|


Sorry, only registered users may post in this forum.
Rally Anarchy © 2014 Corvus Digital –
Part of the AutoShrine Network –
Problems? Send an email to the Webmaster