

Audi CQ Rally Build
Posted by dalspaugh


aj_johnson A.J. Johnson Elite Moderator Location: Pendleton OR Join Date: 01/07/2011 Age: Settling Down Posts: 1,381 Rally Car: 88 Audi 80 |
If you VBand the exhaust, and get rid of those top bolts, I pulled it out, checked the clutch and had it installed in an hour. Bugger is that that is the lowest point of the exhaust and it's easy to F up on rocks and shit. That'll ruin timeline in a heartbeat. Edited 1 time(s). Last edit at 08/25/2015 01:54PM by aj_johnson. |
dalspaugh David Alspaugh Infallible Moderator Location: Boston, MA Join Date: 04/30/2015 Age: Settling Down Posts: 66 Rally Car: '91 Audi Coupe Quattro |
Yeah I don't think the front mounts to the subframe are all that difficult to get to and remove. But I can definitely see how the top bolts would be god awful.
I was just day dreaming about exhaust fabrication - it seems so far away at this point. haha.. Blog about my history with the rally car written for non-automotive folk: davescq.wordpress.com |
dalspaugh David Alspaugh Infallible Moderator Location: Boston, MA Join Date: 04/30/2015 Age: Settling Down Posts: 66 Rally Car: '91 Audi Coupe Quattro |
Spent considerable time on the project this past weekend. Biggest accomplishment was getting the entire chassis and engine harness out of the car as 1.
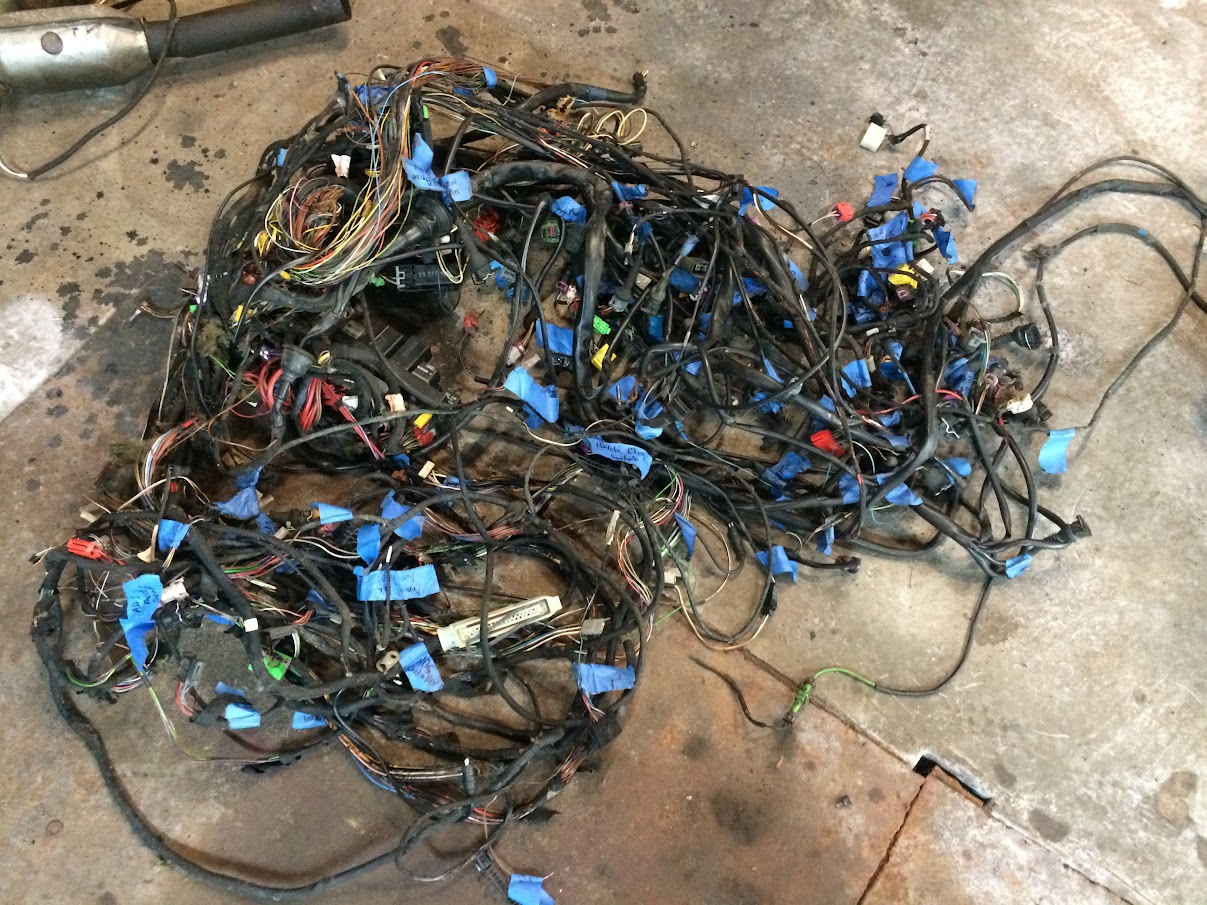
I've got a lot of work to do here laying this out, cutting it up, repairing lines, replacing others... etc. etc. etc. I will update as I go. Big thanks to the contributors on that electrical connectors conversation over in "rally Chat". I've got some good ideas now on how to go about sealing this up. Engine bay looking pretty empty! More details on my projectpad post, link on my first page 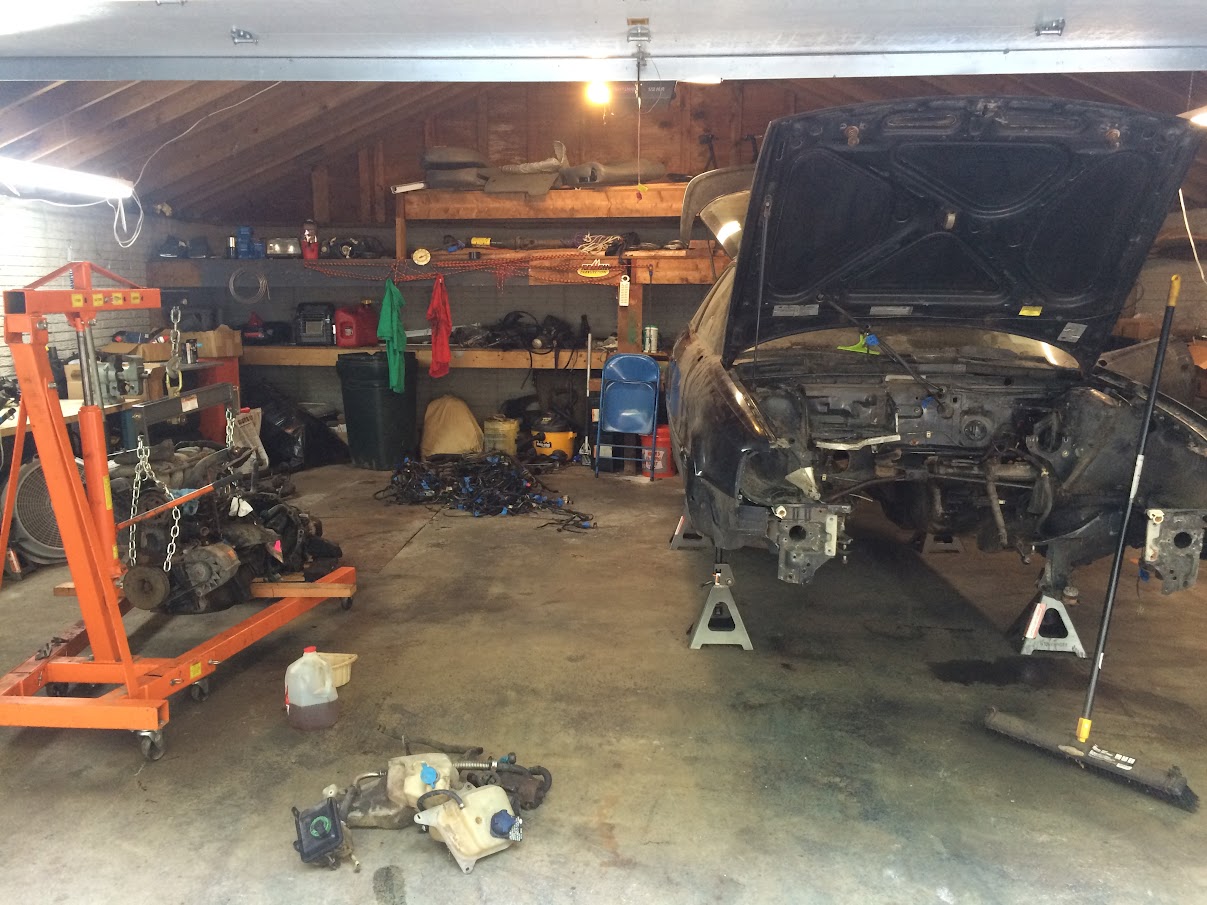 Blog about my history with the rally car written for non-automotive folk: davescq.wordpress.com |
vbares Vittorio Bares Senior Moderator Location: Londonderry, NH Join Date: 04/10/2007 Age: Ancient Posts: 413 Rally Car: Audi 4k (3b conversion) |
Just my 2 cents + 87 lira - I was bending 1 bilstein per event before the JVAB boingers. It's money very well spent...travel and softsprings....yum!
I look at it this way, you're going to spend a minimum of $1k to $2.5k to enter and run an event - hell just to show up - you're going to hate not finishing... and I do think an Audi can win at the regional level...but no way at the national, just too much technology to contend with... |
dalspaugh David Alspaugh Infallible Moderator Location: Boston, MA Join Date: 04/30/2015 Age: Settling Down Posts: 66 Rally Car: '91 Audi Coupe Quattro |
Well that's good to hear, I don't have much of a choice at this point. I've already made a big fuss about Audis and spend a bunch of money on this project, time to sink my teeth in and build it. I definitely plan on getting some proper suspension, my focus right now though is to just get the car back to road worthy before the winter. My target is to run this car in Vermont Winter Challenge TSD. For that I don't need a cage or nice suspension and it was a ton of fun in my DD 90Q last year. Nice to see another Audi rallyer, and in the NE area..! Blog about my history with the rally car written for non-automotive folk: davescq.wordpress.com |
dalspaugh David Alspaugh Infallible Moderator Location: Boston, MA Join Date: 04/30/2015 Age: Settling Down Posts: 66 Rally Car: '91 Audi Coupe Quattro |
Got some work done last night, finished seam welding the rear subframe.
Now looking at how to go about reinforcing the rear diff mount. I had to make do with only two C-clamps and a pipe for a hammer... 
I'm thinking this should do... 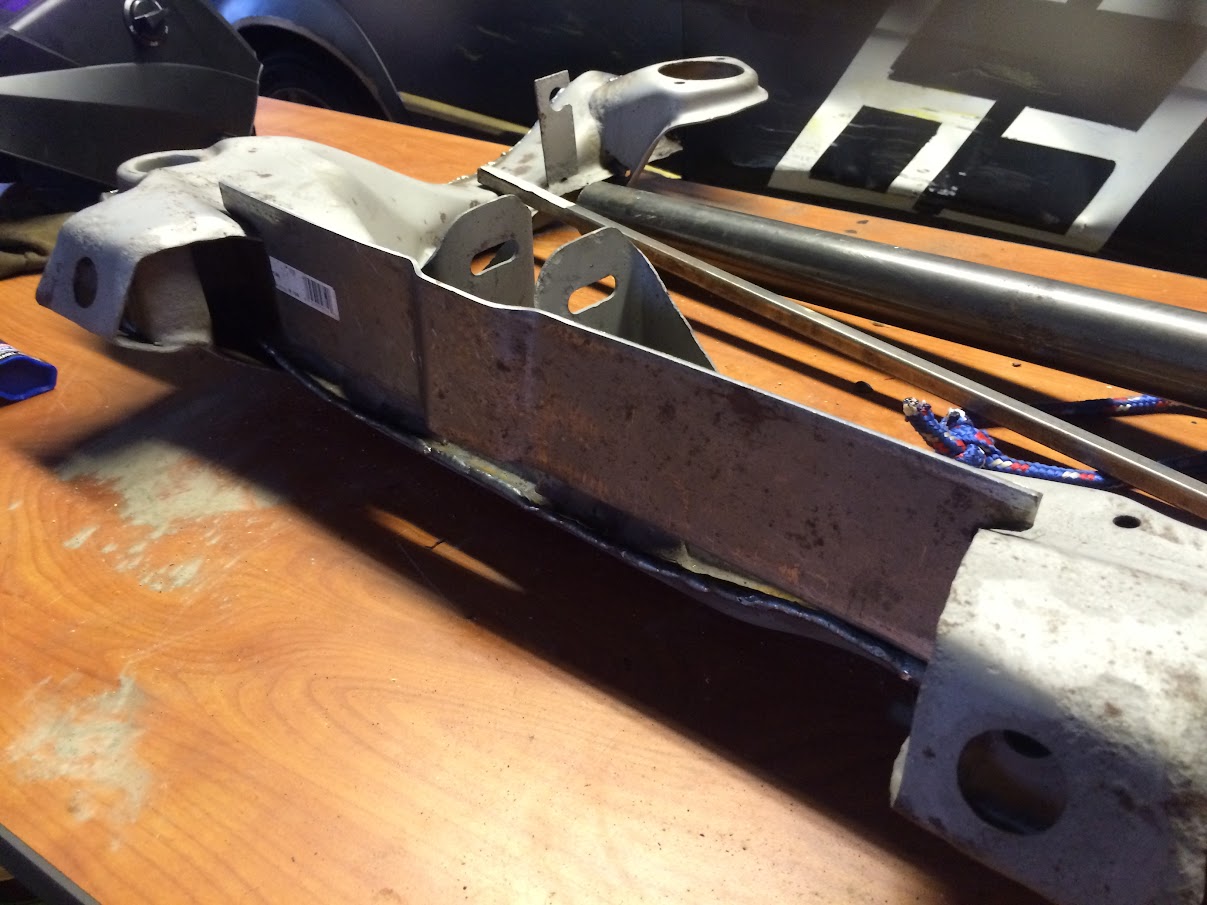
 Blog about my history with the rally car written for non-automotive folk: davescq.wordpress.com |
dalspaugh David Alspaugh Infallible Moderator Location: Boston, MA Join Date: 04/30/2015 Age: Settling Down Posts: 66 Rally Car: '91 Audi Coupe Quattro |
Alright, I had a bit of a marathon weekend in the garage. 3 days, alone but productive.
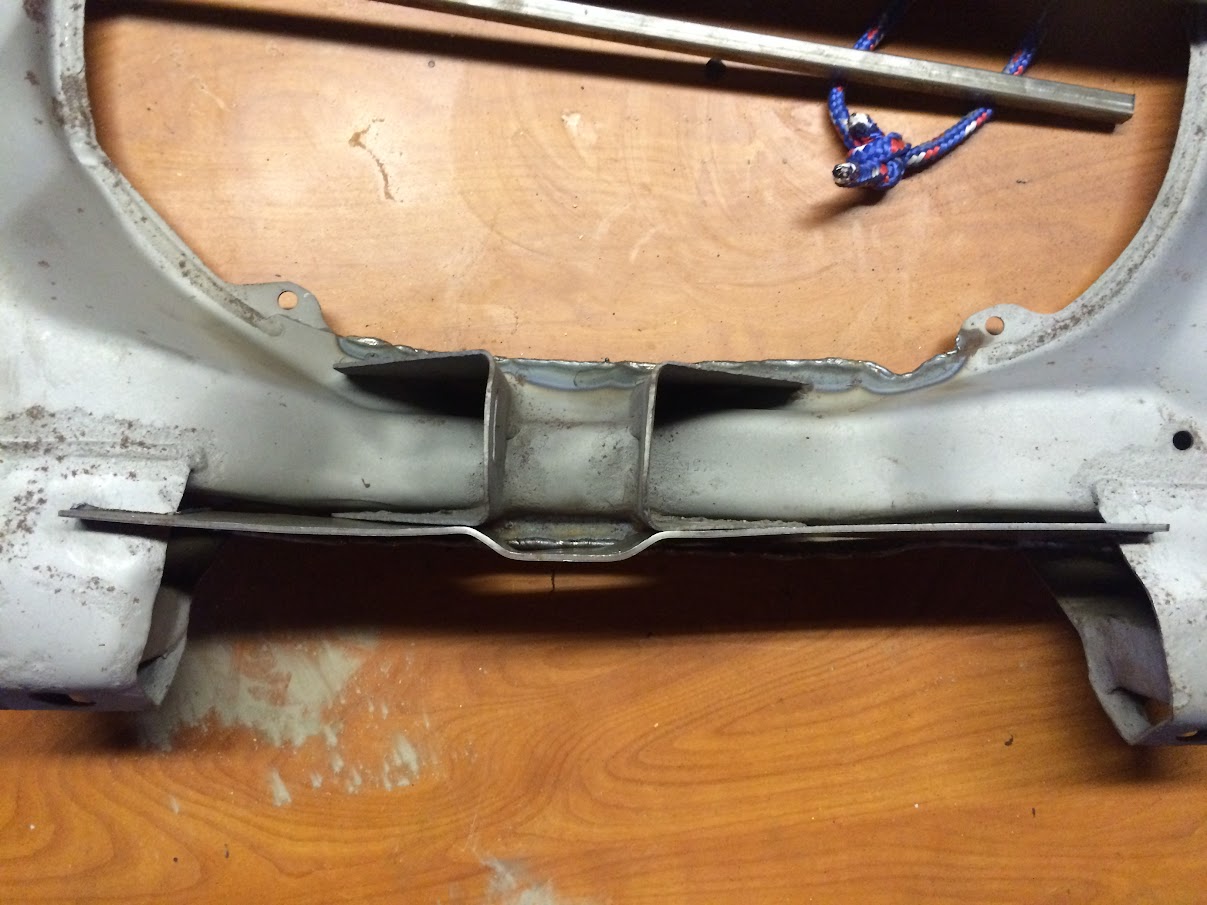
I'll start with the rear diff mount since that's where I left off. I abondoned my one-piece rear solution shown above. and decide to form two U-shaped pieces that fit inside the OEM mount, and then reinforce one spot outside that was particularly worn away from rust. Welded up and mid grind... 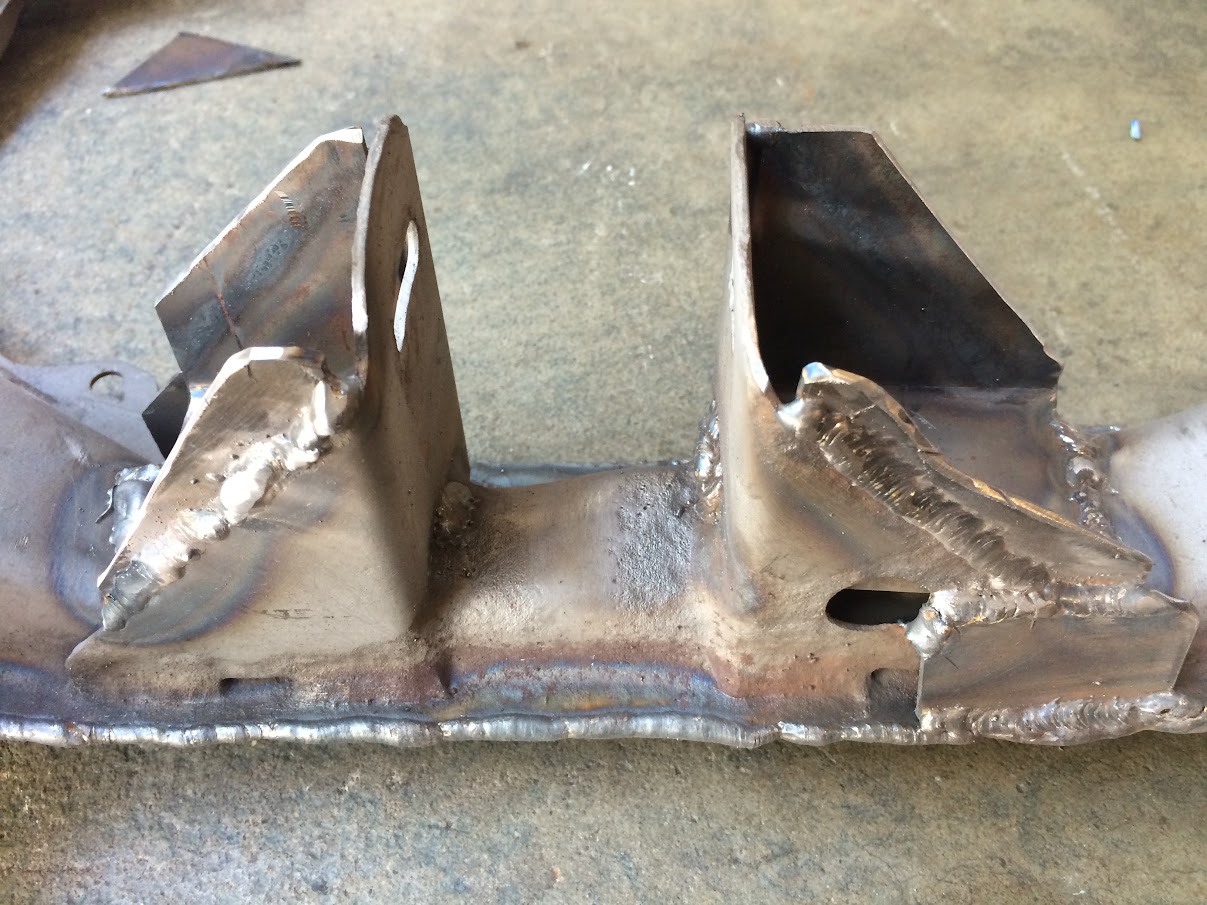
inside look... I got little bit carried away with the welding - I was really enjoying it! 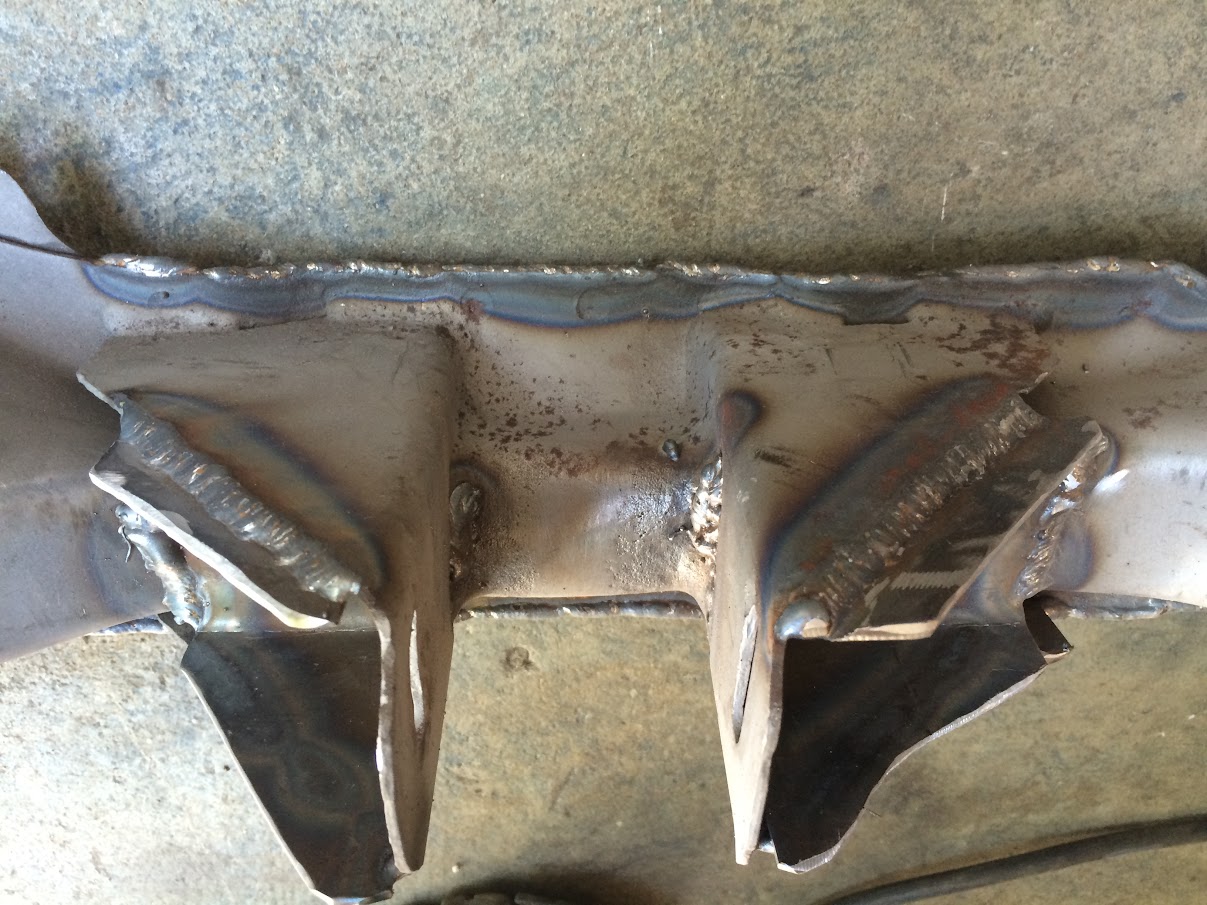
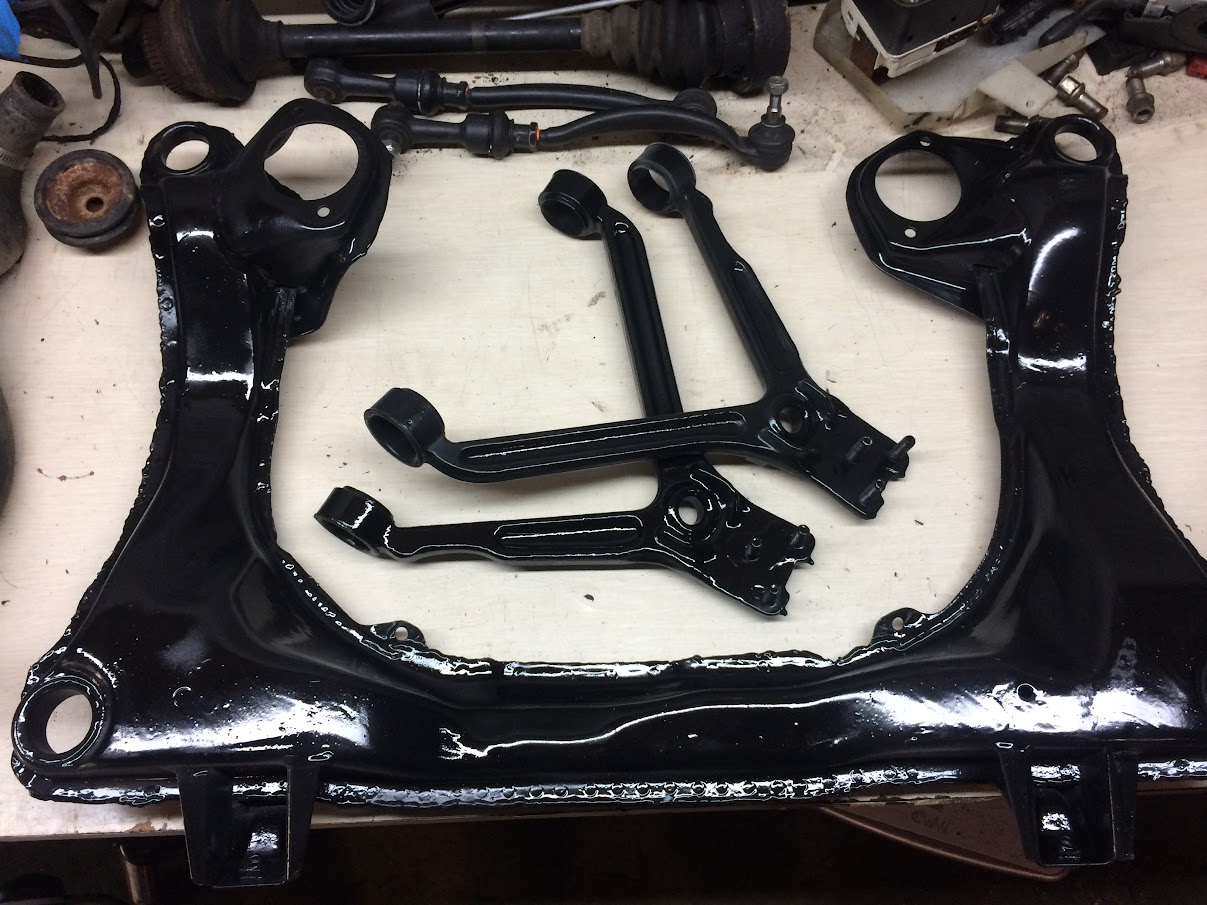
Once that was welded up, it was time to finish painting the suspension pieces... damn this was time consuming... 
Process: Clean with scour pad and POR15 Degreaser, rinse and let dry. Spray with POR15 metal prep for 20 minutes, rinse (A LOT) and let dry, hang up and paint with POR15... wait... apply second coat... let dry. Then... top coat with 2 layers of rustoleum clearcoat... 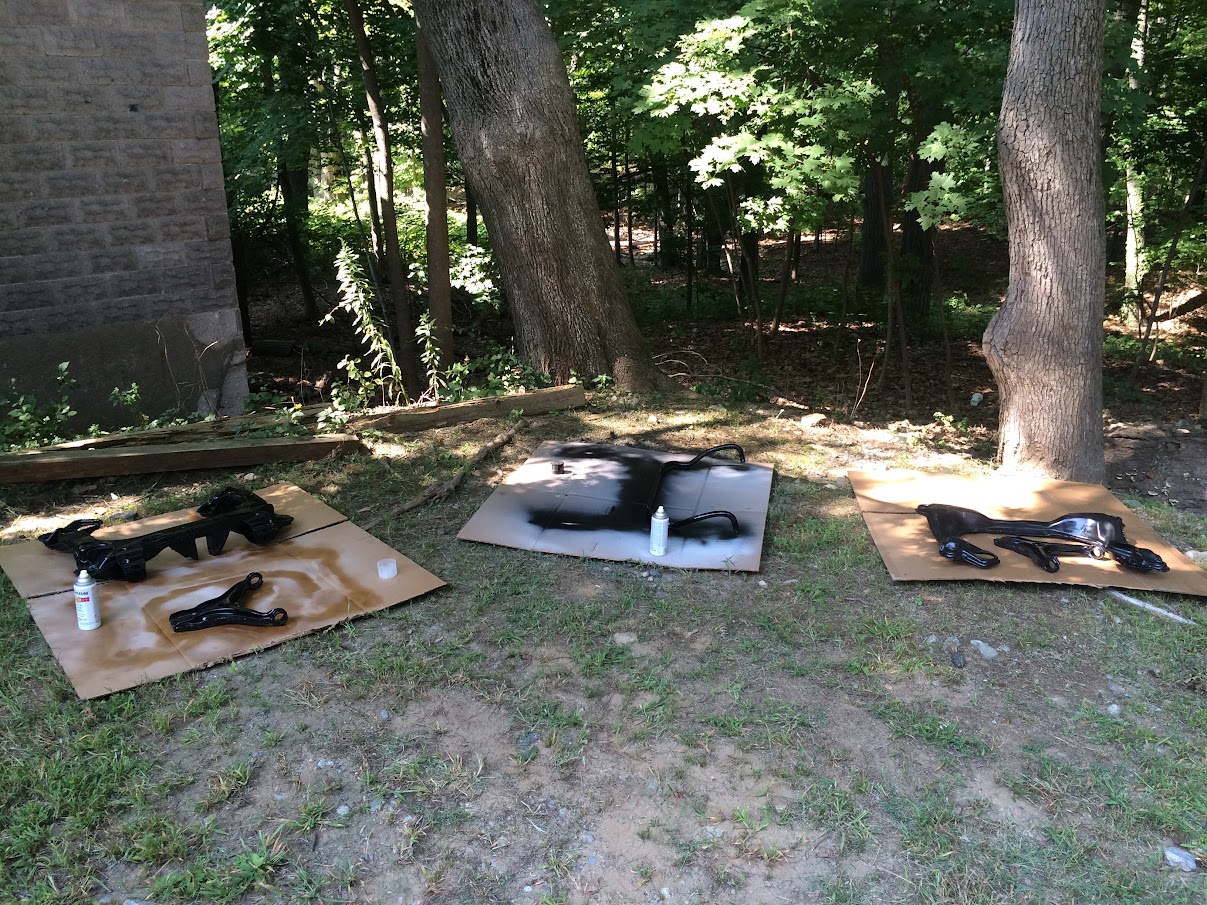
I also realized that I've been ignoring the front swaybar this whole time... so I got out the angle grinder... 
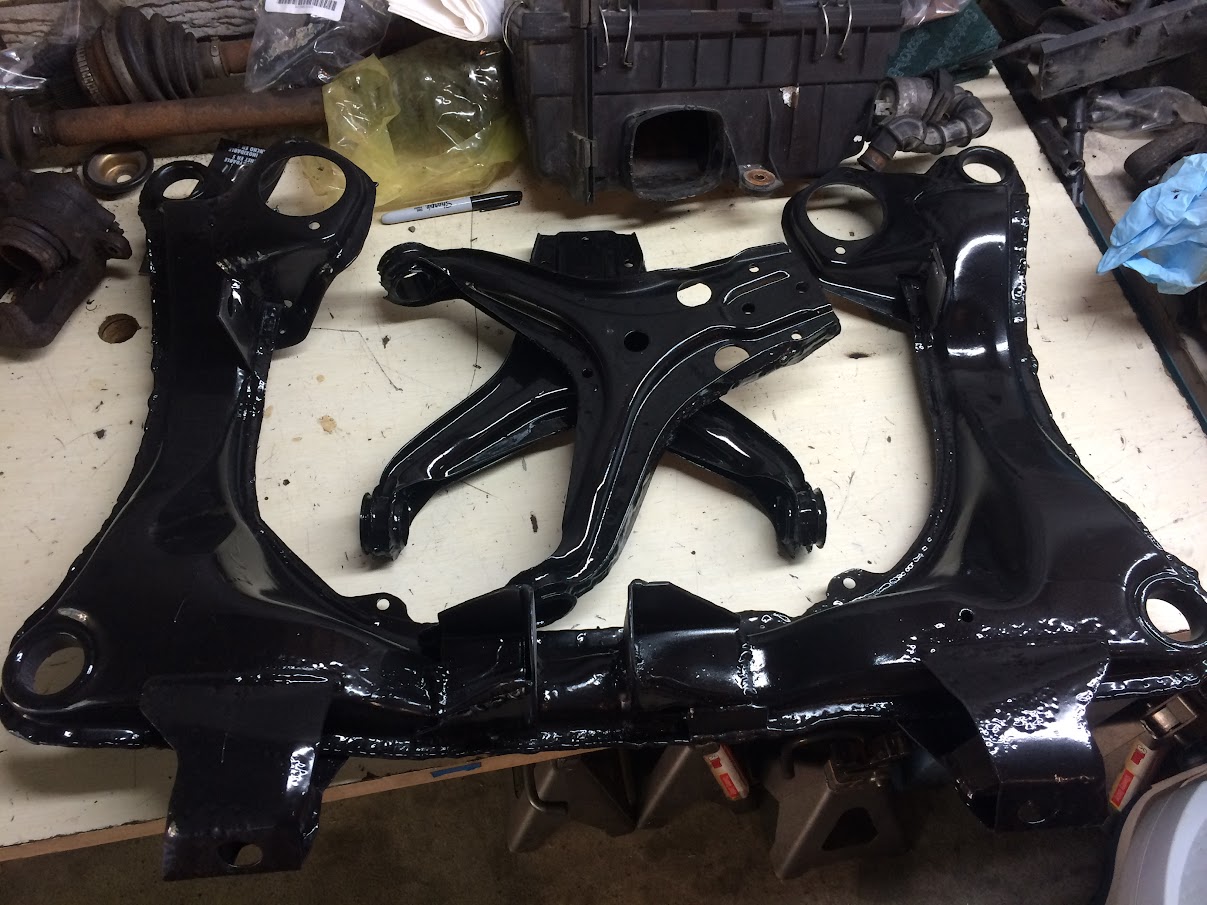
I didn't want to open a whole new can of POR15 just for this bar so I decided to do it all with rustoleum spray (and I'm already regretting it) 2 coats of primer... 3 coats of black... 2 coats of clearcoat and it's no where near as strong as the POR15... oh well... Shiny pieces awaiting install... 
I'm so sick of painting... Then, attention turned to the E Brake. The grey threaded piece that offers adjustment was completely rusted and seized so that had to go. but Audi doesn't make this part serviceable... for most. Old Assembly 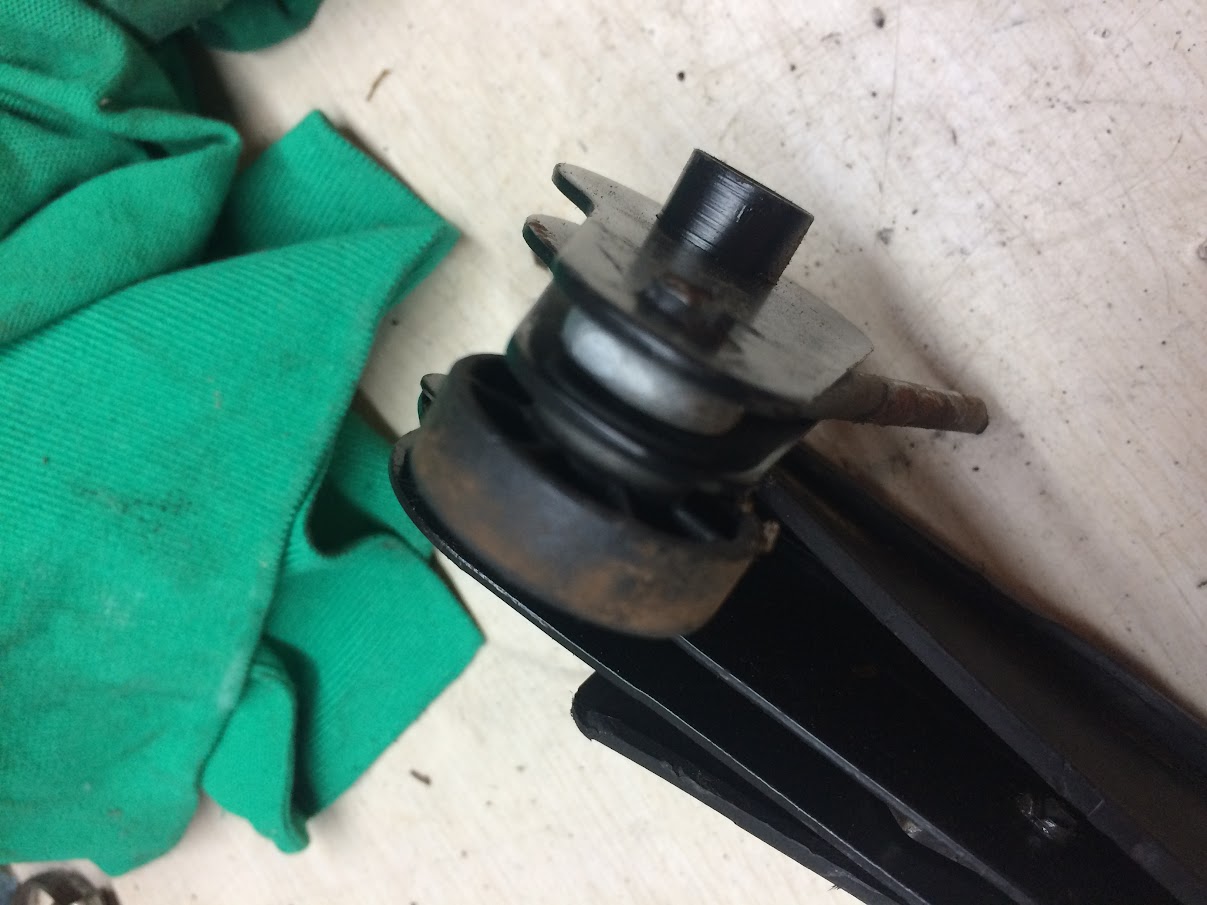
Grind off the ends of the pin, make pretty colors on the washer, punch out the old pin 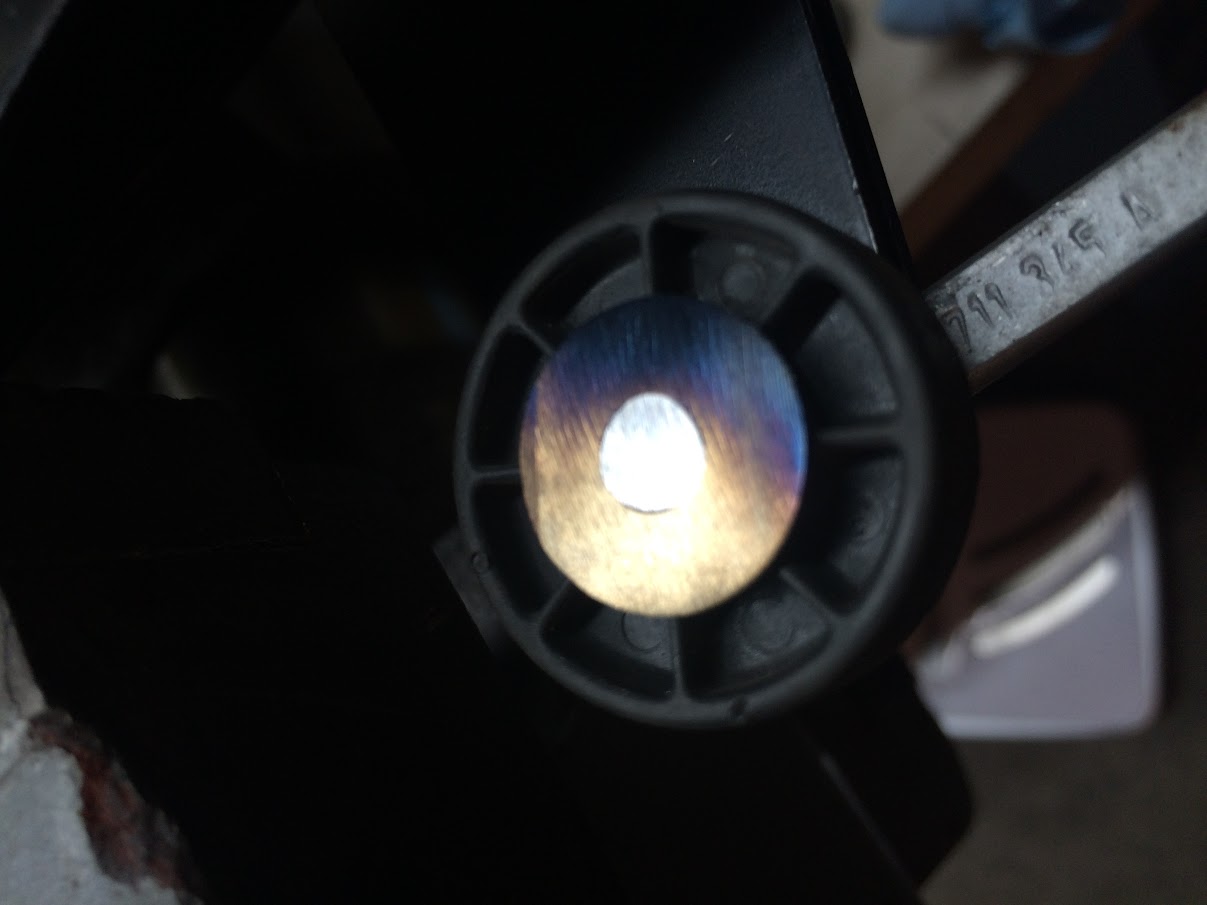
You'll find then that all of the pieces have different ID's... wtf Audi?... so I made up some inserts of Alum and Plastic... and pressed them, nothing fancy, the assembly is totally captive once installed so it doesn't have to be fancy.... 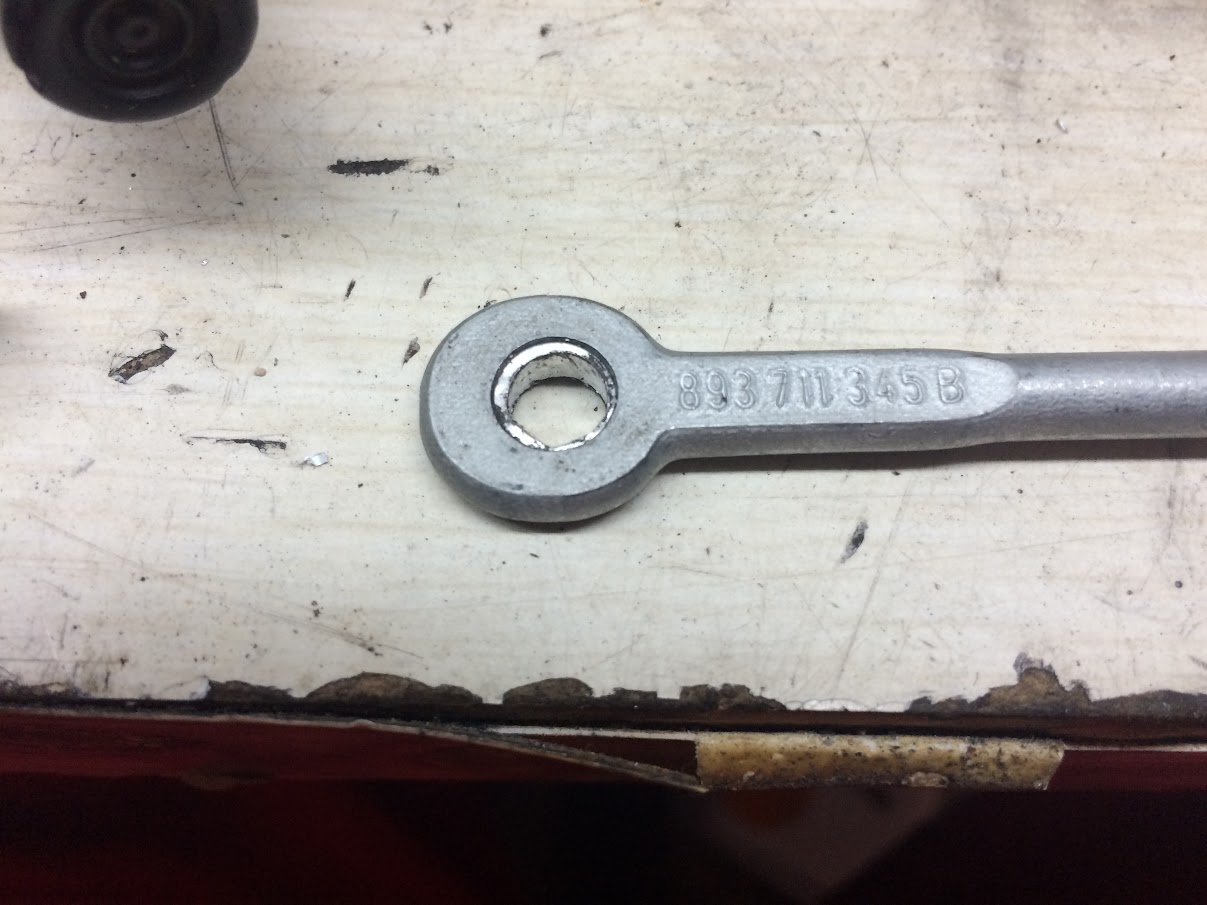
Assembled back together. I want to get a low-profile nut for the 1/4-20 bolt... help slim things down... but overall I'm happy with it. 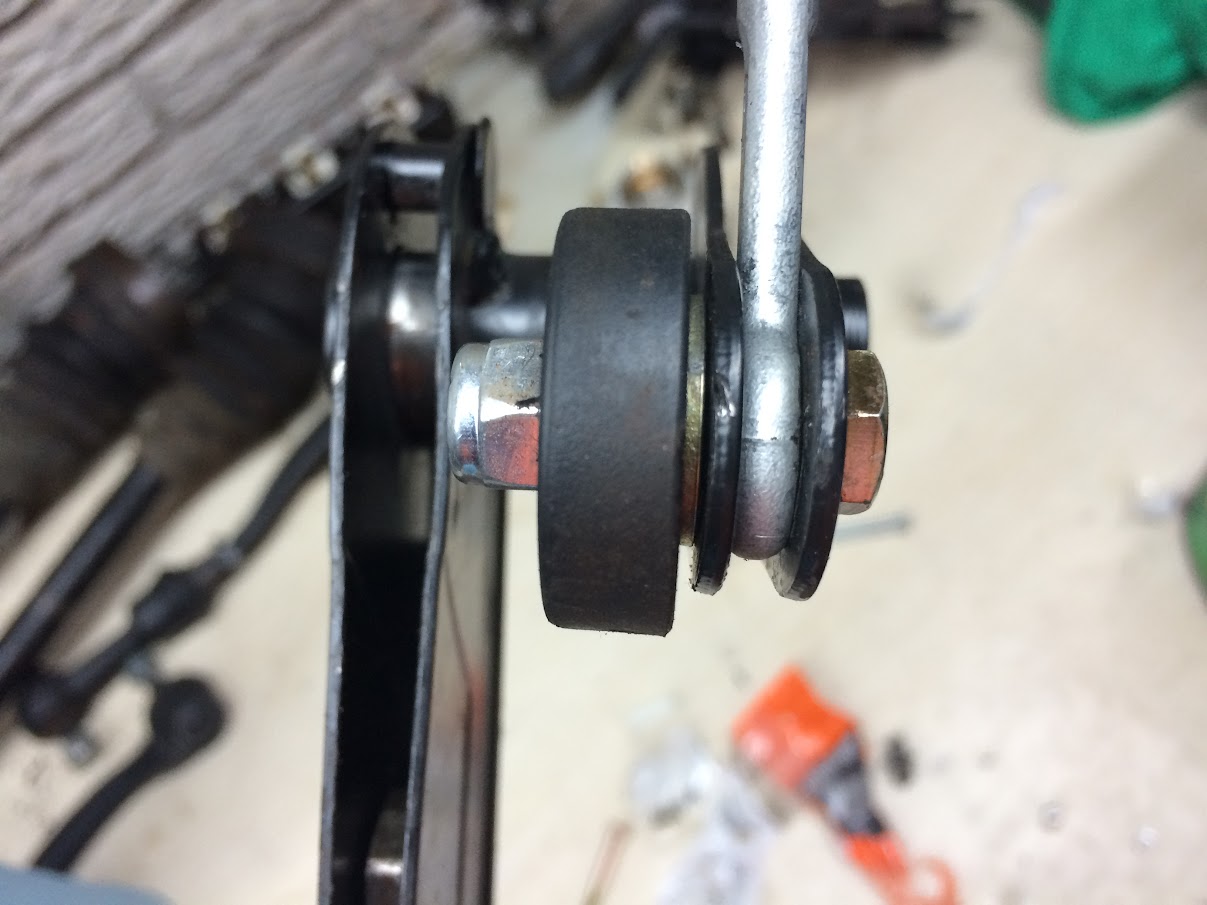
Spent considerable amount of time in the engine bay cleaning. I found that simple green worked better than Acetone and the POR15 "industrial" degreaser... Simple green FTW... 
Oh yeah, I cut out the battery tray, ABS brackets, random broken and corroded studds and crap... 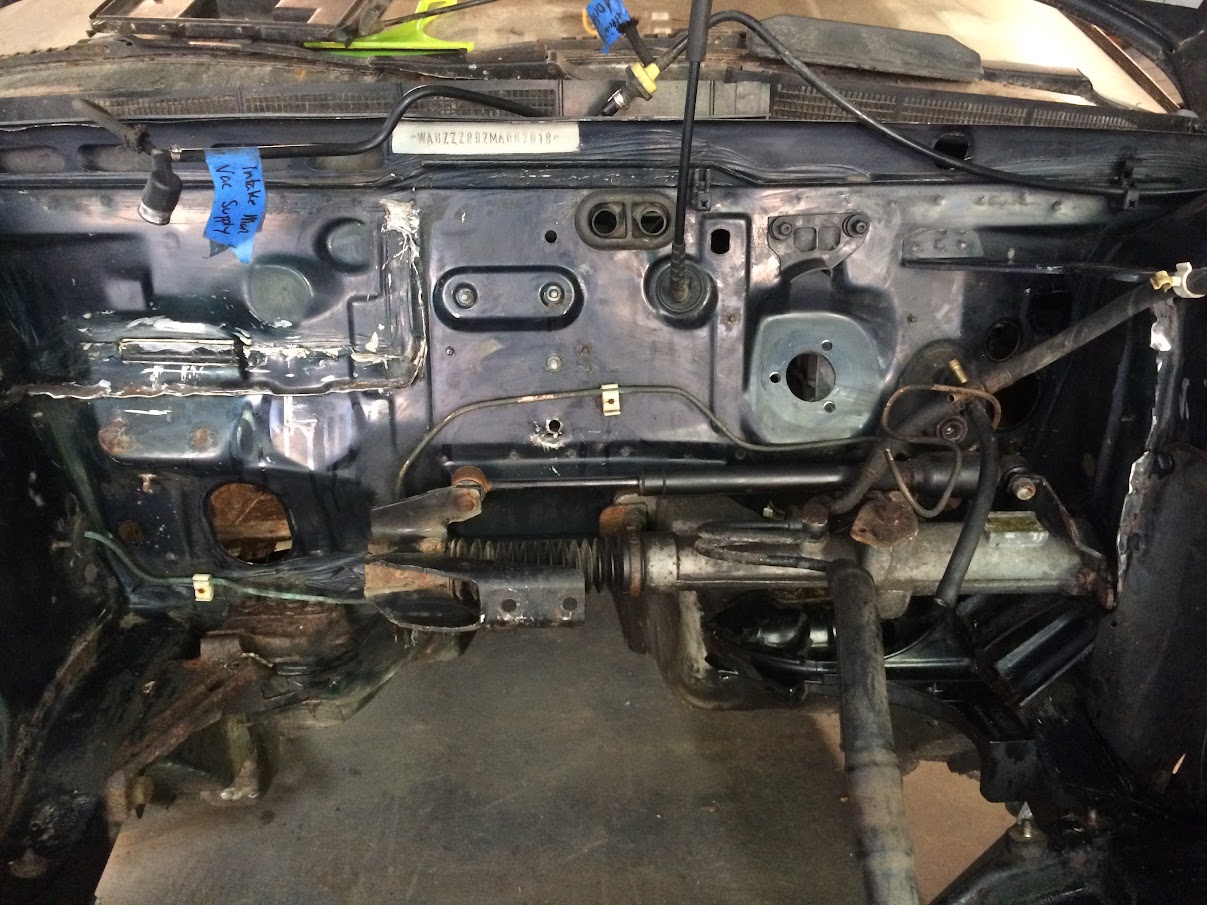
I need to start thinking about which holes to weld up and which ones to leave... This is how I left the garage on Monday night: 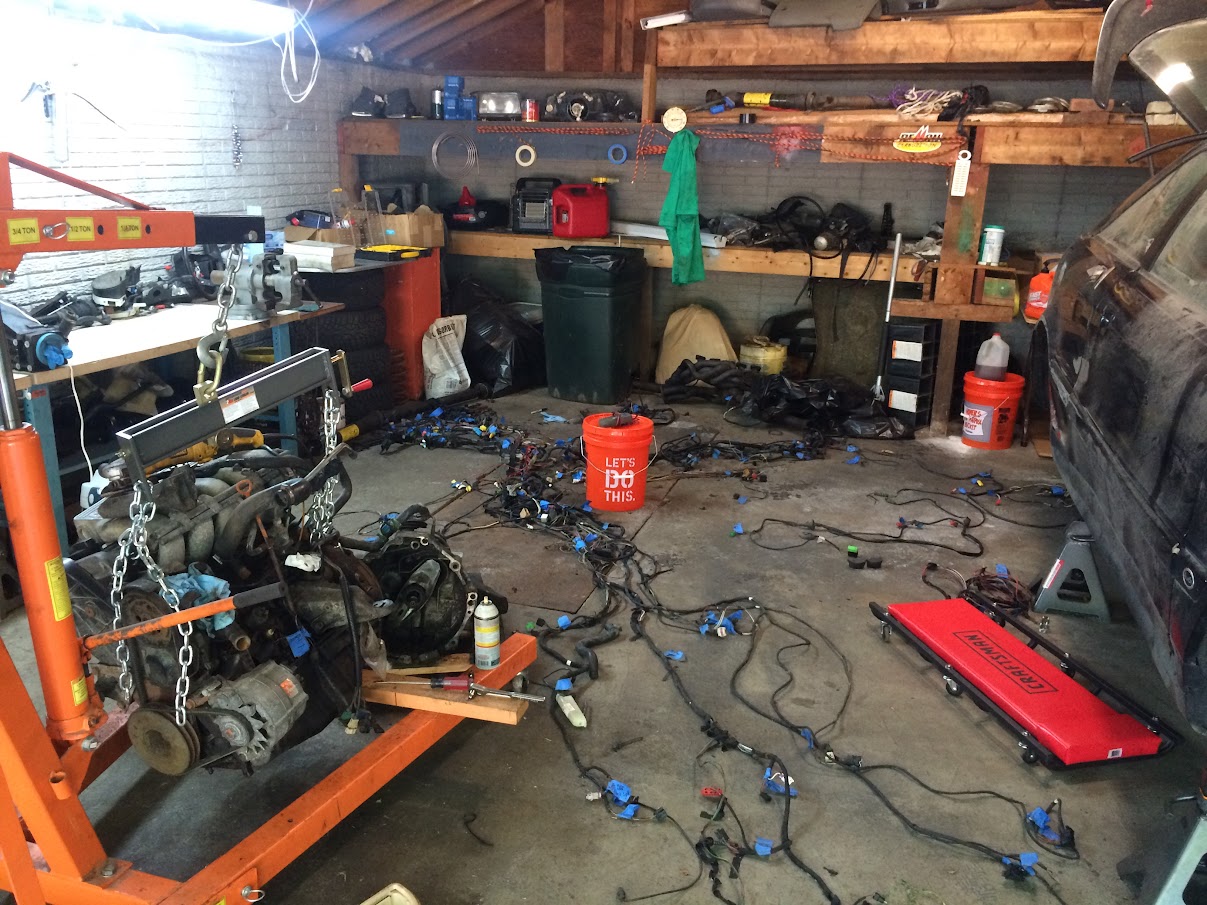
You can see at this point I had started looking into the wiring harness. spreading it as best I can in the limited space, trying not to step on and break any connectors... On Tuesday night I got free and went right back at it for the 4th day in the row... and got a few hours to get familiar with the wiring harness. Started pulling out certain strands and labeling what's left behind and etc. etc... I've deleted power seats, ABS, and the locking system and alarm... much more to come on that... but the harness is already looking thinner... deleted wire bundles on the right there... 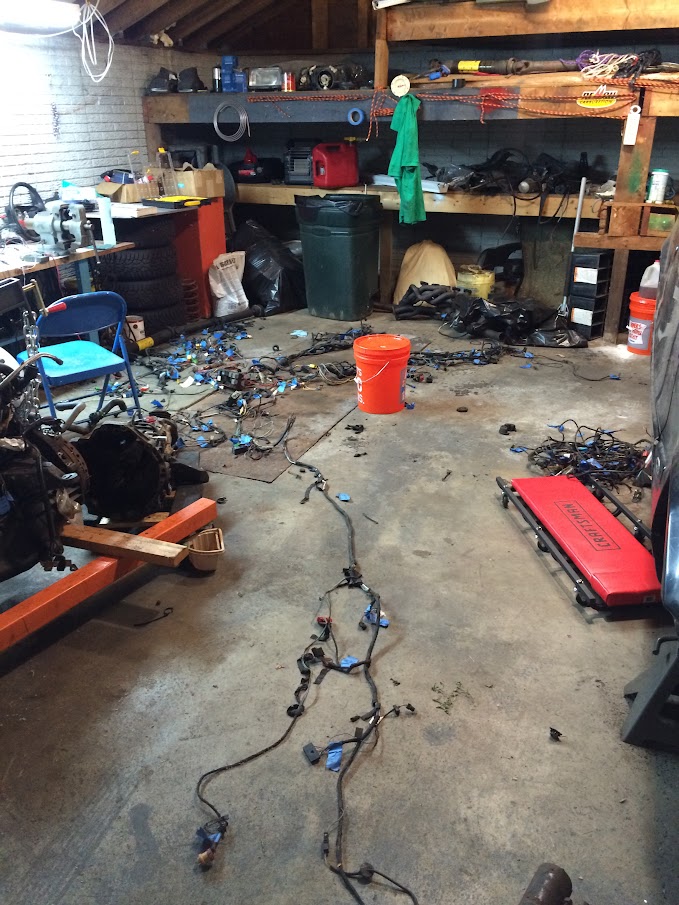 Blog about my history with the rally car written for non-automotive folk: davescq.wordpress.com |
john vanlandingham John Vanlandingham Mod Moderator Location: Ford Asylum, Sleezattle, WA Join Date: 12/20/2005 Age: Fossilized Posts: 14,152 Rally Car: Saab 96 V4 |
A little suggestion on parts that are potentially one day going to be subjected to stress...potentially...
Mighty hard to see any cracks beginning in a part painted black... VERY EASY to see cracks beginning in parts painted light grey or maybe my old favorite Krylon Dull Aluminum. 
The assumptions in the above are many including parts seeing stress, and that somebody cares to see and find cracks early so they can be repaired, and there is an awfully good chance I am as usual making wrong assumptions. But I would and have not painted any stressed steel part black for more than 30 years---and have caught early lots of cracks. John Vanlandingham Sleezattle, WA, USA Vive le Prole-le-ralliat www.rallyrace.net/jvab CALL +1 206 431-9696 Remember! Pacific Standard Time is 3 hours behind Eastern Standard Time. |
dalspaugh David Alspaugh Infallible Moderator Location: Boston, MA Join Date: 04/30/2015 Age: Settling Down Posts: 66 Rally Car: '91 Audi Coupe Quattro |
That's a really good point John, hadn't thought of that. I guess I chose black becuase it's what POR15 came in...
I'm so sick of painting at this point. I have another complete suspensions assembly coming which I'll be working on for spare parts so I'll change up my strategy for that set. Thanks! Blog about my history with the rally car written for non-automotive folk: davescq.wordpress.com |
dalspaugh David Alspaugh Infallible Moderator Location: Boston, MA Join Date: 04/30/2015 Age: Settling Down Posts: 66 Rally Car: '91 Audi Coupe Quattro |
Alright, After two hours on Tuesday tracking down wires of this and that, I had a relay socket that I had no idea what it did. I posted on an Audi FB page and got an answer and that was a huge relief.
The relay socket is for a low oil pressure warning relay which my car does not have since it has a fancy "Auto Check" system - which for some unknown reason, I'm attempting to preserve. Since I don't know how long I'll actually try to keep the Auto Check system in this car, I figured I would leave it - oil pressure is important I've been told... This means I've identified everything in the harness and it's all labeled - however shitty. This is where the different branches stand now. I estimate that 50% of the wiring in the car was non-essential and removed. 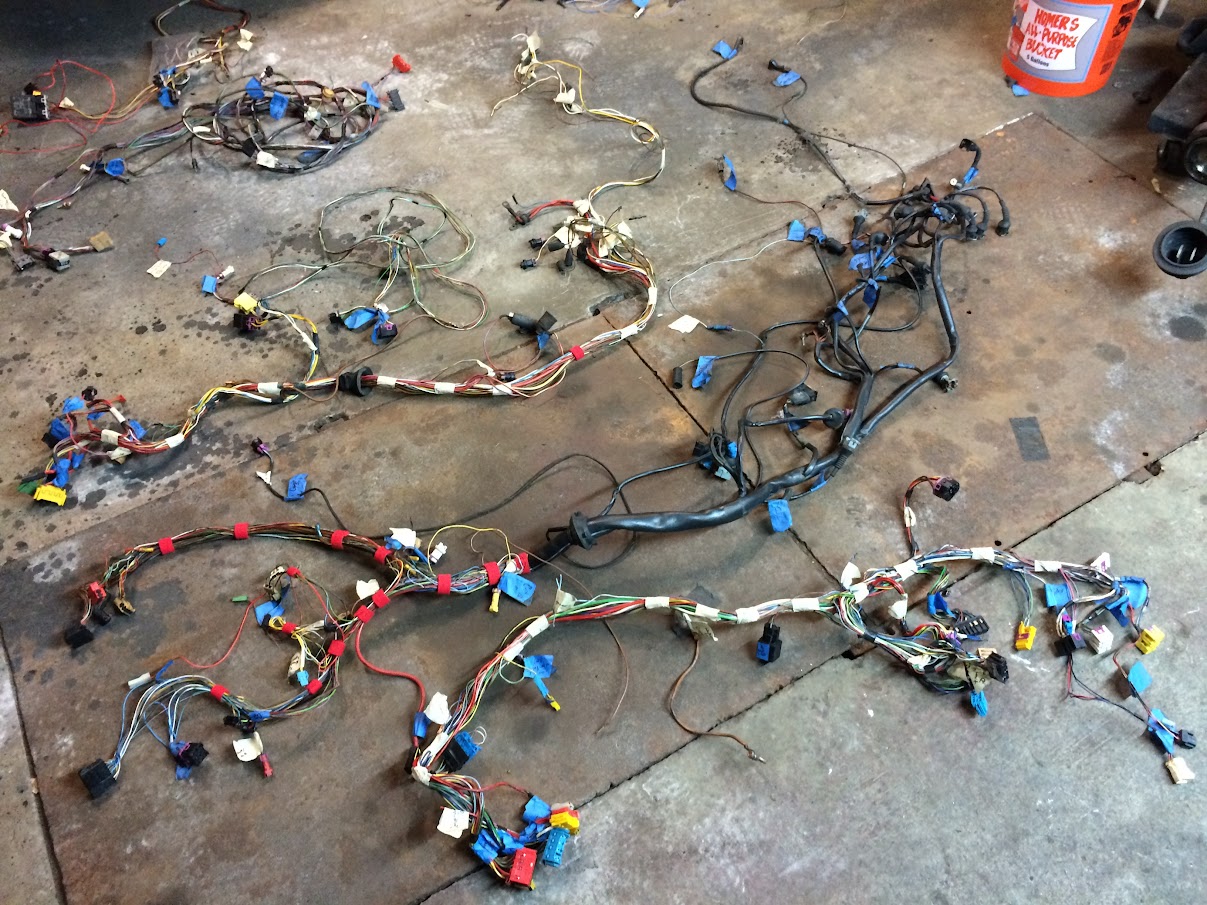
More on this in the coming weekend. I also put my harbor freight oscillating tool through its paces... and apparently too much, because I broke it... no surprise, but I was expecting it to last more than 2 hours... 
Anyway, floor looks like this: 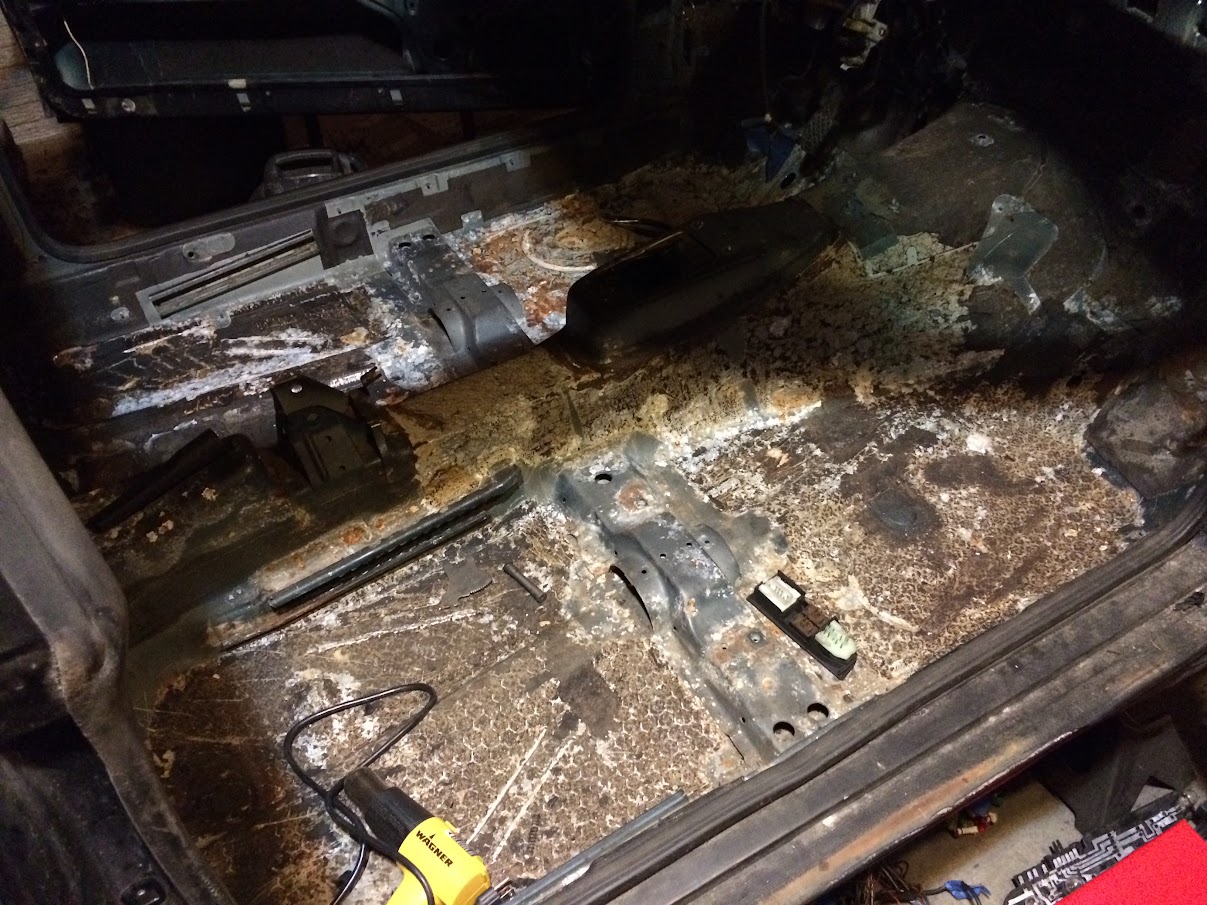
It's not ready for paint yet, but I'm confident I can get it painted this weekend. I've limited my scope a little bit because I'm about an entire summer behind where I'd like to be... I'm only going to paint the tub for now. I'll have to grind and weld in seat mounts soon but I'll deal with it later. I want to cap the rust on the floor with POR15, then I'll top coat it in some lighter color, likely White. Big Weekend of work coming up, things on the list:
Grind and weld up holes in the fire wall and mask the car for paint prep Scuff and paint engine bay Continue scraping/grinding interior floor pan down for paint prep Paint Floor with Por15, scuff, paint with lighter top coat Extract broken exhaust stud... and a huge list of smaller things... let's see how it plays out Blog about my history with the rally car written for non-automotive folk: davescq.wordpress.com |
aj_johnson A.J. Johnson Elite Moderator Location: Pendleton OR Join Date: 01/07/2011 Age: Settling Down Posts: 1,381 Rally Car: 88 Audi 80 |
|
dalspaugh David Alspaugh Infallible Moderator Location: Boston, MA Join Date: 04/30/2015 Age: Settling Down Posts: 66 Rally Car: '91 Audi Coupe Quattro |
Ha! no, they're still in there. I was planning on cutting them out though... A powerful angle grinder and a fresh wheel should make short work of them no? Got a good bit of work in this weekend. Focused a lot on getting the engine bay painted. Once this is done, I can finally start looking at putting things back ON this car instead burying myself in a never ending to do list... Taped up, scuffed, and cleaned: 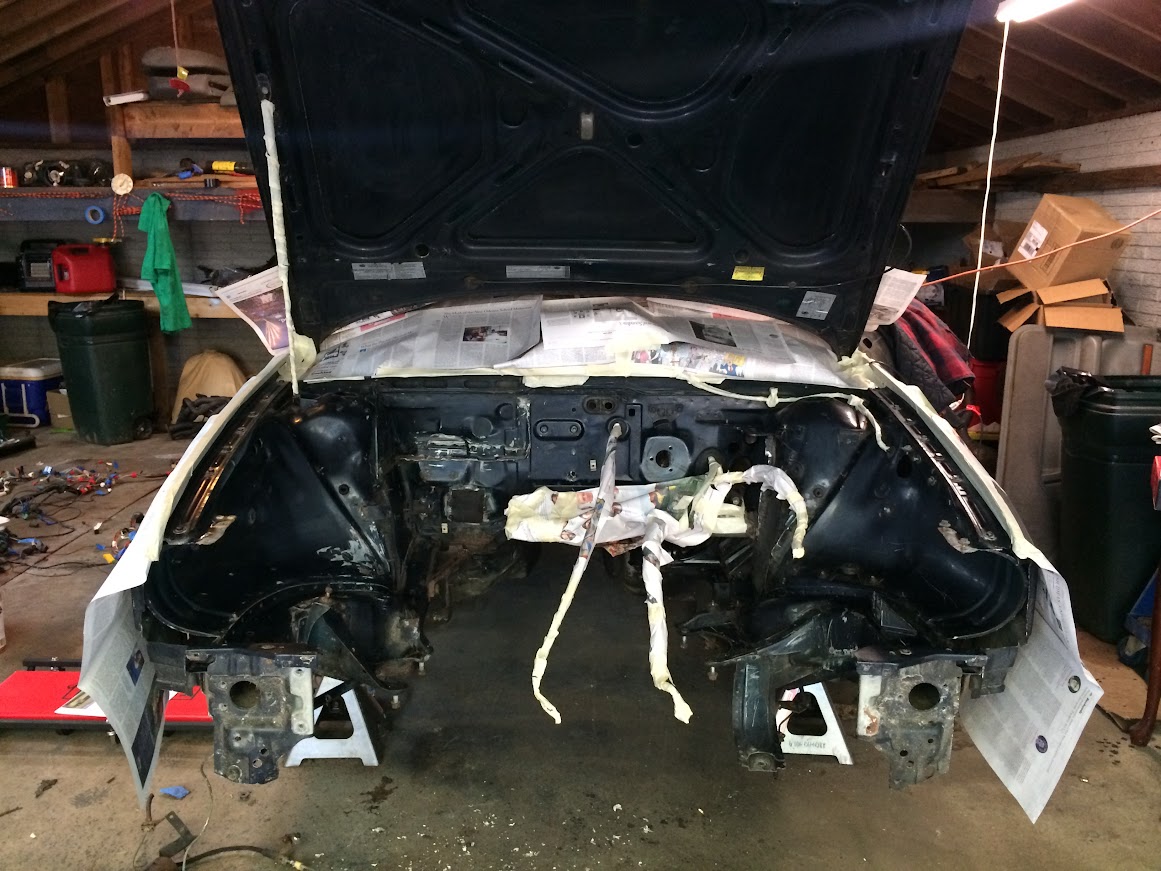
Primed: 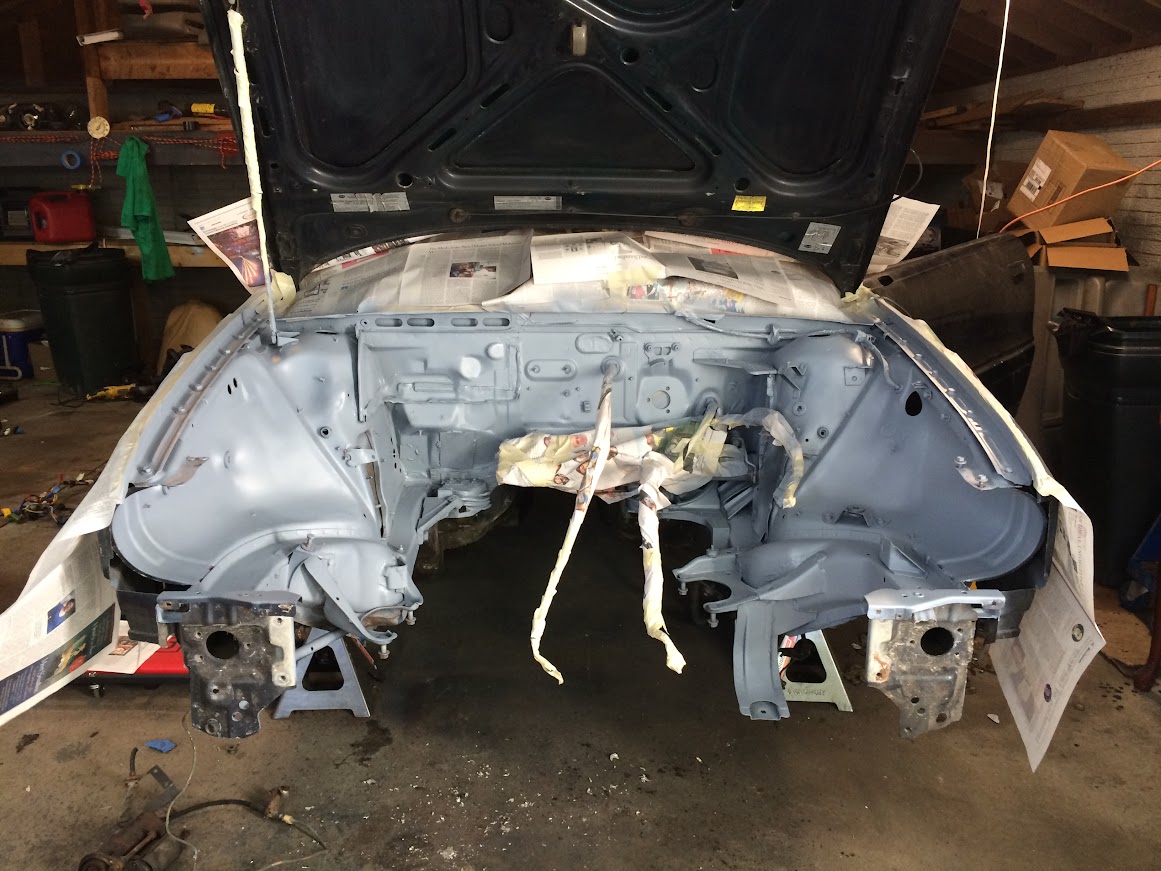
Paint: 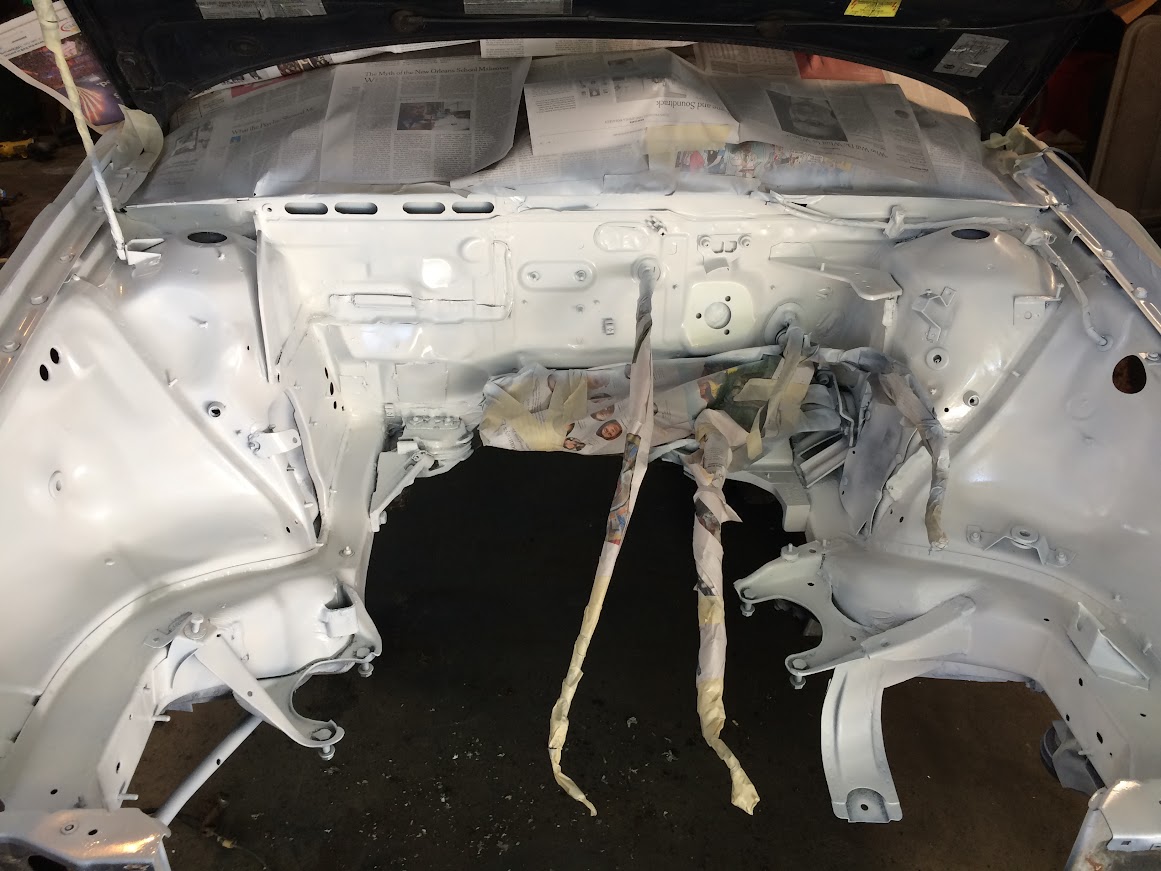
Clear coat and unmasked: 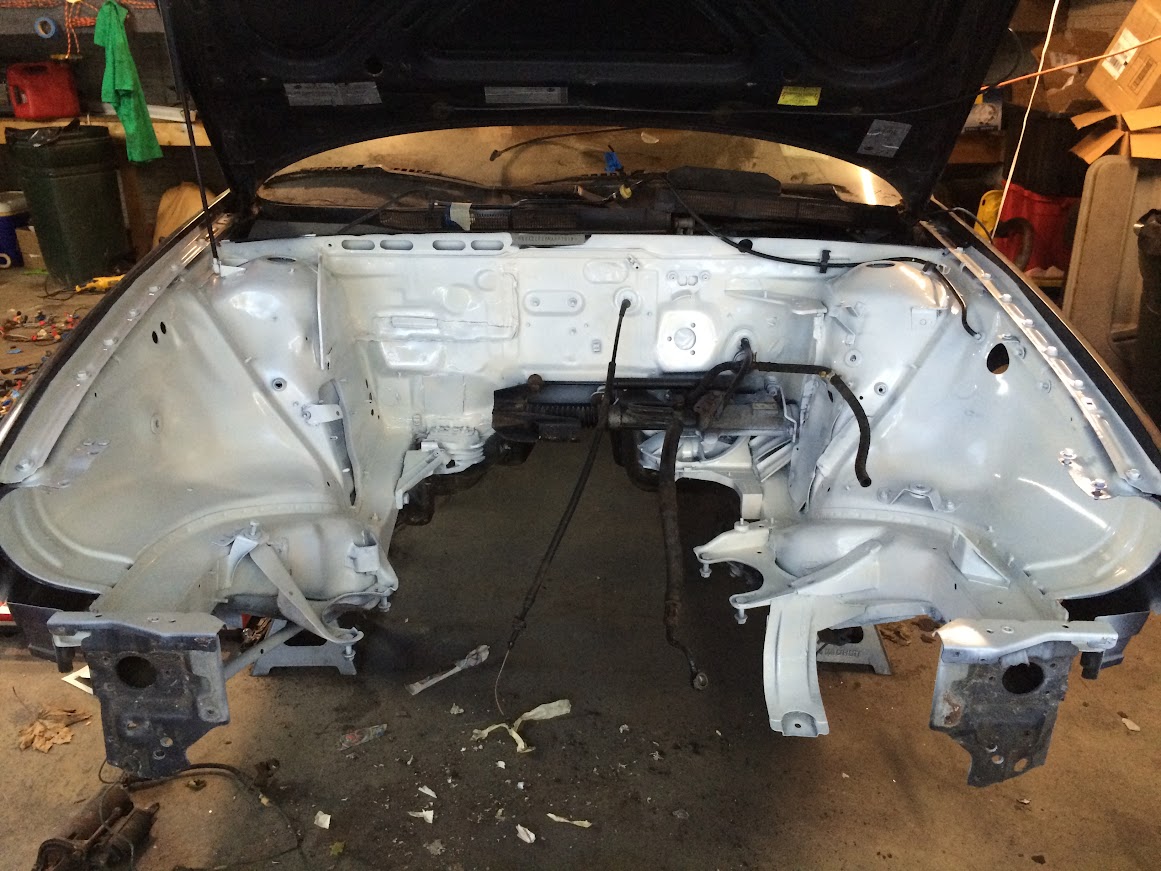
I used VHT engine enamel paint which was pretty good. I was really happy with how it looked after primer but the Paint was too cold I think (temp was in the high 50s) and there were little flakes of congealed paint that was spraying out. I couldn't get them to go away and I was in a time crunch so I had to roll with it. Result is that there is now a bit of texture in the paint... but whatever, its rally car. Anyway, in between the drying times I got some smaller stuff accomplished. I ordered and installed these nifty ABS plug caps, really happy with the fitment. This occupies the space left by removing the ABS Sensor from the spindle. 
Also, sealed up some wires in the harness and ordered some materials for finishing this up. Still need to replace the masking tape flags with real labels. I'm still working on the vibration dampening crap on the inside, it just takes so much time... maybe not as bad as wiring... I'm maybe 60-70% of the way there with prep. I've decided to just paint the floor pans and trans tunnel for now. I need to limit my scope a bit here or I'll never get this car to an operable point any time soon. 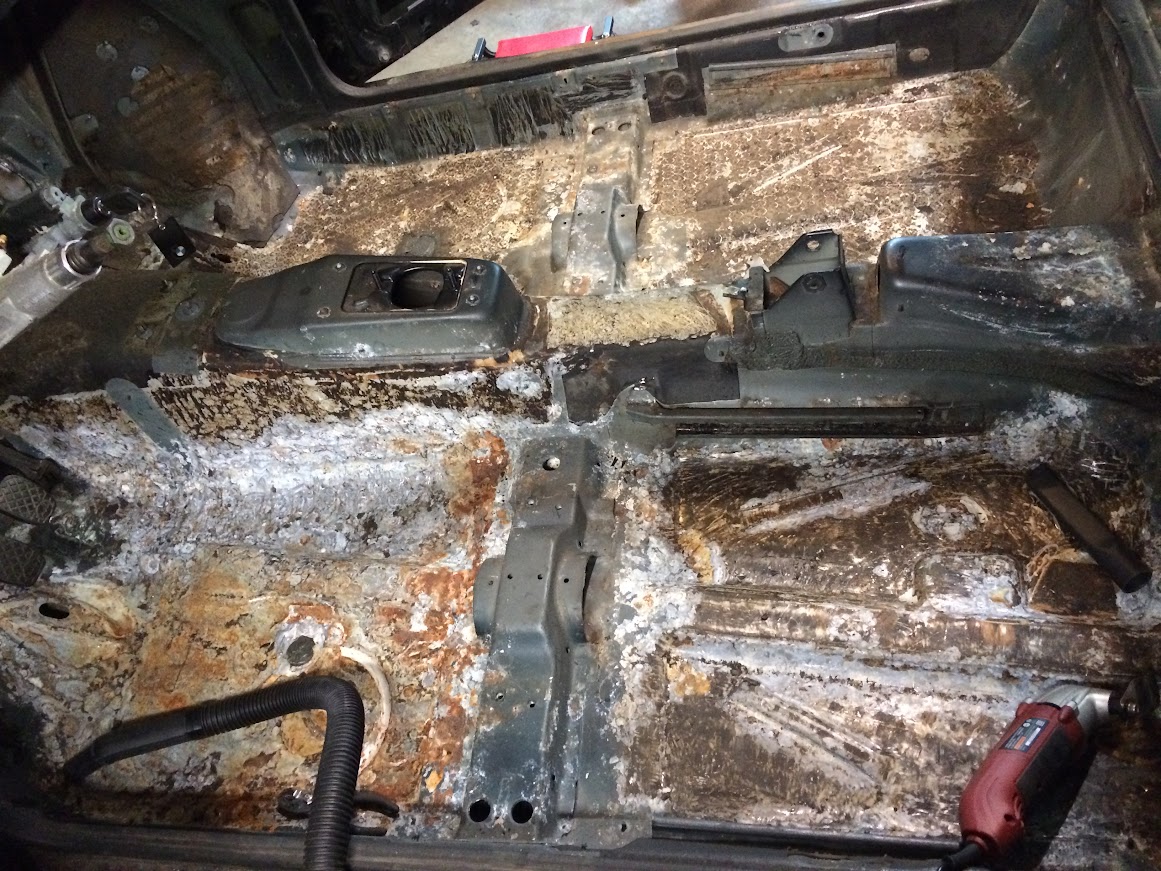
I was going to use POR15 on the floor but it requires a lot of prep that then needs to rinsed very thoroughly (because the prep solvent is extremely corrosive) and since I'm not interested in hosing down my entire garage, I need to get a different paint. I'm leaning towards using brush-on rustoleum but definitely looking for suggestions here! Hopefully to be done tomoorrow. Blog about my history with the rally car written for non-automotive folk: davescq.wordpress.com |
aj_johnson A.J. Johnson Elite Moderator Location: Pendleton OR Join Date: 01/07/2011 Age: Settling Down Posts: 1,381 Rally Car: 88 Audi 80 |
they are pretty well attached I tried removing one and gave up. I notched the top and slid my box tube for the rear seat mount inside and welded it to the rail. Seemed simpler than cutting it out and then having to a weld a plate in anyway.
While the engine bay is bare. Put in a couple nicely located grounds for the block and head. I put one on the firewall as well for the coil grounds (ls2 coils) which ground to the head and the firewall. (ecu uses the chassis as a ground and I wanted to make sure no grounding issues) |
dalspaugh David Alspaugh Infallible Moderator Location: Boston, MA Join Date: 04/30/2015 Age: Settling Down Posts: 66 Rally Car: '91 Audi Coupe Quattro |
Good point about the seat rails... I could be OK with doing less welding later.
I can only think of the Ground from the bell housing to the chassis. I'll make that a 1/2" Bolt through the firewall (Up nice and high and easily accessible with a custom cable) with external teeth washers on both sides zinc finish. I don't remember seeing a ground on the Head but that sounds ridiculous, I'm sure I can find a grounding point to chassis. Since I'm moving the battery to the mid or rear of the car, is there any need to ground the battery up near the engine? Seems like a good Ground anywhere in the car should be OK? similar style, Thru Bolt with external tooth washers. Otherwise, Stock grounding for the harness should be sufficient since I've removed a lot of load on those circuits. Blog about my history with the rally car written for non-automotive folk: davescq.wordpress.com |
dalspaugh David Alspaugh Infallible Moderator Location: Boston, MA Join Date: 04/30/2015 Age: Settling Down Posts: 66 Rally Car: '91 Audi Coupe Quattro |
|
Sorry, only registered users may post in this forum.
Rally Anarchy © 2014 Corvus Digital –
Part of the AutoShrine Network –
Problems? Send an email to the Webmaster