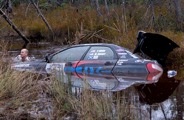

Audi UR Quattro Rally Build
Posted by BRAIDusa


BRAIDusa Paul Eddleston Senior Moderator Location: Birmingham, Michigan Join Date: 09/06/2012 Age: Ancient Posts: 554 Rally Car: Subaru Outback Wagon EG33, 911 Carrera |
Storage Unit Rally Build: Week 7 - Finishing Brake Lines
This week we were determined to finish the brake lines. We had so many projects open we were determined to finish anything to be honest, but brake lines seemed the most likely candidate for success so we jumped in. Our 90 degree 3AN bulkhead fittings had arrived so we started in the rear wheel wells and created hard lines to the flex pipes. 

The next obvious step was the lines from the bulkheads to the tee at the end of the transmission tunnel but instead we moved to the engine bay and plumbed in the brake master cylinders and lines to the front brakes! 

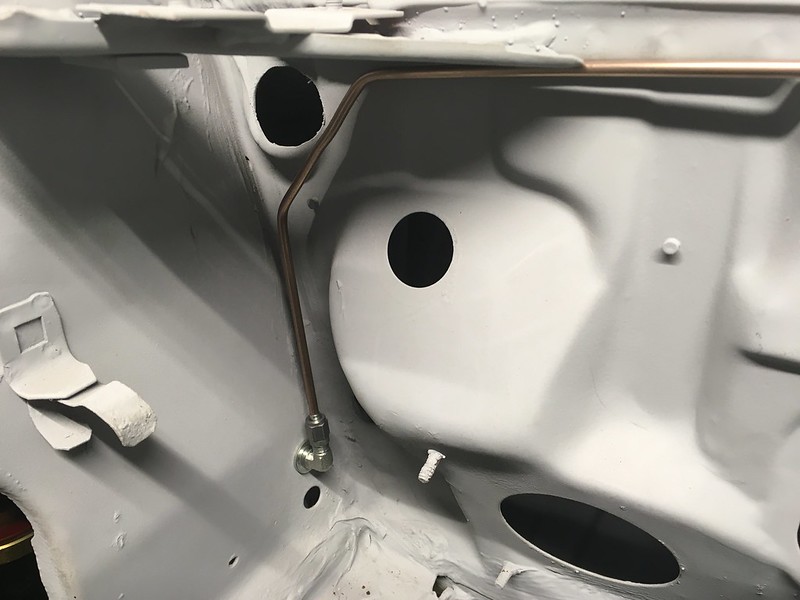

Then we focused on the lines inside the car starting with locating the line lock. We think we’ll dispense with a handbrake. We’ve never been keen on handbrake turns all wheel drive cars so just need something to act as a parking brake so this should do nicely: 
Now we just need to get brake lines to it. 

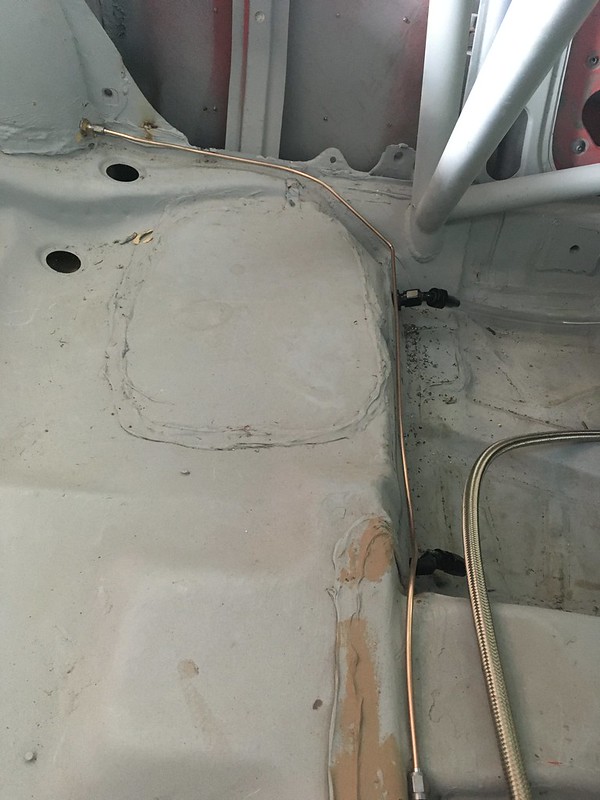

We’ll clamp everything as a separate project as we might have to move everything later anyway. We are very happy with how the brake lines turned out but there were a few casualties along the way. This got flung across the unit in fit of frustration... 
...and next time we work in the rear of the car we’ll perhaps remove the seats and climb in rather than leaning in through the window aperture. Ouch! 
 Paul Eddleston BRAID Wheels USA www.BRAIDUSA.com Team Illuminata Motorsport www.teamilluminata.com |
BRAIDusa Paul Eddleston Senior Moderator Location: Birmingham, Michigan Join Date: 09/06/2012 Age: Ancient Posts: 554 Rally Car: Subaru Outback Wagon EG33, 911 Carrera |
Storage Unit Rally Car Build, Week 8 - Coolant/Heater Lines, Power Steering & More
More coolant hose parts from Pegasus arrived. Yes, those are Dzus fasteners. More on those later. This hose worked out a lot simpler than we thought it might with just two shortened elbows, one of them being a reducer. 

We also got the heater valve and pipes in: 

At this point we gave up on the coolant lines as we need to locate the electric power steering pump and lines before we know where we can run lines to the coolant reservoir. So we shifted our attention to the PVC system. Getting crowded in here now. 

This section needs to find its way into the intake manifold via the PCV check valve, which we don’t seem to have. It also seems to want to go through our new radiator DOH! We are hoping we can bend the steel lines just enough. 
Paul Eddleston BRAID Wheels USA www.BRAIDUSA.com Team Illuminata Motorsport www.teamilluminata.com |
BRAIDusa Paul Eddleston Senior Moderator Location: Birmingham, Michigan Join Date: 09/06/2012 Age: Ancient Posts: 554 Rally Car: Subaru Outback Wagon EG33, 911 Carrera |
Week 9 of the Storage Unit Rally Build
We ran out of things to do so now we can reveal what those quarter turn Dzus fasteners are for: The removable dash panels! 
We have never played with these before so this might not go well. Our panels are not very thick so we ordered the fasteners for the thinnest material possible. Fortunately they seem to be the perfect size: 
Our dash and removable panels cane pre-drilled for these fasteners but we still had to clearance the center hole to allow the fasteners to sit flush. Then we riveted them in place. 


That went well but then we had to attach the springs to the back of the dash panel. In order for the removable panels to sit flush we needed to countersink the holes and to use countersunk rivets. But we couldn’t find any locally. Then an old-school bodywork guy told us how to make our own countersunk rivets. You place a regular river in a 45* flare die and chamfer the end or a short piece of steel brake line. Place this brake line chamfer “tool” over the stem of the river and tap it into the die with a light hammer until it forms a 45*. It worked great! 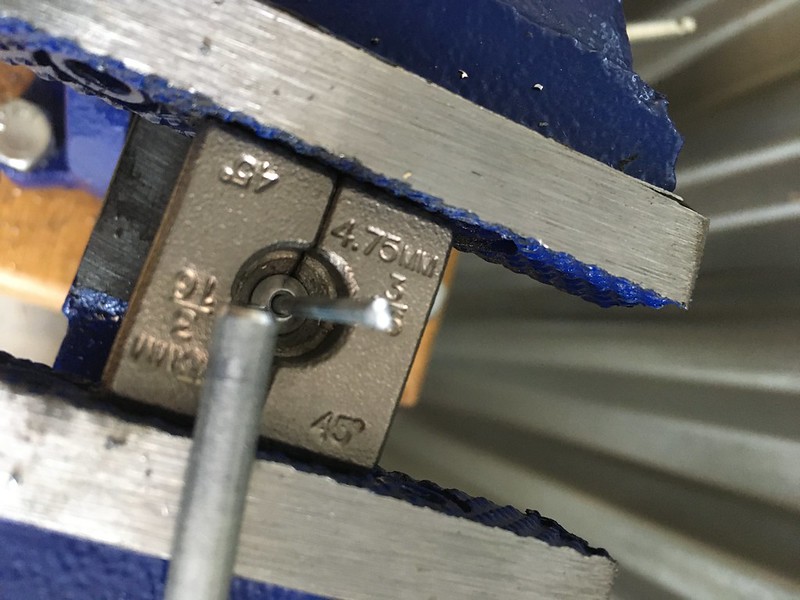

and enabled us to mount the springs without any frontal protrusions once we filed them flush: 

Then we installed our first removable panel. May be time to order some fuse blocks: 

The rally computer panel had us worried though as the top right faster was really close to the roll cage. In fact we had already filed it down to get the dash to fit. We went at it without a plan for that one fastener. 
After attaching the other fasteners we riveted the top right one in place and filed it down a little to clear the cage but we were still missing one of the rivet holes for the spring. Still, one less countersunk rivet to make! 
Then we thought “What the hell. Maybe It will work with half a spring!” 
And what do you know; it did! 

We decided to hold off on the gauge panel as we’d have to remove all the gauges and switches to install the fasteners. We’ll wait till we do that when we paint it. Paul Eddleston BRAID Wheels USA www.BRAIDUSA.com Team Illuminata Motorsport www.teamilluminata.com |
BRAIDusa Paul Eddleston Senior Moderator Location: Birmingham, Michigan Join Date: 09/06/2012 Age: Ancient Posts: 554 Rally Car: Subaru Outback Wagon EG33, 911 Carrera |
Week 10 of the Storage Unit Rally Car Build
Inspired by our success with the dash fasteners we moved on to something that has been troubling us for a while, the PCV system. We’d like to keep the engine as stock as possible for now as we don’t want to complicate getting an engine we are unfamiliar with running well after it has been idle for who knows how many years. So we think we’d like to keep the PCV system intact as it came from the factory. This was complicated by the fact that we know nothing of the mysteries of PCV and that part of it connects into the intake manifold; the stock intake manifold. Undaunted we dug through our 300 boxes and pulled out anything that looked like it might be part of a PCV system. 
We thought it good insurance to replace all the weird bits that weren’t just pipe so we went to our friends at Pelican Parts. 
We offered up the bits that went around the back of the engine but it was clear that our radiator was in the way of a straight shot forward. So out with the pipe cutter! 

And added a length of flexible hose. It fits now. 
Once passed the radiator we aimed it at the intake manifold behind the throttle body like the stock manifold and used a piece of clear hose for now. We will need to take the manifold off to either weld on a bung or tap it for a fitting of some sort. Next time the engine’s out perhaps. Paul Eddleston BRAID Wheels USA www.BRAIDUSA.com Team Illuminata Motorsport www.teamilluminata.com |
BRAIDusa Paul Eddleston Senior Moderator Location: Birmingham, Michigan Join Date: 09/06/2012 Age: Ancient Posts: 554 Rally Car: Subaru Outback Wagon EG33, 911 Carrera |
Storage Unit Rally Build Week 11 - Diverter Valve & Door Handles
Diverter Valve Our new diverter valve arrived while we were playing with the PCV system so we slapped that in too, upside down at first! 
Fortunately, it sits directly over the turbo pipe into the intercooler 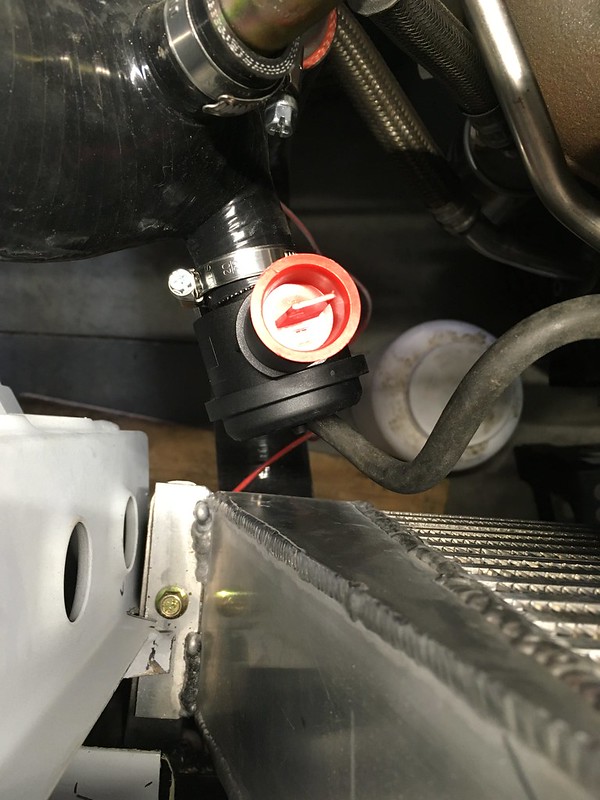
But we will need to weld on a bung to attach it. No welding in the storage unit though. 
Door Handles We were told to get a handle on things so we pulled these out of a big blue box. 
They go on the doors. Might not seem like a big deal But it’s been a real PITA to constantly reach in through the window aperture to pull the interior door handle. This will make storage unit life much more palatable. If we can fit them. We again went to the parts diagrams to see what was needed. 
Initially it didn’t look promising as we seemed to be missing some actuator rods. Specifically, #8 and #9 but when we looked inside the doors we found both #8s still attached to the lock mechanisms. 
Also, it turns out the missing #9 operates the lock so we’ll get one of those later as we won’t be needing to lock it for quite a while. The handles themselves cleaned up very nice and we had all the bits. The driver’s side lock did give us a scare as it appeared it may have been re-keyed at some point because we could not get it to turn. A bit of WD40 freed it up though so we slapped them on. 
The actuator rods were a bit fiddly but they are now on and the doors work. Nice! Paul Eddleston BRAID Wheels USA www.BRAIDUSA.com Team Illuminata Motorsport www.teamilluminata.com |
BRAIDusa Paul Eddleston Senior Moderator Location: Birmingham, Michigan Join Date: 09/06/2012 Age: Ancient Posts: 554 Rally Car: Subaru Outback Wagon EG33, 911 Carrera |
Storage Unit Rally Build - Week 12: Clutching Straws
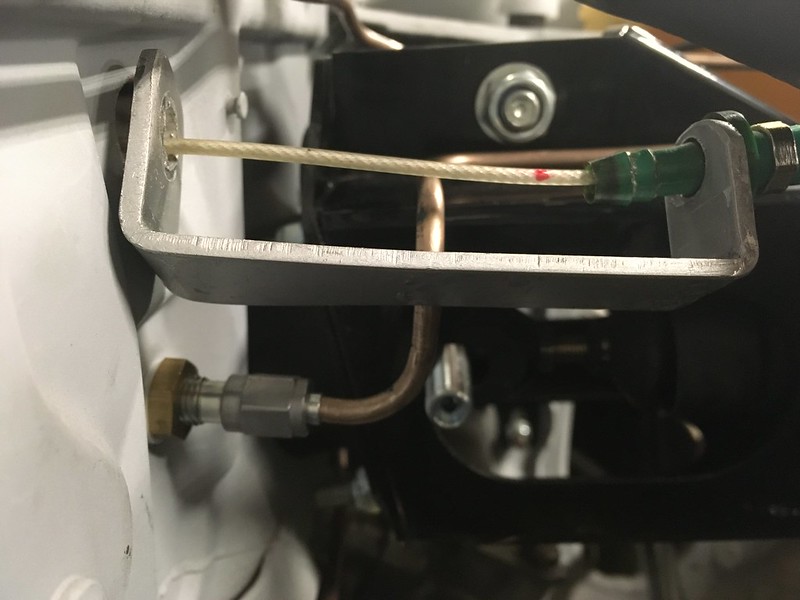
We spent this week clutching at straws, curly straws at that! No, actually, we made a curly clutch line that goes between the slave and master cylinder. We have no idea why it’s this shape but Audi went to a lot of trouble to make it so we thought we should too! We were going to use the original one but it’s in really good shape and will make a great spare for our '85 road car so we decided to get bending. Hope it doesn’t drive is round the bend. 
According to math this thing is enormous before you bend it. Nearly 3 foot long! 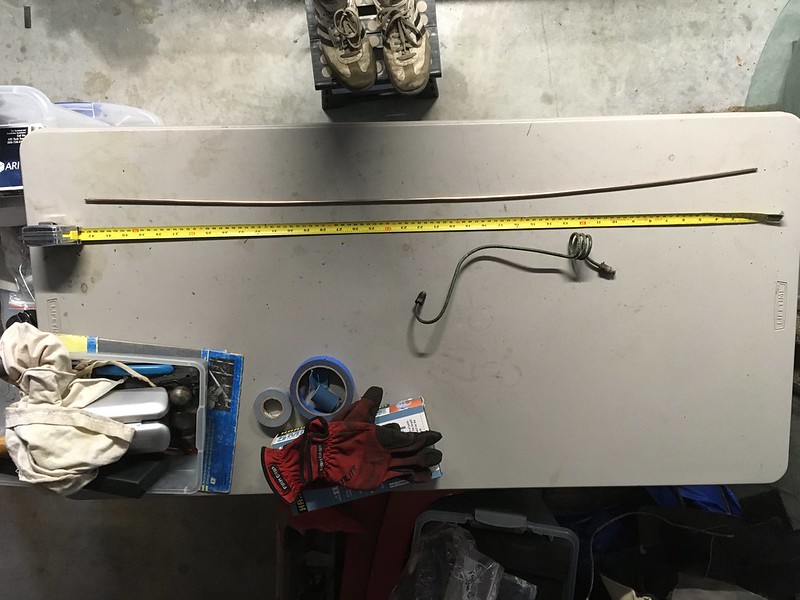
We needed to find something suitable to form it round. The jack handle will do. 

It was actually easier than we thought it would be. 


And it added up fitting pretty well. Don’t worry, we have a new master cylinder, somewhere. Pat on the back! 

Paul Eddleston BRAID Wheels USA www.BRAIDUSA.com Team Illuminata Motorsport www.teamilluminata.com |
BRAIDusa Paul Eddleston Senior Moderator Location: Birmingham, Michigan Join Date: 09/06/2012 Age: Ancient Posts: 554 Rally Car: Subaru Outback Wagon EG33, 911 Carrera |
Storage Unit Rally Car Build - Week 13: Axels & Heater Lines
AXLES One day we are going to find a new building and will have to push this thing back out and into the trailer. With the axles out the wheel bearings flop about so we didn’t want to struggle with it again like we did, pushing it in. We decided now was a good time to reinstall the axles, even though we haven’t refurbished them yet. 
Don’t worry, we cleaned them up a bit. We’re not peasants. When we dug them out of hiding it soon became apparent that there were two long ones and two shorter ones. But where did they go, front and rear, left and right, where? It turns out, opposite corners! 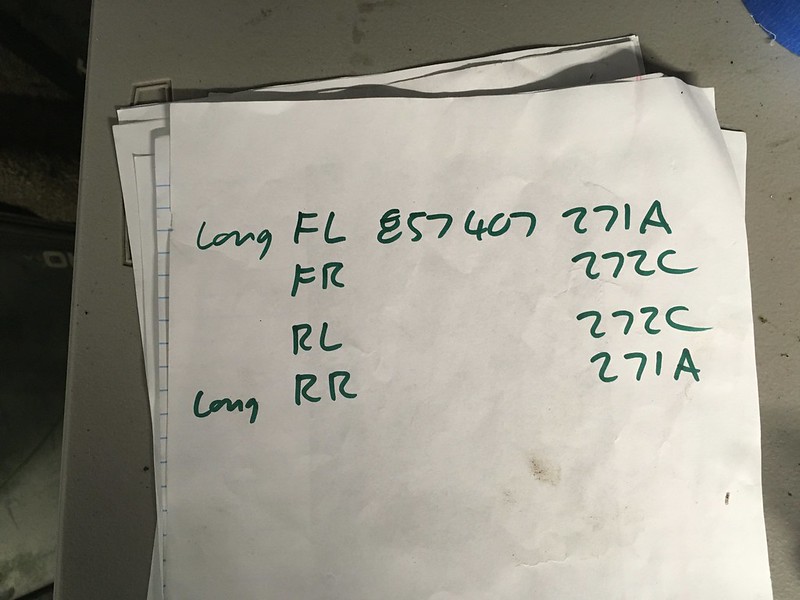
We’re sure there’s a good reason but just for giggles we did try to install one in the wrong place, just because, well, we’re idiots to be honest. It was too long. 
HEATER PIPES The 45* bends we were waiting for from Pegasus Racing came in so we got to finish heater pipe installation. 
We’ve also located a brand new double grommet for the bulkhead! 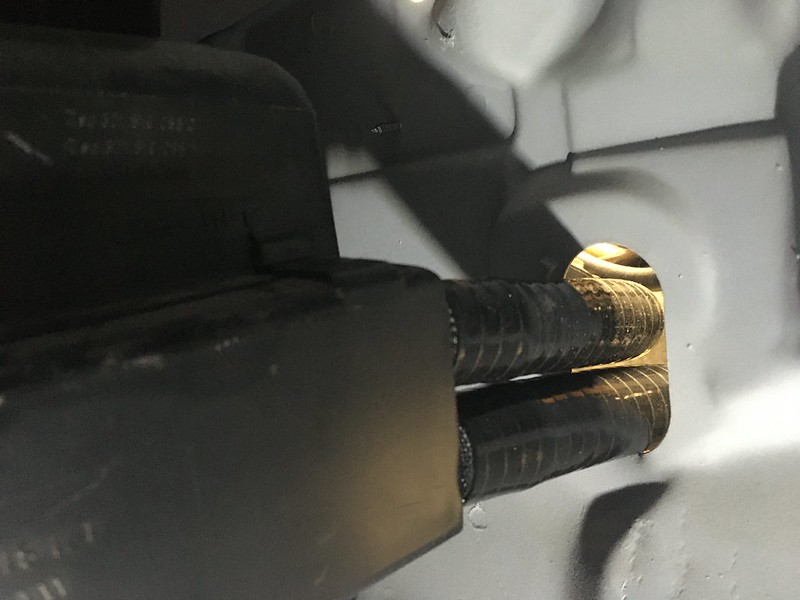
Paul Eddleston BRAID Wheels USA www.BRAIDUSA.com Team Illuminata Motorsport www.teamilluminata.com |
BRAIDusa Paul Eddleston Senior Moderator Location: Birmingham, Michigan Join Date: 09/06/2012 Age: Ancient Posts: 554 Rally Car: Subaru Outback Wagon EG33, 911 Carrera |
Week 14 of the Storage Unit Rally Car Build
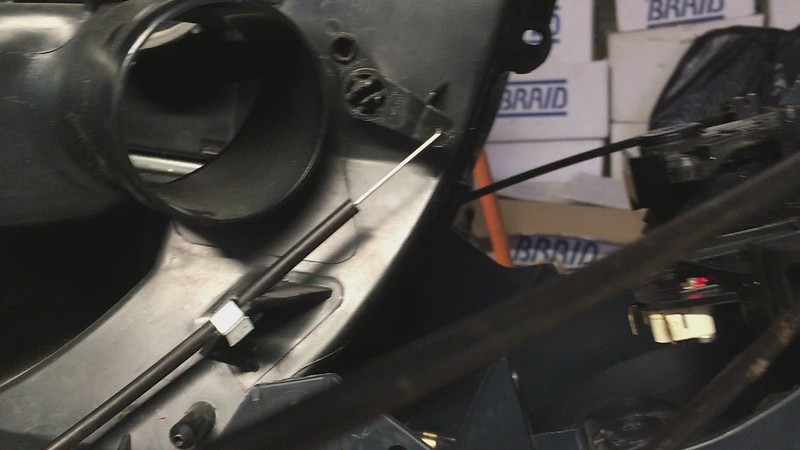
IACV (Idle Air Control Valve) Yep, we’re now struggling to find things we can install while working in the storage unit. Picking at straws so to speak. Next on our list is therefore the idle air control valve. IACV. If you don’t already know, this ECU controlled valve bypasses the throttle at idle to allow it to, well, idle. Of course, with our fancy aftermarket intake manifold it won’t just bolt back in place. There is a connector for it at the back of the manifold be we’ll still have to tee into the intake tract before the throttle at some place. Here’s the valve with its rubber mounting ring and the nifty bracket that it sits on. 
It is quite heavy so we think we should try to mount it using the OE bracket if possible. The inlet to the manifold is towards the back directly underneath, but whatever the IACV mounted off before is no longer apparent. So, we contrived a bracket extension off the engine mount arm as there were already three threaded holes in that. Engage CAD design mode. 

We’re not really setup to make this in our storage unit so we’ll either make it later or outsource it. The inlet is a straight-ish shot to the back of the intercooler end tank but we’ll need to weld a bung on for it so, job stopped! SEALS Our searching through various boxes for various parts revealed the window and aperture seals so we decided to take inventory and install some because, well, we’re running out of things we can do and we have to keep moving forward somehow. Door seals 
Windshield seal 
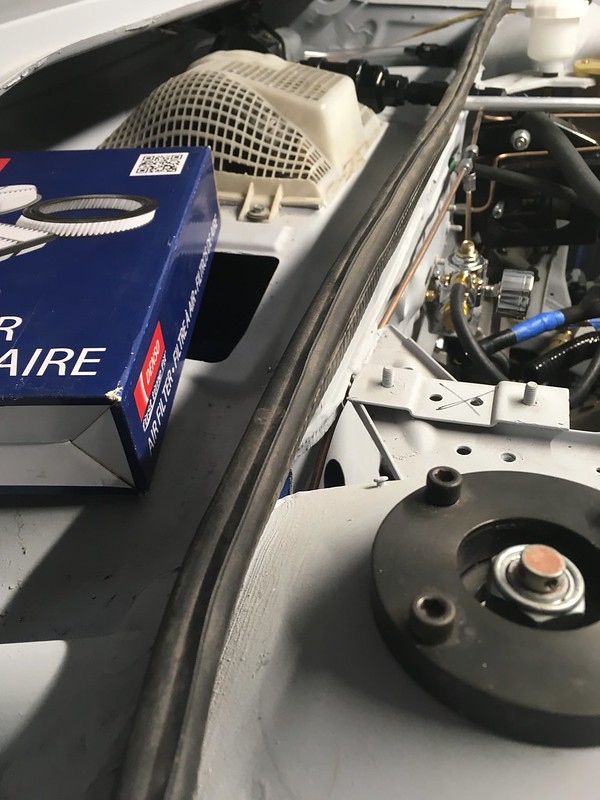
Under hood cowl seal 
Trunk seal 
The rest of the window seals are already on the respective windows hidden away, somewhere. These pieces seem to be still in good shape and were surprisingly satisfying to install. Paul Eddleston BRAID Wheels USA www.BRAIDUSA.com Team Illuminata Motorsport www.teamilluminata.com Edited 1 time(s). Last edit at 01/14/2021 09:08AM by BRAIDusa. |
BRAIDusa Paul Eddleston Senior Moderator Location: Birmingham, Michigan Join Date: 09/06/2012 Age: Ancient Posts: 554 Rally Car: Subaru Outback Wagon EG33, 911 Carrera |
Storage Unit Rally Build - Week 15 (Quick Update)
I'm back to working on the fan mount. You may remember that our beautiful afterthought of a fan shroud would not allow us to fit the actual fan as it interfered with the frame rails because we didn’t think it through. So, we ordered up six of these fan mounting brackets and went to town. 

The fan is quite weighty so we thought some vertical hanging type mount would be a good idea. We cobbled one together. 
That’s better. 
Fits too! 
Paul Eddleston BRAID Wheels USA www.BRAIDUSA.com Team Illuminata Motorsport www.teamilluminata.com |
BRAIDusa Paul Eddleston Senior Moderator Location: Birmingham, Michigan Join Date: 09/06/2012 Age: Ancient Posts: 554 Rally Car: Subaru Outback Wagon EG33, 911 Carrera |
Week 16 of the Storage Unit Rally Build
It's been cold so we felt inspired to hook up the heater controls. This week we learned all about “Bowden Cables”! These clips are hard to find new but we found some. 
And dug out the rest of the system. 

The control sliders went in easily but hooking up the cables and clamps was a bit fiddly. Surprisingly satisfying once done though. 


Now we just have to figure out how to direct the air from the heater box to various body parts and bits of glass. Paul Eddleston BRAID Wheels USA www.BRAIDUSA.com Team Illuminata Motorsport www.teamilluminata.com |
BRAIDusa Paul Eddleston Senior Moderator Location: Birmingham, Michigan Join Date: 09/06/2012 Age: Ancient Posts: 554 Rally Car: Subaru Outback Wagon EG33, 911 Carrera |
Week 17 of the Storage Unit Rally Build: A Sharp Intake of Breath
We’ve been back and forth on what to do about an intake system for the car for ages. We’d like to have our cake and eat it too but we just can’t see a way to get there. This is what we’d like to have: 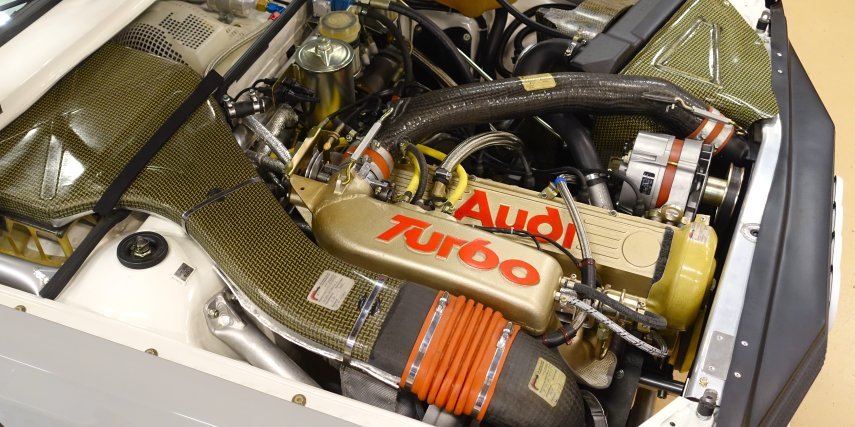
As used on the works rally cars. It looks iconic and sucks air from the high pressure cowl area where, conveniently, there are louvers in the hood above for that very purpose. There are a few problems with this. Firstly we have a MAF sensor to incorporate in the intake track, ideally in the stock location as we have an aftermarket U shaped intake tube that houses connections for all kinds of other bits and pieces that we need. This really doesn’t mate up to that. 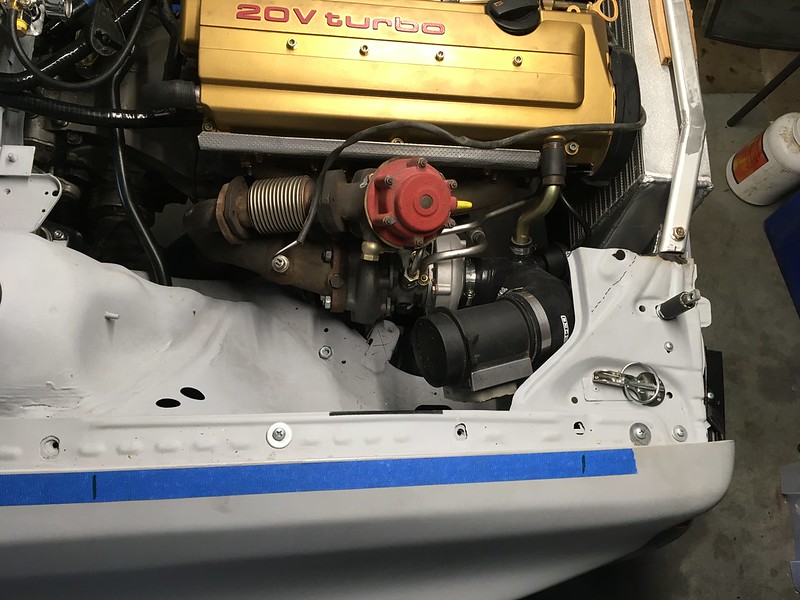
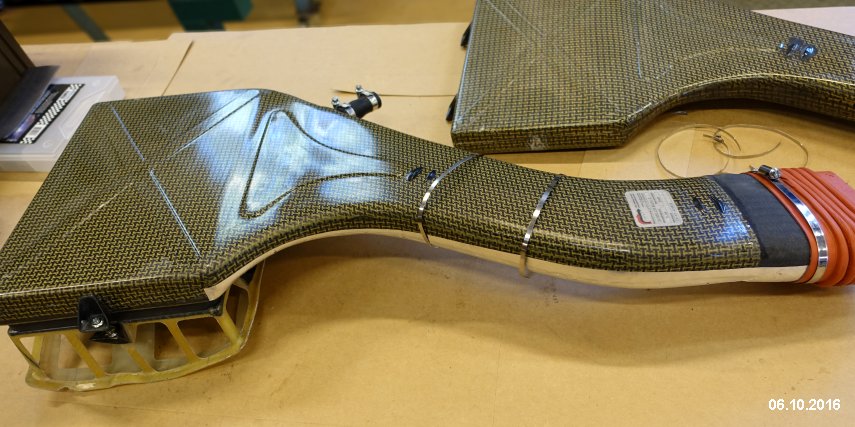
Secondly, if we did this it really would have to be made of carbon Kevlar to pass muster and making one from scratch would be very expensive and time consuming. You can, in theory, buy one but we’ve heard it’s of dubious quality and it still wouldn’t mate to our MAF sensor. We tried prototyping an alternative route to the cowl that goes down the bulkhead to an existing 3” hole before doing a 180 into the passenger compartment and back up through another existing hole in the cowl. We think we could terminate this into an oval shaped pancake filter with a lid. It would probably work and we think we could make it look half decent but our fear is that it would just look like a poor substitute for the original. 
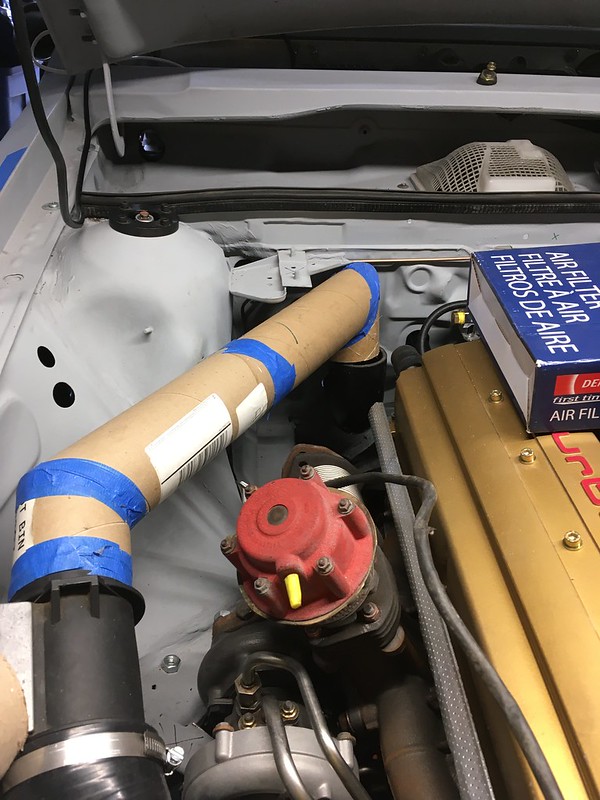
We could just whack a bloody great cone filter on the end of the MAF sensor and declare “job done” but there are a few problems with that too. It would be sucking air from right next to the turbo and also be right under the hood louver that lets hot air out of the engine bay and, not great, water in. So we dismissed this too. Here it is mocked up with a small filter. 


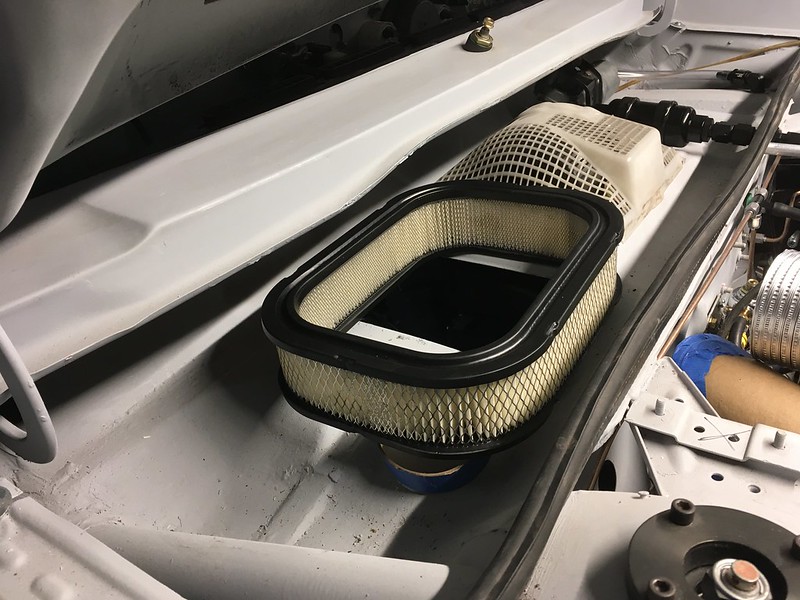
We looked at modifying some OE intake boxes but they don’t seem to be suitable either. 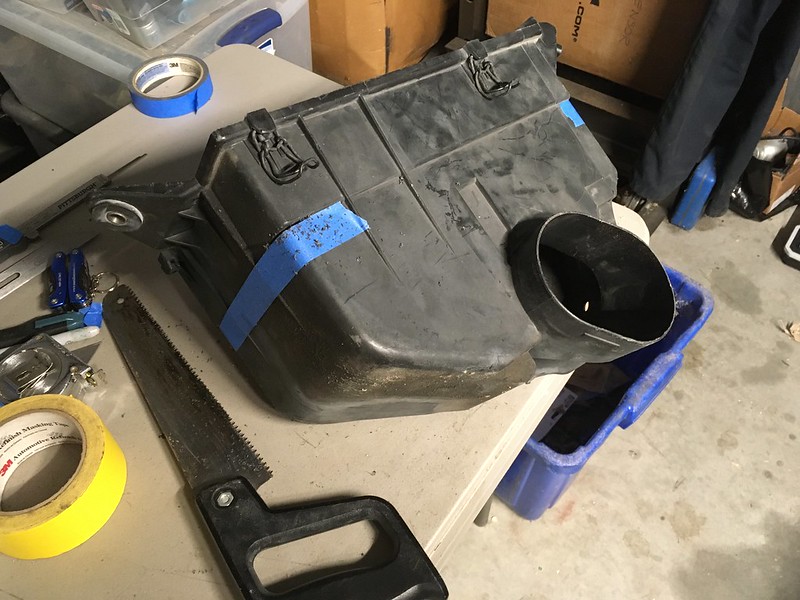
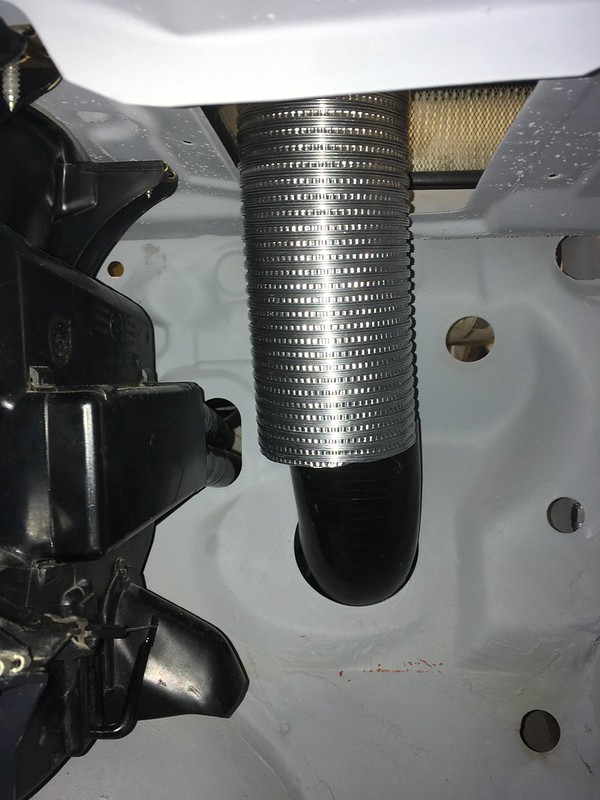
So we’ve settled. Settled on another U bend with a cone filter behind the headlight. This is not under the louver so should stay dry and it gets a good cold air feed from the grill and light surround. We also think we can shield it from the engine bay quite easily and, although it is a bit rigged it will hardly be visible so it doesn’t matter if it looks it. 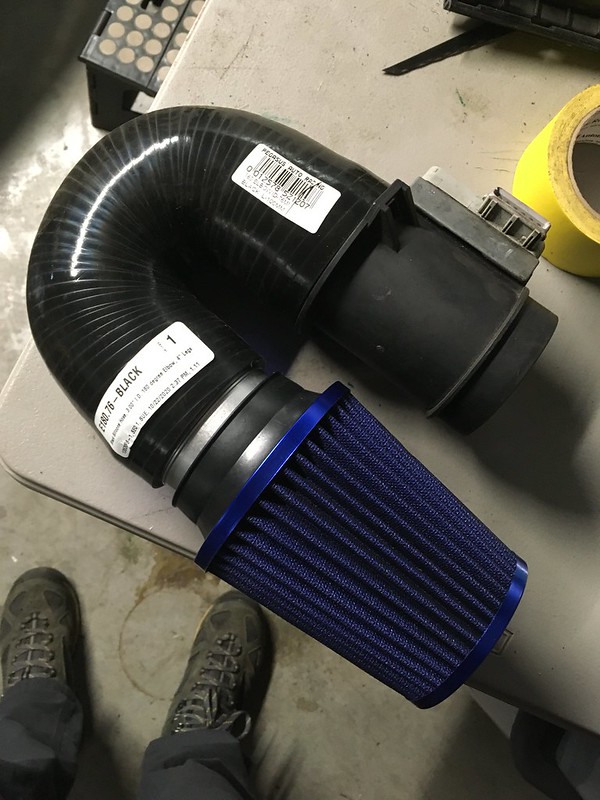


If nothing else it will do to get the car running. Maybe we will revisit this later, or not. Paul Eddleston BRAID Wheels USA www.BRAIDUSA.com Team Illuminata Motorsport www.teamilluminata.com |
BRAIDusa Paul Eddleston Senior Moderator Location: Birmingham, Michigan Join Date: 09/06/2012 Age: Ancient Posts: 554 Rally Car: Subaru Outback Wagon EG33, 911 Carrera |
So after we took that deep breath in the last update we stood back and assessed where we are in the project and found a great way to shrink our to do list: put it on a photocopier and hit REDUCE.

Kidding aside, we have got it down rather a lot but it’s still quite daunting to think about what’s still in front of us. And this is just the dry build phase! Still, Press On Regardless, as they say. We have moved the car out of the storage unit now so that is a good thing. It was fun seeing what we could achieve in there but towards the end we were getting frustrated and running out of worthwhile things to do. Here it is looking resplendent in its new surroundings. 


We didn’t waste much time cracking on once we got it in the new building. Admittedly we did start with some trivial jobs. First order of business, get the hood prop installed. Because we could. 
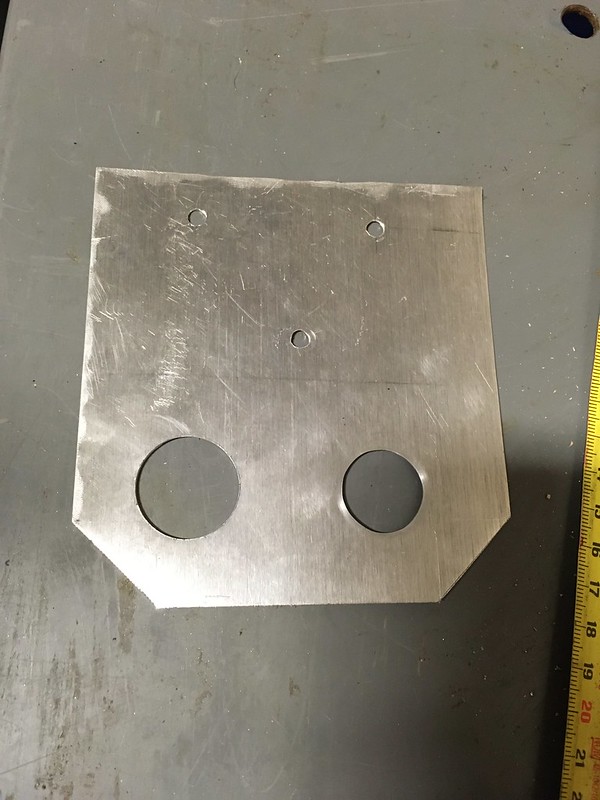
Then we made a bracket for the idle air control valve and installed that. 


We also managed a couple of other trivial but satisfying installs this week. The right turn signal lens and dip stick are now in! 

Next we went through the car and installed p-clips on all the brake lines and fuel lines we’d put in it. These were temporarily secured with self-tapping screws but will later be replaced with threaded inserts, after paint. Remember, many of these lines are temporary as well. 


We told you it wasn’t going to be very exciting. We saved that stuff for the next update, we promise. Paul Eddleston BRAID Wheels USA www.BRAIDUSA.com Team Illuminata Motorsport www.teamilluminata.com Edited 1 time(s). Last edit at 03/04/2021 09:44AM by BRAIDusa. |
BRAIDusa Paul Eddleston Senior Moderator Location: Birmingham, Michigan Join Date: 09/06/2012 Age: Ancient Posts: 554 Rally Car: Subaru Outback Wagon EG33, 911 Carrera |
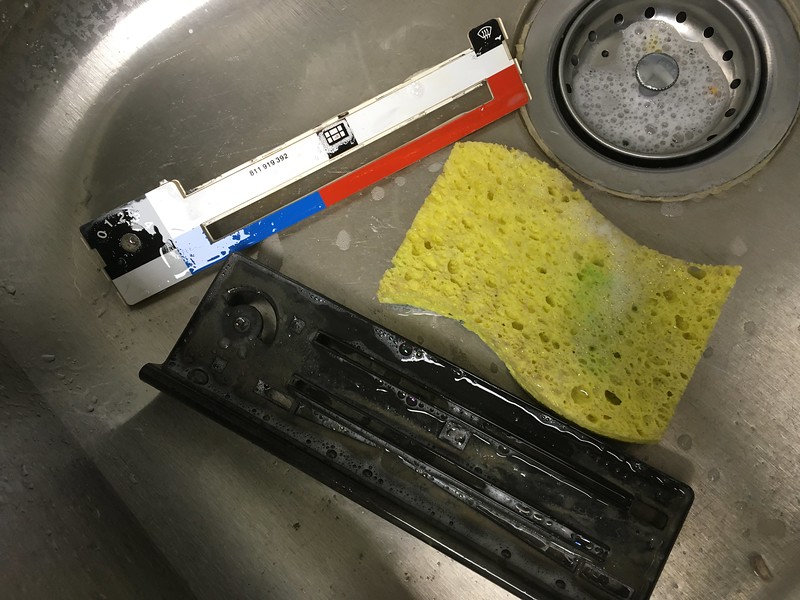
This week we turned our attention back to the heater control panel which we hadn’t installed because it needed refurbishing. The plastic was faded and the legends needed a good clean.

So we split it in two, gave it a good scrub, re-made the legends, hit it with some plastic paint, slapped it back together and installed it. 


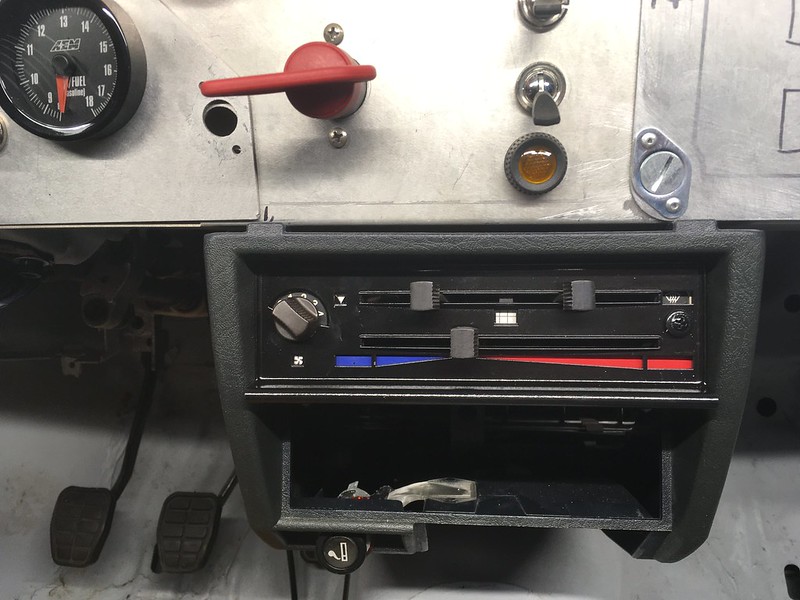
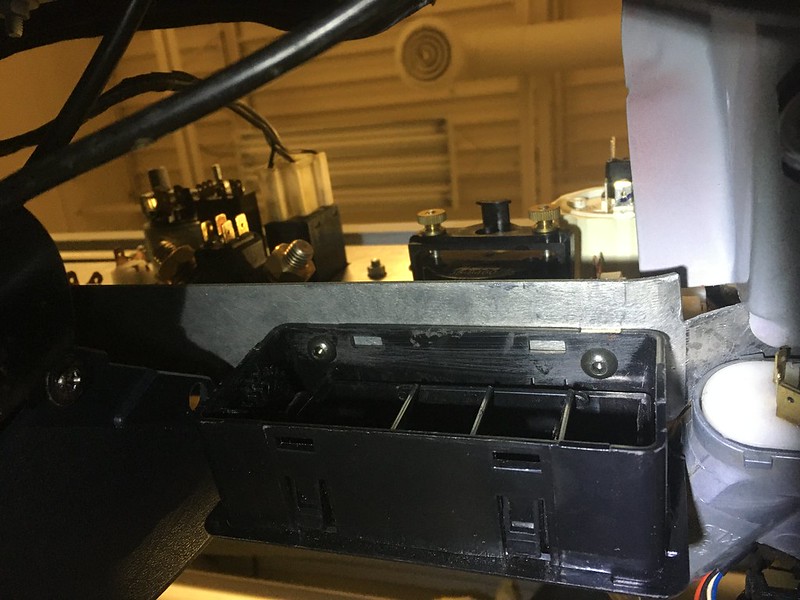
With that looking spiffy we thought we’d tackle the vents. The works cars used some OE vents mounted either side of the center console. We couldn’t fit ours because we still have the ignition key barrel and the inlets on ours are on the sides and we needed them to come out of the rear. 
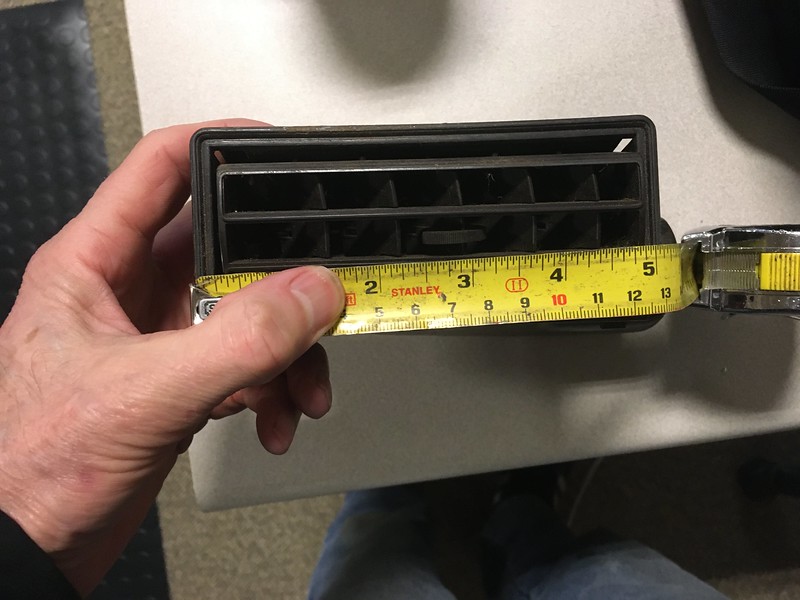
Fortunately you can buy generic ones on the interweb that are the right width and are fed from the rear. 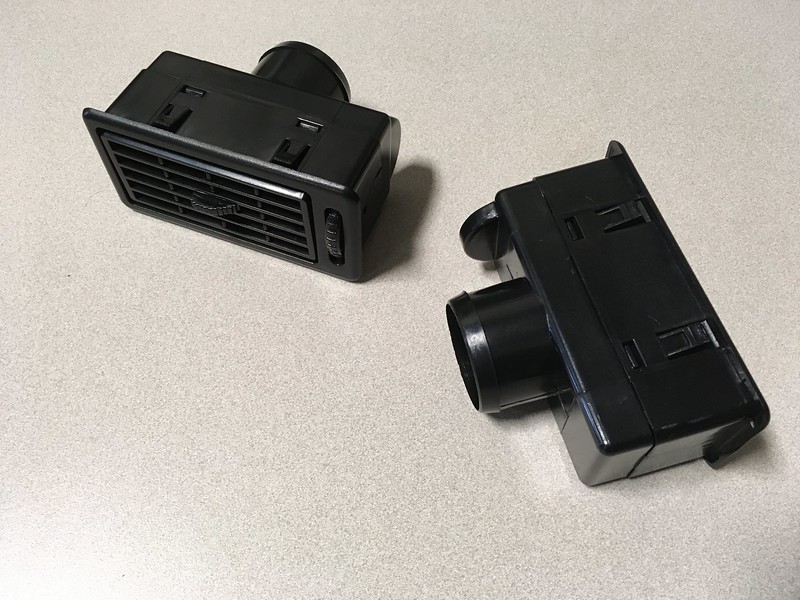
The only way we could come up with to mount them was to use some low profile allen screws up through the dash panel above but in order to do that we had to disassemble them first. 
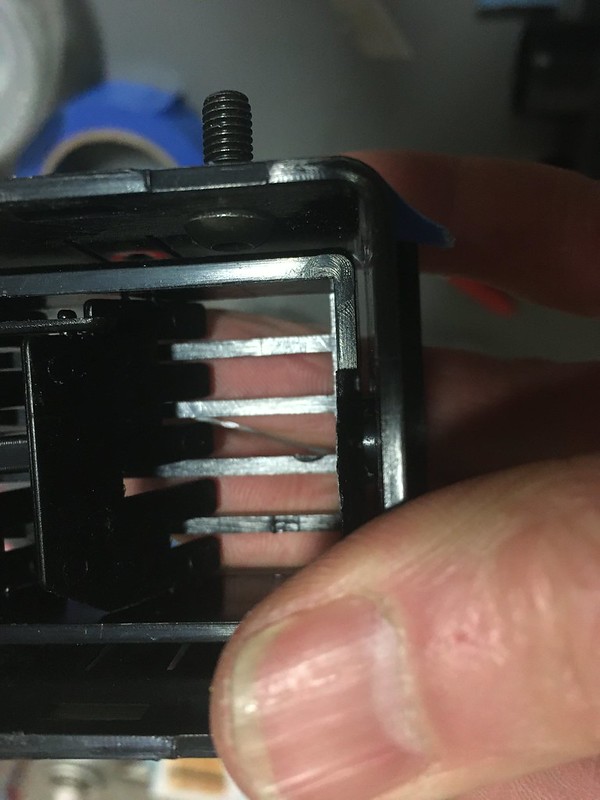
Then file the mounting tangs flat so they would fit flush. 
And then just a little more fettling before they fit perfectly and look like they belong there. 


Of course now we needed to feed some air to them. They’re no good just looking pretty. They need to function too. We ordered a few feet of flexible ducting from Pegasus in the size we thought would fit. One end fit inside the outlets in the air box and the other, with a bit of padding with some tape, fit on the inlet to the vent. Looks very professional in our opinion. 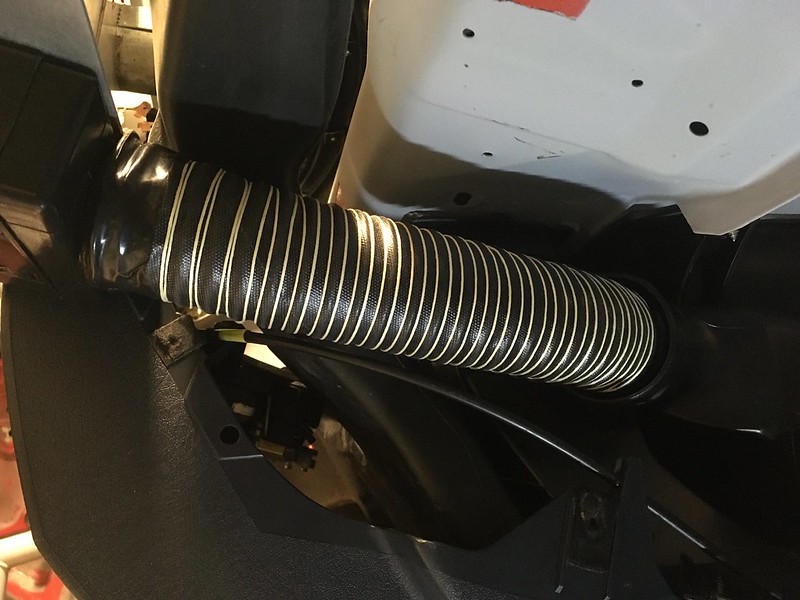
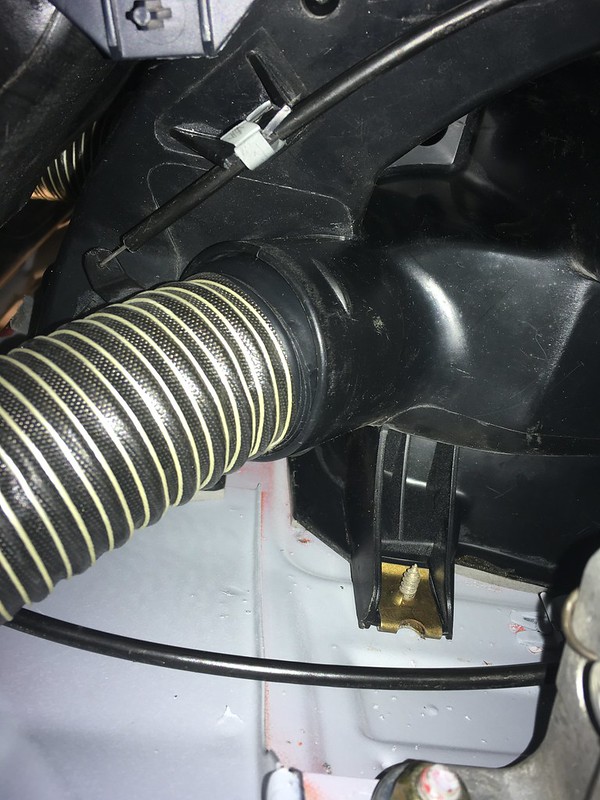
We also wrangled the convoluted plastic tube for the side vents into place but we don’t know if we will be able to retain it as it passes right behind the dash where, ultimately, hundreds of wires need to go. For this reason we didn’t bother terminating them yet but did offer up a piece of silicon hose to mimic he orientation. 


Paul Eddleston BRAID Wheels USA www.BRAIDUSA.com Team Illuminata Motorsport www.teamilluminata.com |
BRAIDusa Paul Eddleston Senior Moderator Location: Birmingham, Michigan Join Date: 09/06/2012 Age: Ancient Posts: 554 Rally Car: Subaru Outback Wagon EG33, 911 Carrera |
It’s been an interesting and satisfying couple of weeks with the car. We checked off a few smaller things from the list and opened up some big things.
Right after our last update we received this package from Rennline. Based in Vermont, Rennline manufacture and sell specialized parts for mostly European cars. They are very well known for the Porsche parts, many of which we have on our 911 rally car, but also have parts for Audi, BMW and other marks. And clearly they have pars for our Quattro rally car. 

The first item that grabbed our attention was a shiny tow hook. How could you miss it? 
We had to modify it to mount it on the rear of our Quattro by bending it at about 45 degrees and, of course, that cracked the powder coating but, luckily, we had a can of Rustoleum that was an exact match. 


The front might be a bit more of a challenge however. 

We also got excited by the battery and mount Rennline supplied. We assembled it and played around with a couple of potential locations. 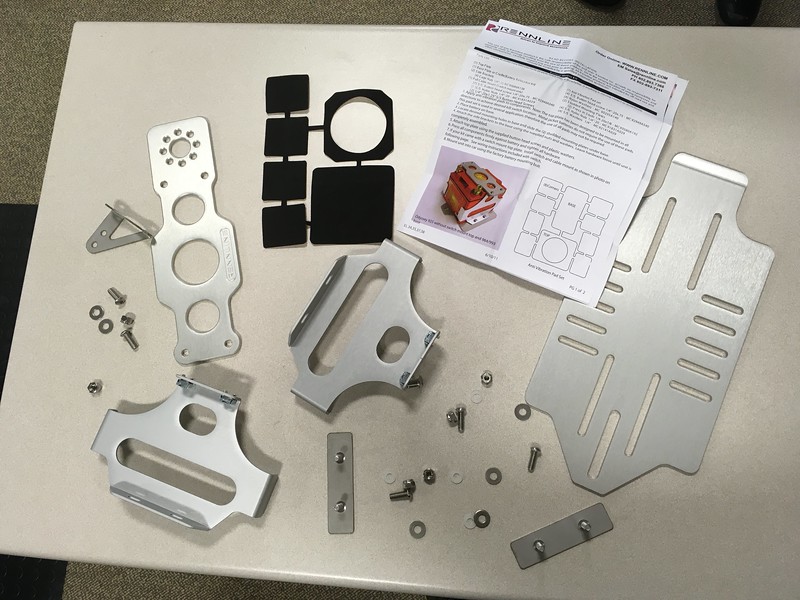

Trunk: 
And back seat area. 
Not sure yet. What do you think? Paul Eddleston BRAID Wheels USA www.BRAIDUSA.com Team Illuminata Motorsport www.teamilluminata.com |
BRAIDusa Paul Eddleston Senior Moderator Location: Birmingham, Michigan Join Date: 09/06/2012 Age: Ancient Posts: 554 Rally Car: Subaru Outback Wagon EG33, 911 Carrera |
Brake Bias, Period Correct USB Ports & Throttle Cable Mounting
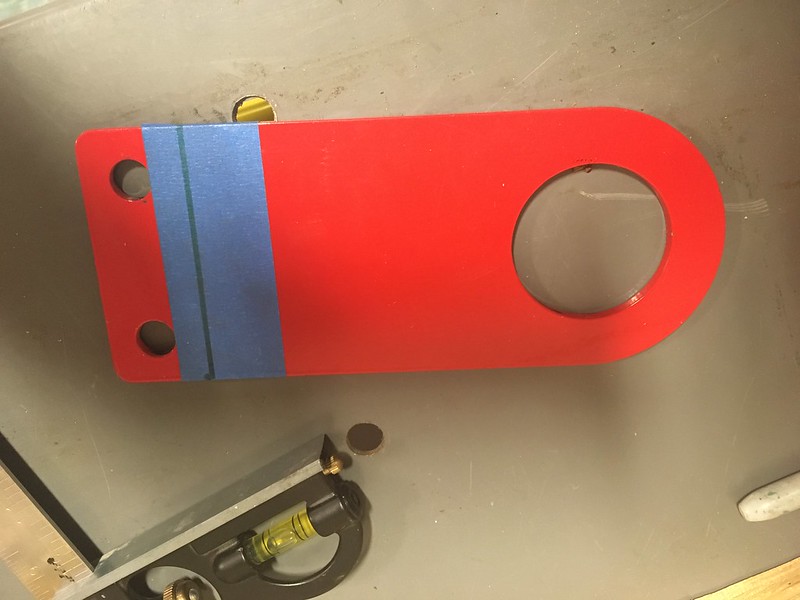
Distractions over we turned to our last remaining issue to solve on the center console: where and how to mount the brake bias knob and the period correct USB ports. So we can sync our Walkman of course! Time for a bracket. 


Then we thought the next logical project would be the throttle cable because, well, we felt we could finish it. You may remember that we had previously rotated the AAN throttle body through 90 degrees to clear the hood but we now realized that would put the linkage in a difficult place to reach with the throttle cable so we put it back where it should be and made some room for it with a Dremmel. 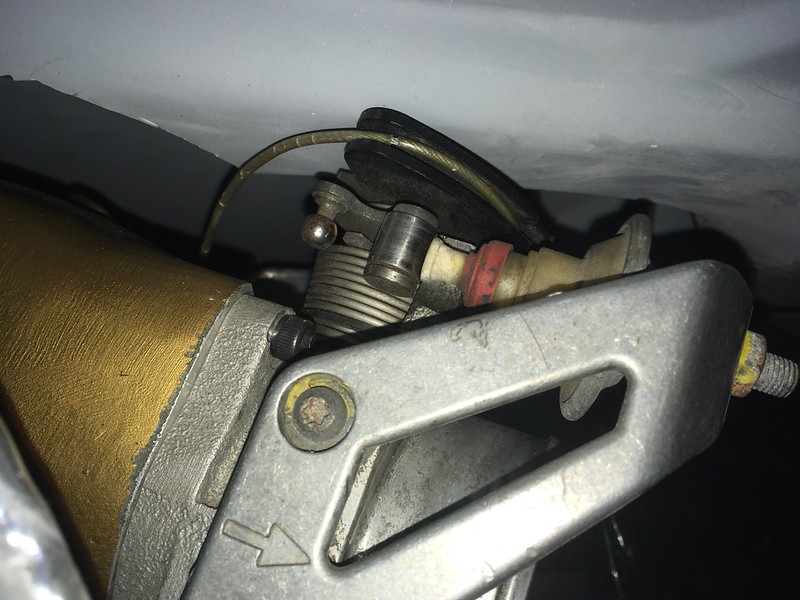

This allowed us to use the bracket supplied with the intake manifold and the intended threaded holes but it then seemed that the outer cable was too short so we rigged up a temporary “outer cable lengthener thingy” at the bulkhead to see if that would help. 
It kinda worked but seemed like a very inelegant solution. Then we realized that our 10V throttle cable was mounted way further from the throttle body on that engine than on ours and our problem was the location of the throttle cable bracket. So we moved it. Of course we mocked it up rally-style with some big-arse cable ties first but it seemed to work so we got the drill and taps out; metric of course. 

 Paul Eddleston BRAID Wheels USA www.BRAIDUSA.com Team Illuminata Motorsport www.teamilluminata.com |
Sorry, only registered users may post in this forum.
Rally Anarchy © 2014 Corvus Digital –
Part of the AutoShrine Network –
Problems? Send an email to the Webmaster