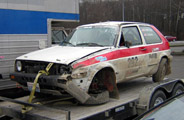

Audi UR Quattro Rally Build
Posted by BRAIDusa


BRAIDusa Paul Eddleston Elite Moderator Location: Birmingham, Michigan Join Date: 09/06/2012 Age: Ancient Posts: 554 Rally Car: Subaru Outback Wagon EG33, 911 Carrera |
Prepping for Custom Stainless Exhaust and Skid Plat Design
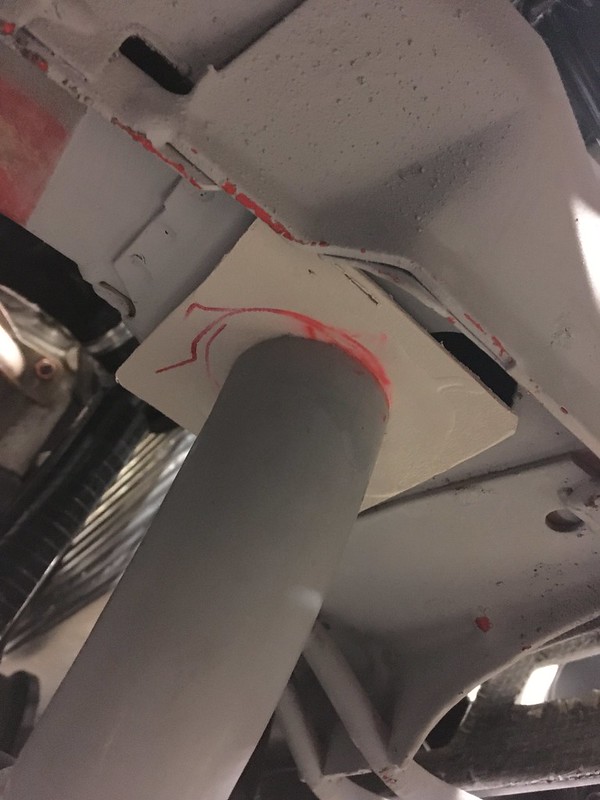
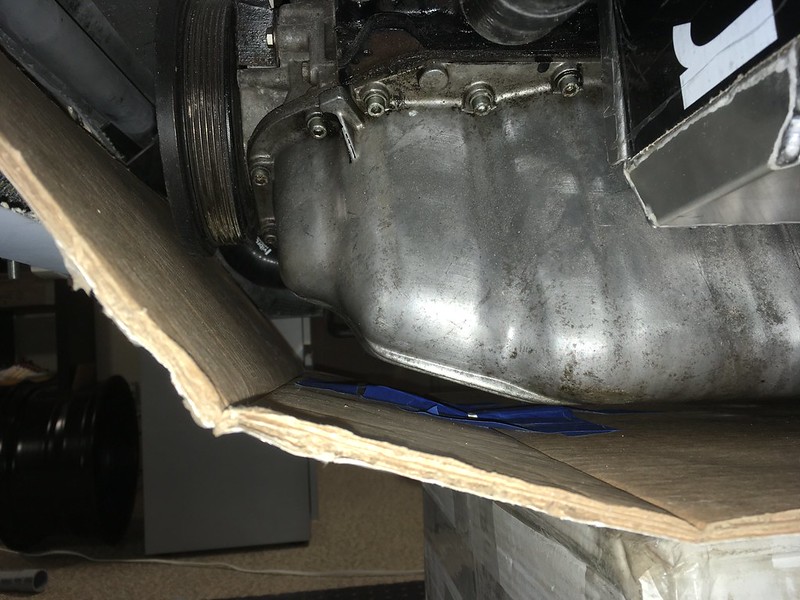
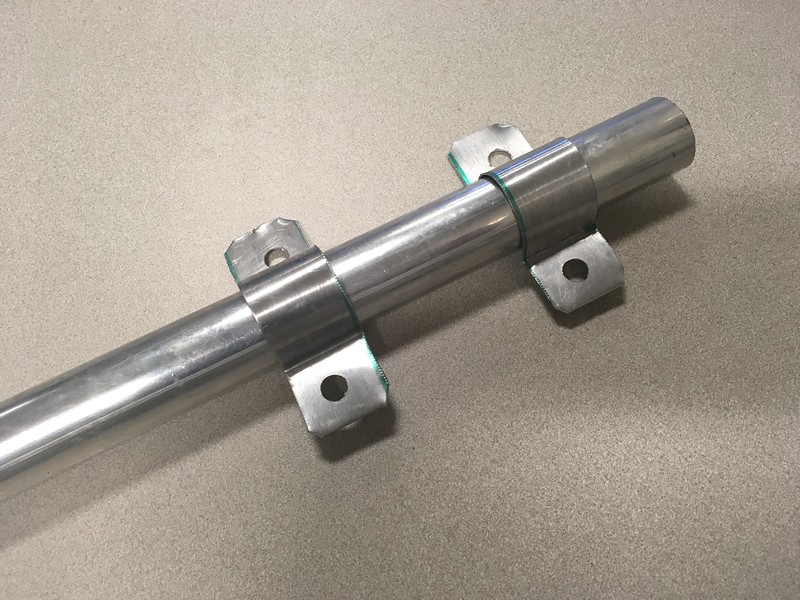
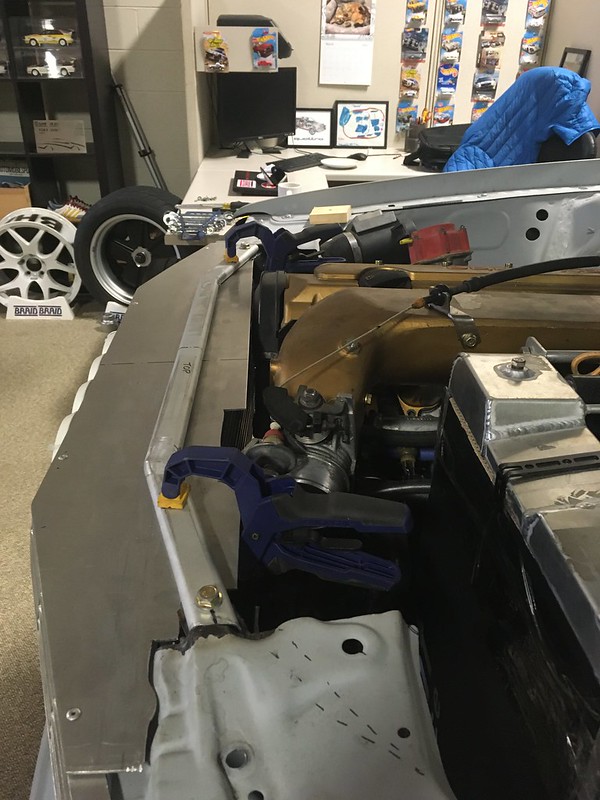
We are honored to have a friend of ours agree to build us an exhaust. It’s going to be 3” stainless steel with one muffler at the rear and as similar looking to the works cars as possible. Of course, that meant we had to build a skid plate! Well, not exactly but we did need to see how much room we would have around it so we mocked one up. First the rear support bar which spans the chassis rails behind the gearbox. We used some rather flimsy aluminum tube we had lying around which made it really easy to flatten the ends. 
Our surrogate 3” exhaust tubing fit through but it might need to be lower. 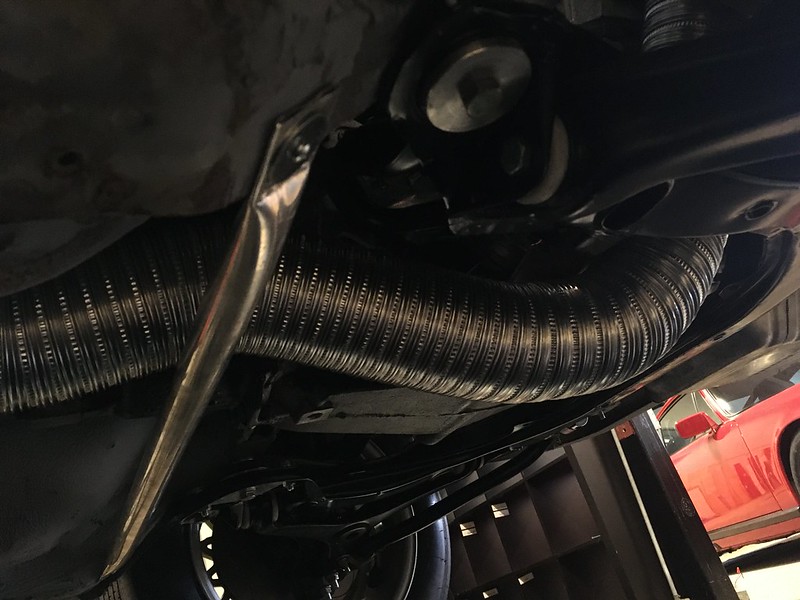
Next, we turned our attention to the front support. We thought we would see if we could mock up a reasonable facsimile of the works support using PVC conduit, even though that would be a little larger diameter than the steel tube we’d ultimately be using. How hard could it be? 


Not bad eh? 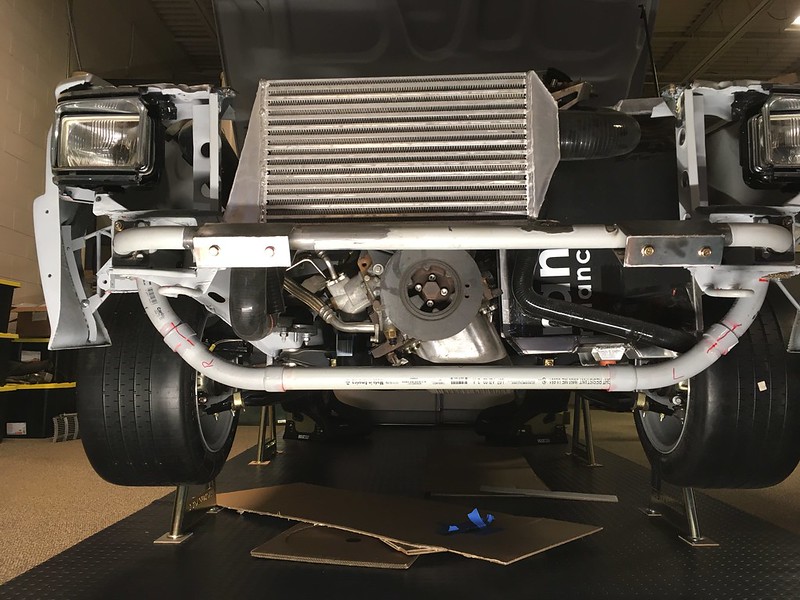

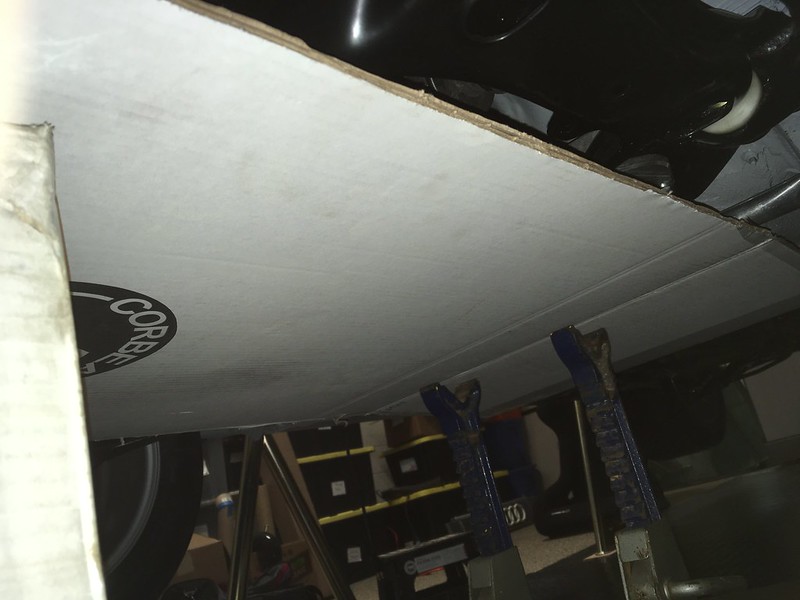
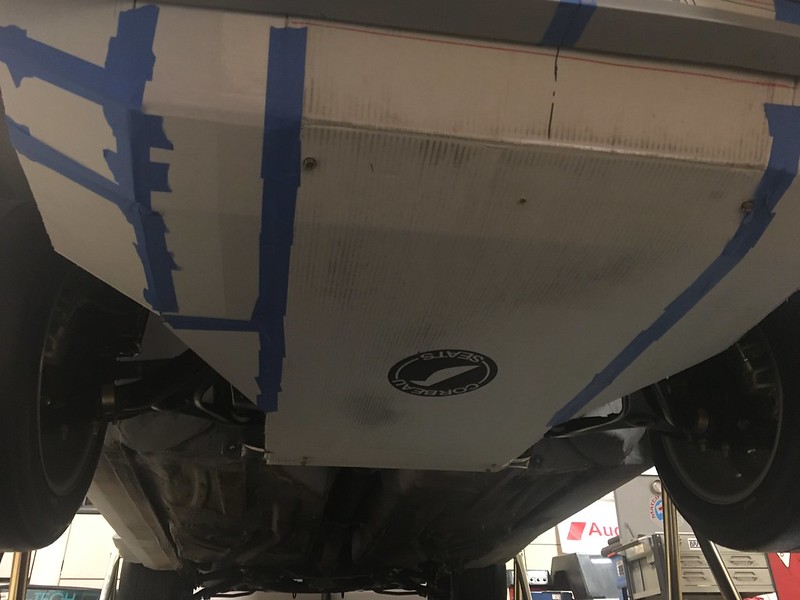
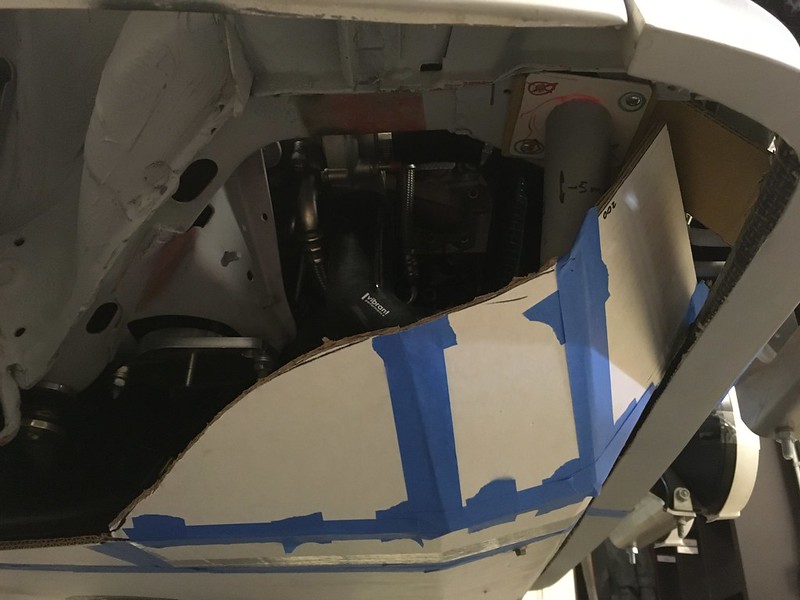
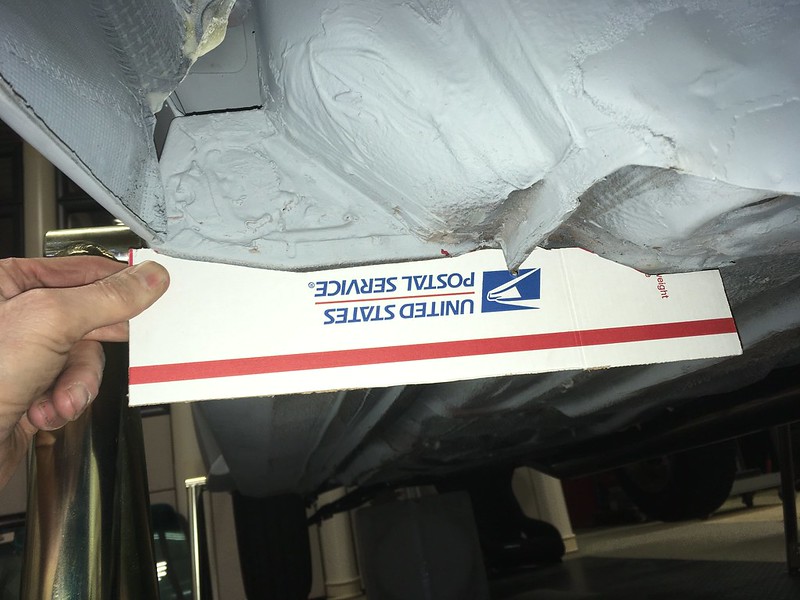
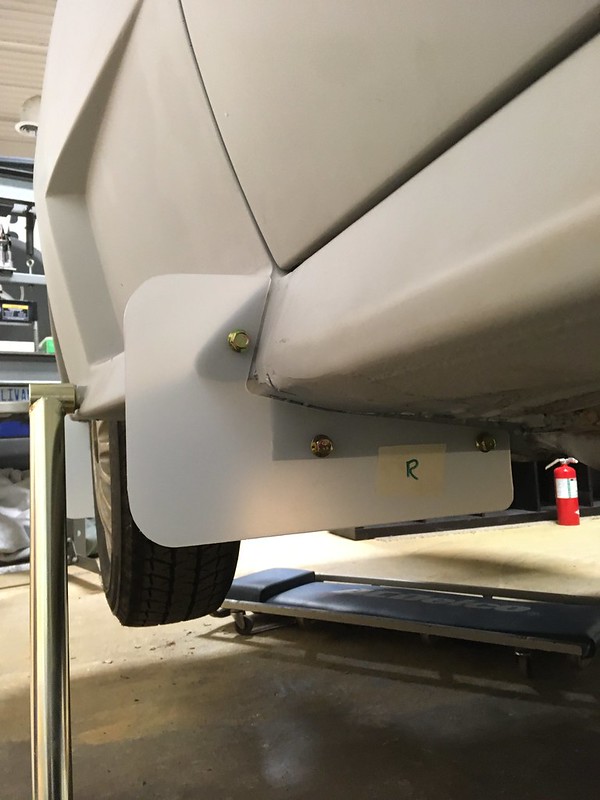
Next, we need an actual plate. Fortunately, we are a Corbeau seats dealer and their seat boxes are perfect for mocking up skid plates. Our plan was to try to replicate the molded Kevlar are whatever exotic material this one was made from, but in aluminum plate. This might be a three or even four Hobnob project! 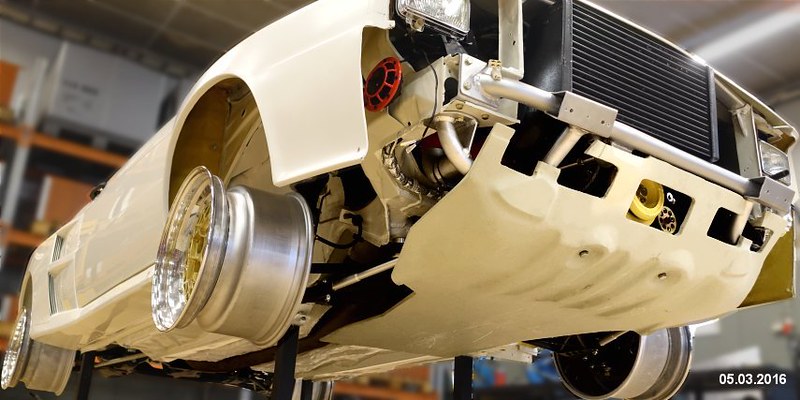
Well, you don’t know until you try so we put the kettle and our thinking caps on and had a Hobnob. First, we made a masking tape mold off of our 1:18 model. Then we put that on the photocopier and hit x18! (no, we didn’t) 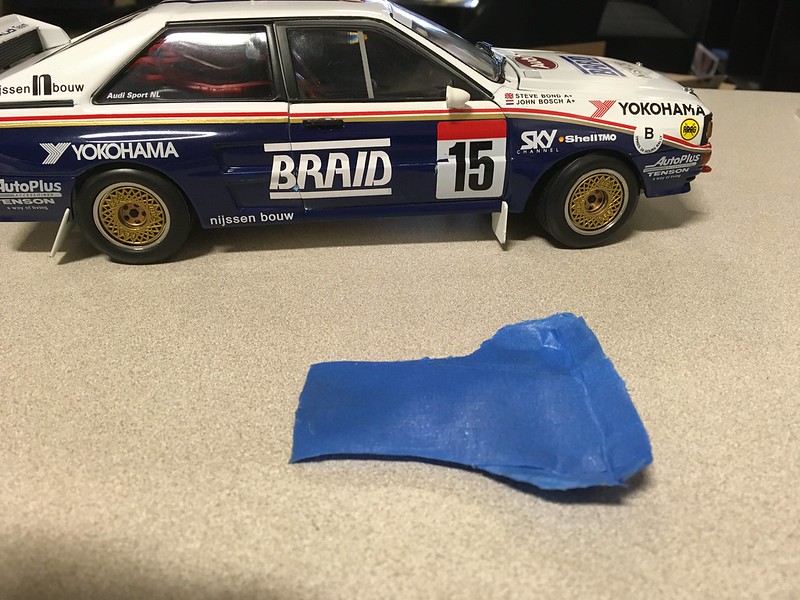
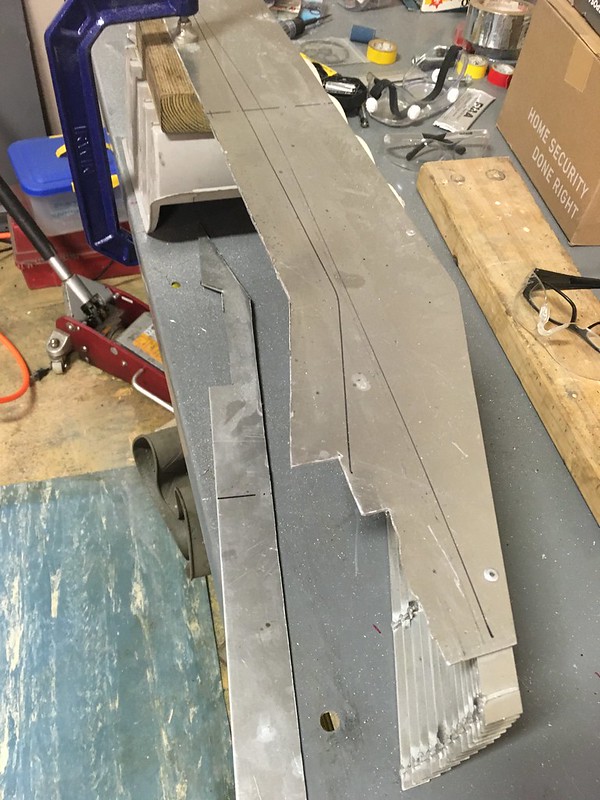
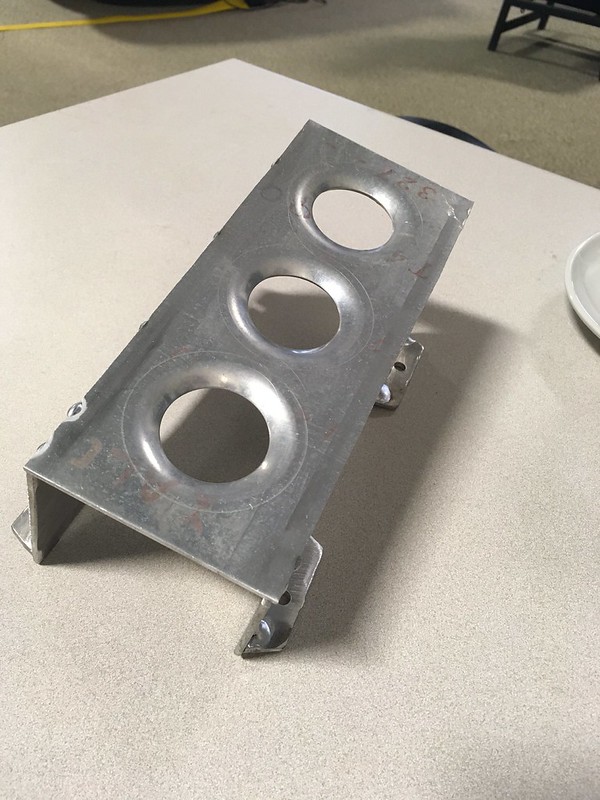
As convoluted as the works plate appears, if you study the it carefully you can make out many flat looking facets to it. Most obvious is the center section that is about two feet wide. We realized that if we took a long piece of box this wide and put two bends in it we would have the essential structure down. Moreover, if we weld some 2” wide rims on it might look quite similar. So that’s the plan. 
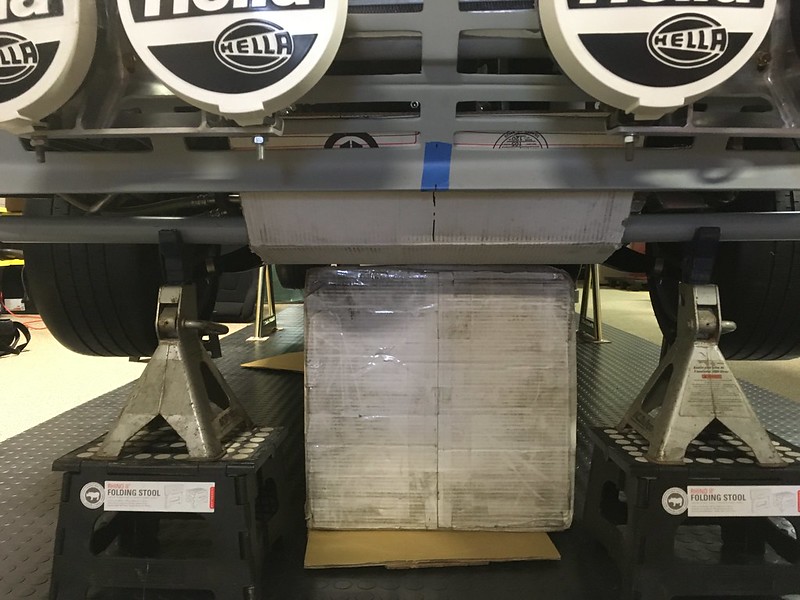
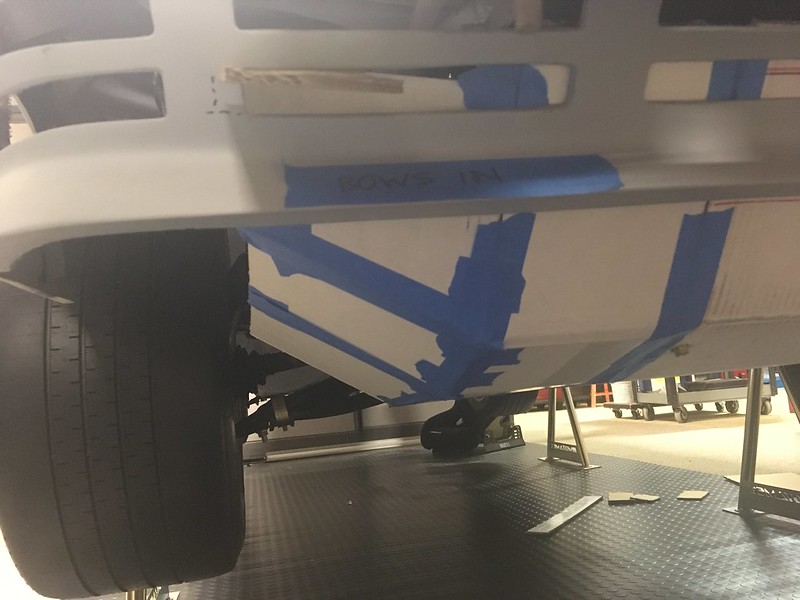
We were pretty happy with this so far and decided that maybe this idea had some legs. We pushed on with mounting the cardboard plate to the PVC support bars so we could remove the box and axles stands. To do this we made some clips out of some thin aluminum sheet and bent them around the bars. They worked rather well unless there’s a slight breeze or somebody sneezes too closely! 


So that was the basic structure sorted. Now we just needed to widen it; and form the upturned sides! A bit more Corbeau cardboard and loads of Hobnobs and Yorkshire tea later we had this: 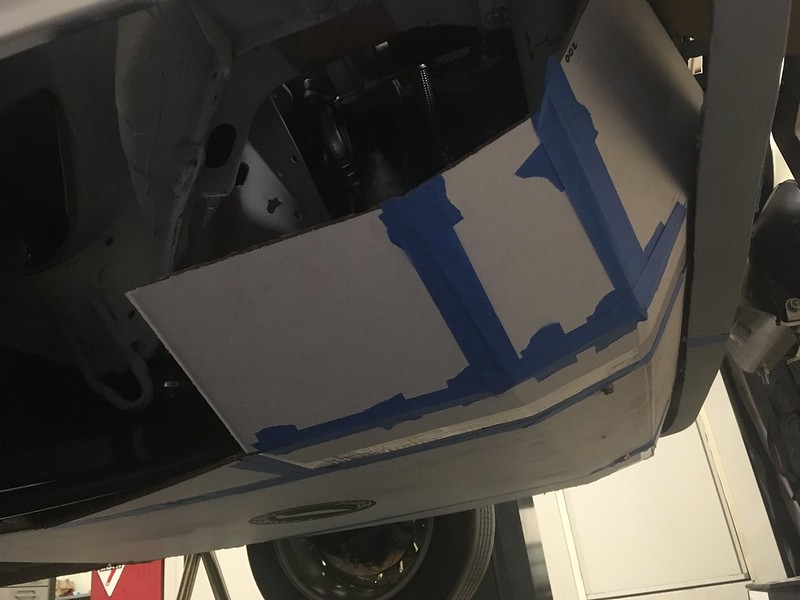
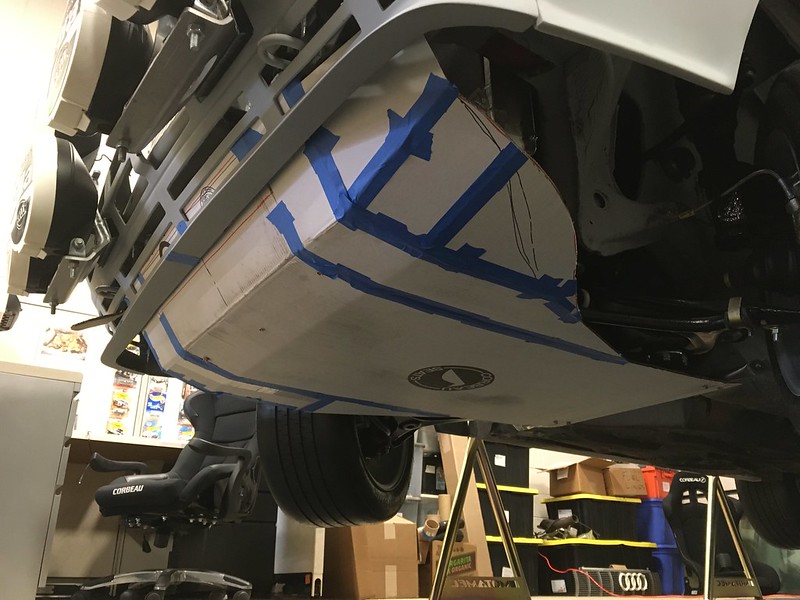

Lovely. Right; what shall we work on next? Mud flaps? First, we’ll have to put the kettle on!  Paul Eddleston BRAID Wheels USA www.BRAIDUSA.com Team Illuminata Motorsport www.teamilluminata.com |
wvonkessler Wilson von Kessler Junior Moderator Location: Lookout Mountain, GA Join Date: 02/28/2006 Age: Possibly Wise Posts: 1,127 Rally Car: Colts are in Finland; now '87 325i, '89 325i |
With a little reinforcement, that would make a nice buck to lay kevlar over, instead of trying to weld aluminum. Just sayin'.
"Talk about drugs. Driving a car like that, going that fast, it’s like all the drugs at once." - Tommy Byrne "Now, Pinky, if by any chance you are captured during this mission, remember you are Gunther Heindriksen from Appenzell. You moved to Grindelwald to drive the cog train to Murren. Can you repeat that?" - The Brain |
BRAIDusa Paul Eddleston Elite Moderator Location: Birmingham, Michigan Join Date: 09/06/2012 Age: Ancient Posts: 554 Rally Car: Subaru Outback Wagon EG33, 911 Carrera |
Solid modeling was the major CAD advancement made in the 1980s. Significant software offerings included the well-known 2D system known as “AutoCAD.” We’ve been doing a lot of Auto-CAD ourselves lately but the more grassroots Cardboard Aided Design versus the Computer Aided Design you might be more familiar with. Most of what we are cadding is to make templates for a bunch of parts we need to fabricate most of which involve welding.
We started with the simple stuff; the foot rests. Yes, you can buy generic ones which work just fine but, you know, we saw that Group B restoration build and now we want those, or as near as we can “reasonably” make. 
And the driver’s dead pedal: 
We may yet find something from Rennline’s catalog that’s fits the bill. For instance, this is our Rennline 911 footrest. Pretty close, eh? 
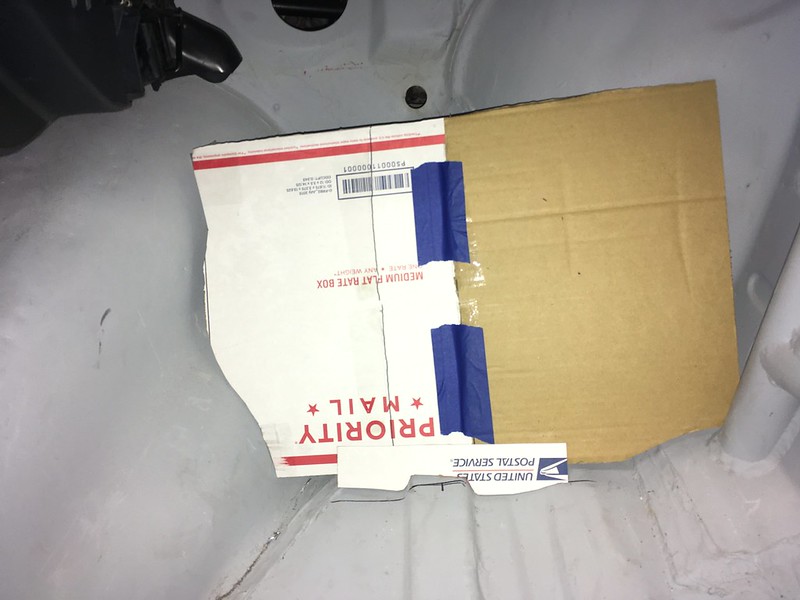
Regardless, we’ll need a bracket. So we made a template: 

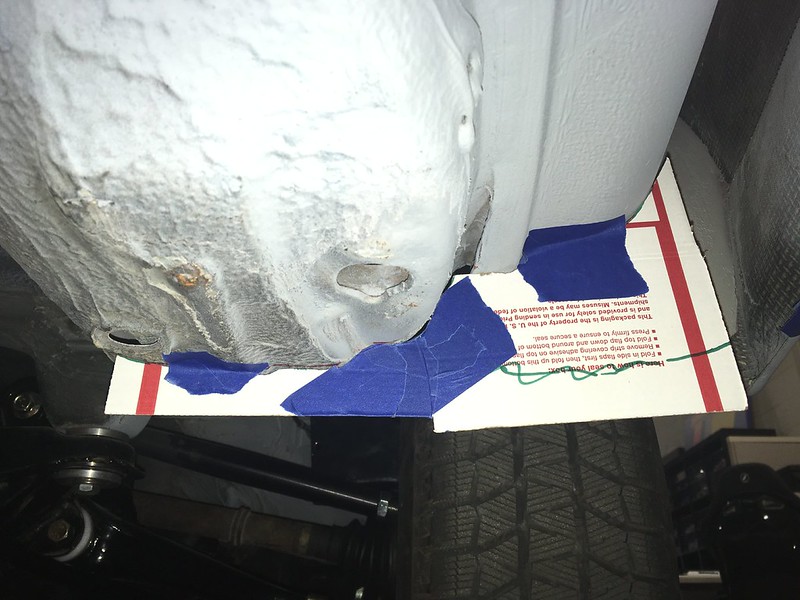
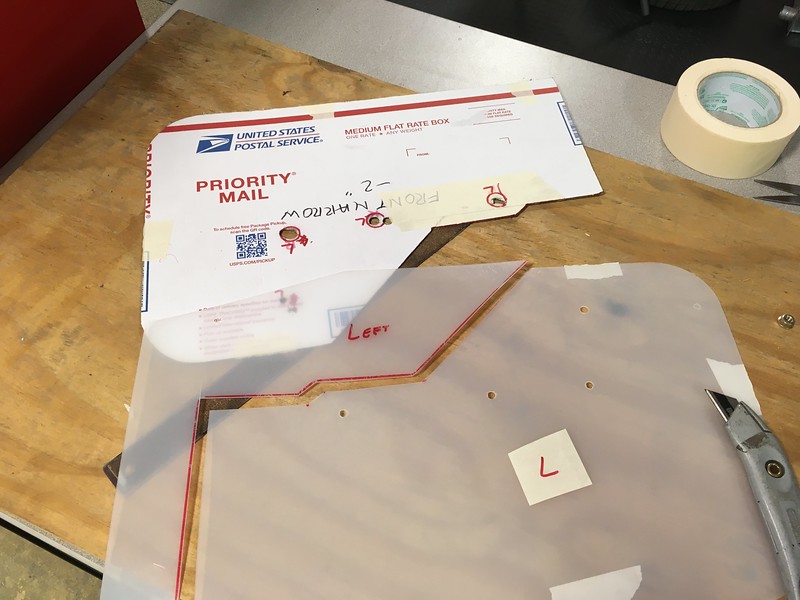
Creature comforts next. Door cards. Unfortunately, there are no real precedents for door cards for a Group B Quattro as they used molded Kevlar doors that were essentially hollowed out. We’re not doing that. So, what to do? Fortunately, the stock Quattro door is pretty flat, apart from a small gap we made a patch panel for, so it looks like a flat panel of some sort will attach easily enough. We just have to come up with a shape, a material, some way to attach them and cut outs for door handles, window winders and door pulls. How hard could it be? 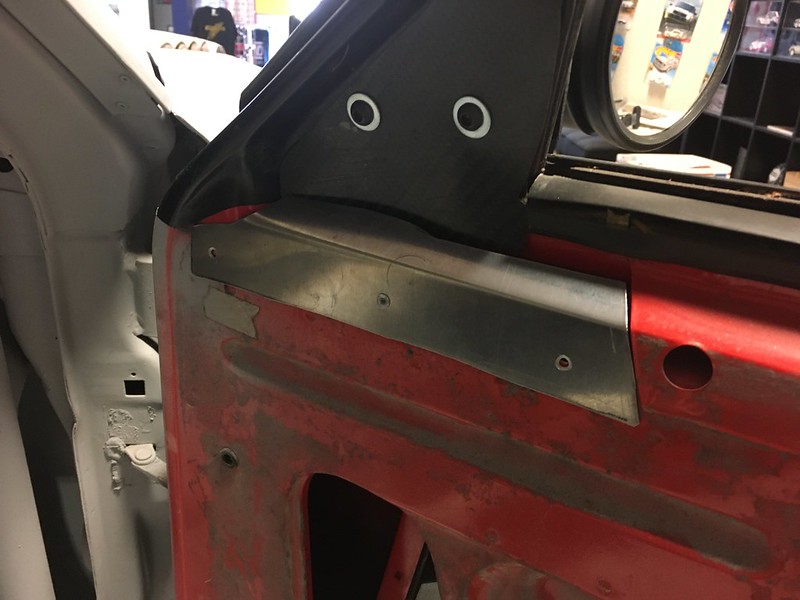
First we covered one door in masking tape. Then we drew around the periphery with a Sharpie and marked all the holes. Next, after a mug of proper tea and some Hobnobs to steady our nerves, we carefully peeled it off the door and stuck it onto a sheet of corrugated cardboard scavenged from a Corbeau seat box. Yep, same as our skid plate. Good stuff. 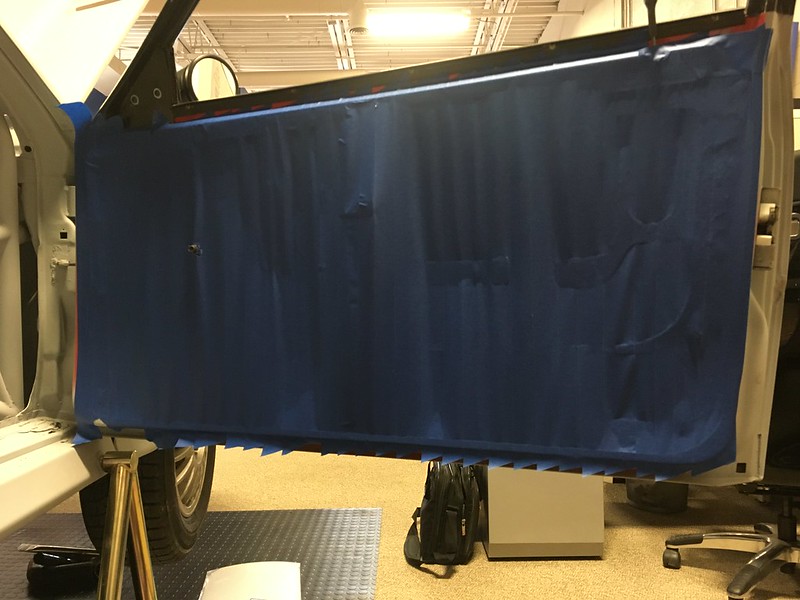
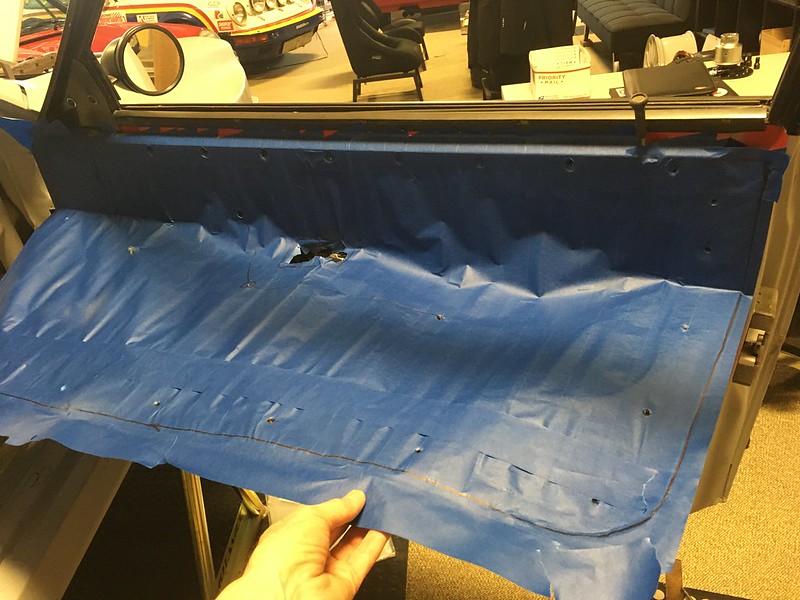
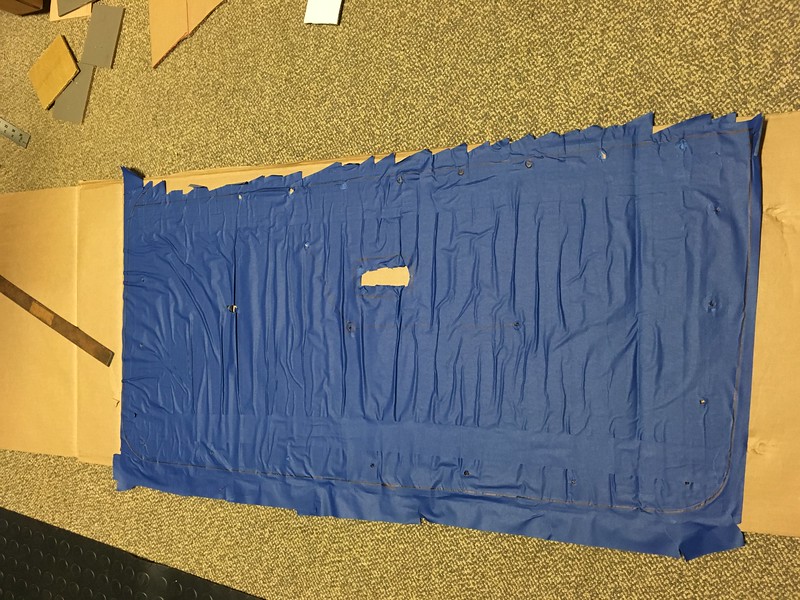
Then cut it out and cut it up. 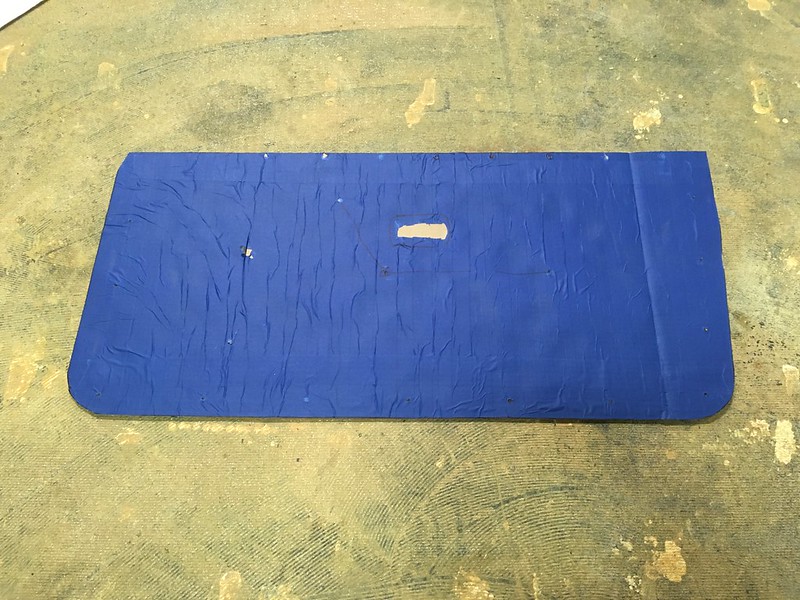
Surprisingly, it actually fit so we dug out the door handle bezels and temporary held it in place with some M8 bolts pushed into the original plastic fasteners that miraculously are still mostly present. Just needs some sort of door pull. We’ll get back to you on that. 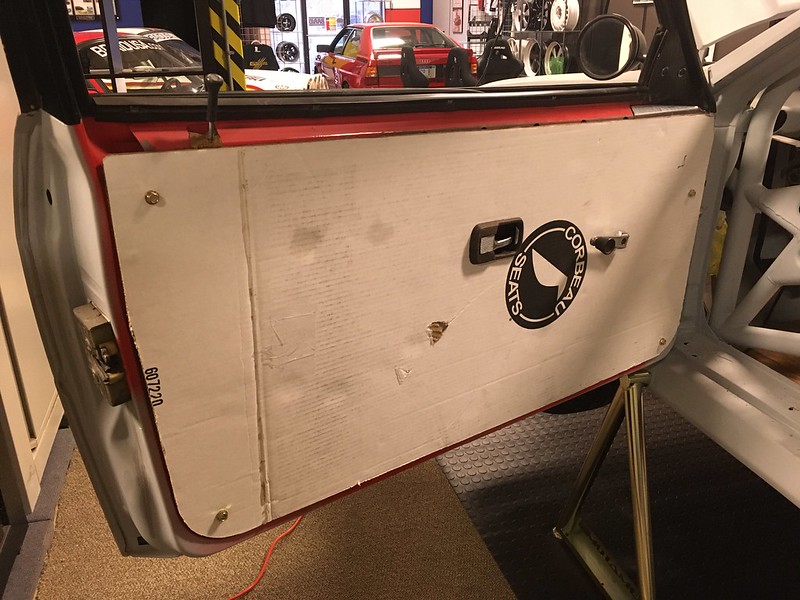
Now full of confidence with our auto-CAD prowess we decided to take on a much more challenging project: Mud flaps! You’re probably thinking “who welds on their mud flaps?”. Well, not us, but the ones on our role model had quite substantial brackets welded to the body and we thought we could mimic those pretty closely. Plus, brackets! 
The fronts seemed the most straightforward so we started there. Break out the template gauge. 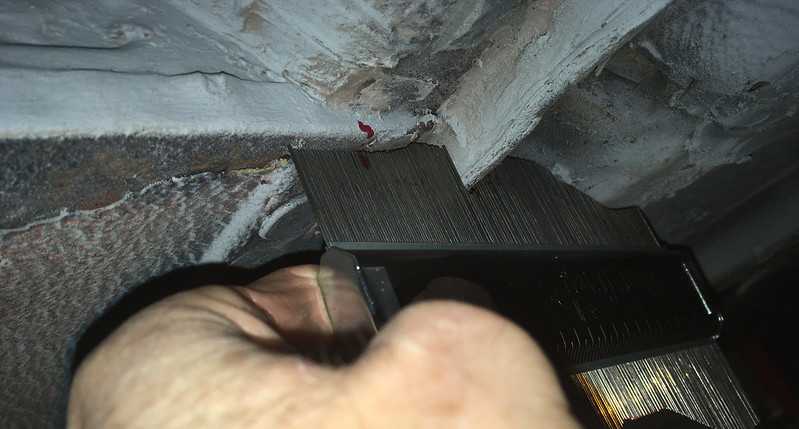

Fortunately, the car sits very level on its pin stands thanks to TRF, so we just used a small spirit level to make sure the bottom of the bracket is level and parallel to the ground. In our experience this is critically important with mud flaps as if they are even slightly off it will ruin the whole look of the car. Rally cars are principally mud flap display devices after all. OK, we may have lost the plot a bit but it makes us happy. 
Now for the tricky bit; the rears. Still easy to keep level but, because they don’t line up with the end of the rocker panel like the fronts, a little harder to keep the same distance from the wheel arch and perpendicular to the centerline of the car. We tried though, really hard 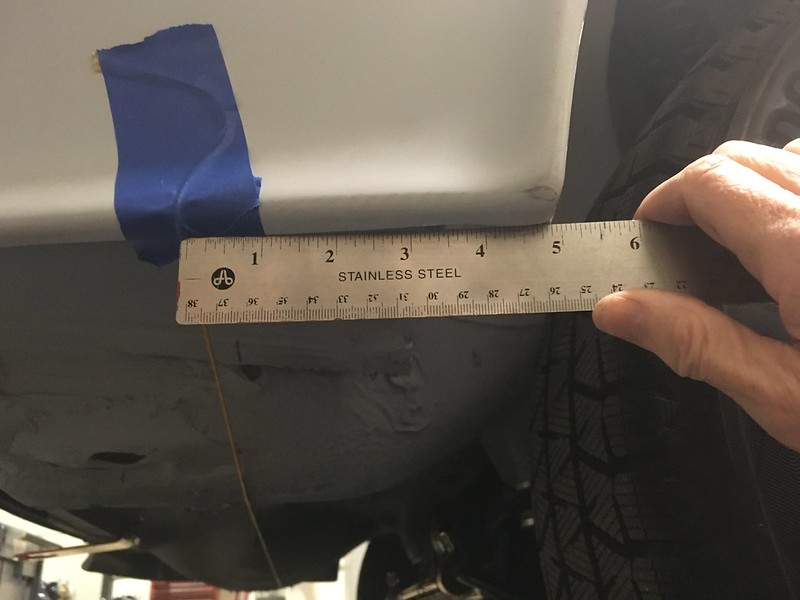

A bit more profile gauge and scissor action and we had one side done. Unfortunately, both sides are not the same on the rear so we had twice as much work to do at this end of the car. 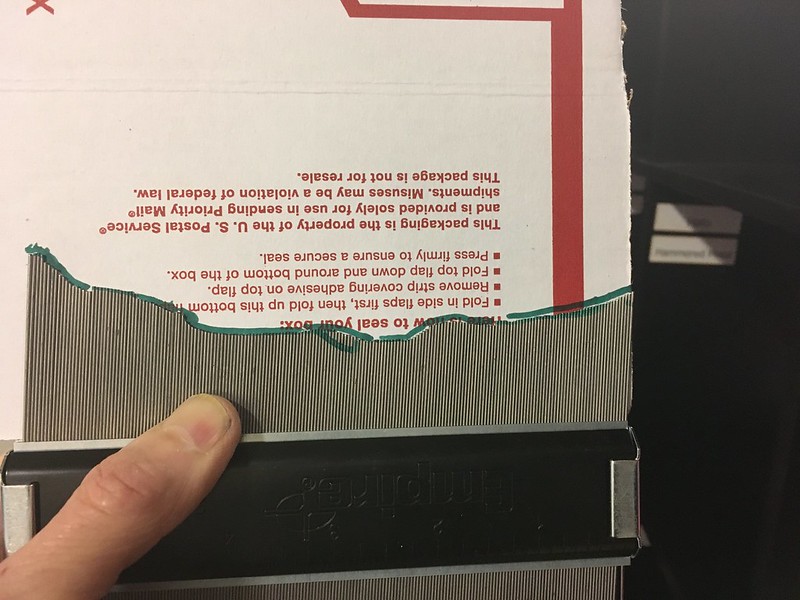
Bet you can’t wait to see what other auto cadding shenanigans we get up to next. And what about those door pulls?  Paul Eddleston BRAID Wheels USA www.BRAIDUSA.com Team Illuminata Motorsport www.teamilluminata.com |
BRAIDusa Paul Eddleston Elite Moderator Location: Birmingham, Michigan Join Date: 09/06/2012 Age: Ancient Posts: 554 Rally Car: Subaru Outback Wagon EG33, 911 Carrera |
Time For Proper Mud Flaps - With the mud flap brackets cadded, it was all we could do to resist cadding the mud flaps themselves. Actually, we couldn’t resist. Well, who could?
First, we started with something that isn’t present on the Group B resto we now seem to be trying to emulate in infinite detail: mid-rocker mud flaps (MRMFs), for want of a better term. What are those and why are you installing them? You may ask, Well, here’s an example that seems to only have been used on some of the David Sutton built cars in the UK. 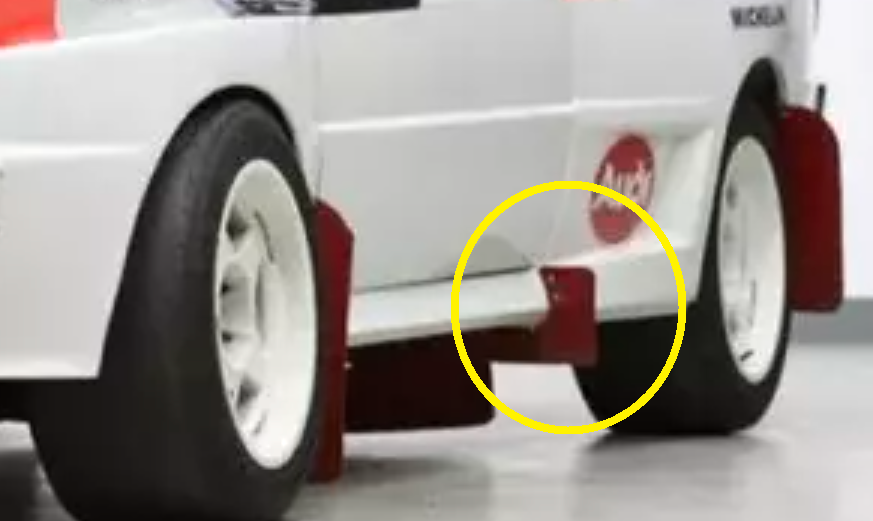
It looks like it was used to mask a dodgy transition from the wide rear fenders to the rocker panel (sill in the UK). Well, that’s what we’re going to use ours for anyway as we have this going on due to, well, we’re not sure why. Maybe because we bought the cheap body kit. 
Looks like it was almost designed for a mid-mud-flap (MMF?), don’t you think? So this is what we came up with. Of course, we also cadded a bracket for it. More welding required. 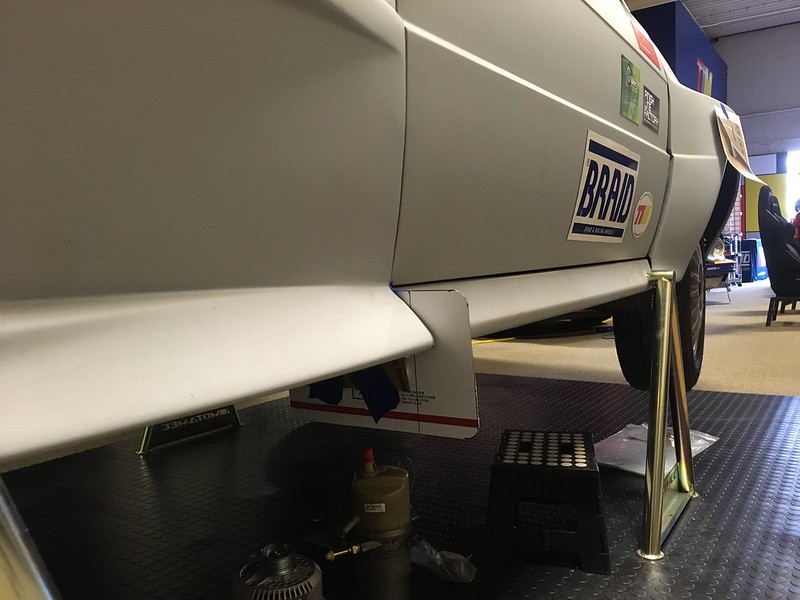

This gave us the confidence to tackle the proper mud flaps (PMFs). Incidentally, we think we are going to use Sparco mud flaps in white as they look to be about the same size as the works ones at about 11” x 19” (that’s 0.002 x 0.004 football fields in American units), are available in white, are cheap and thin enough to fit between the door and the front fender. We also use them on our rally 911 but in portrait orientation. On this car they will be in landscape orientation which is why we measure them in football fields. On the 911 they are 0.09x0.16 stories. We are not using aircraft carriers as a unit of measurement on this car; that would be ridiculous. First attempt seemed too wide. 

So we lopped off 2”. 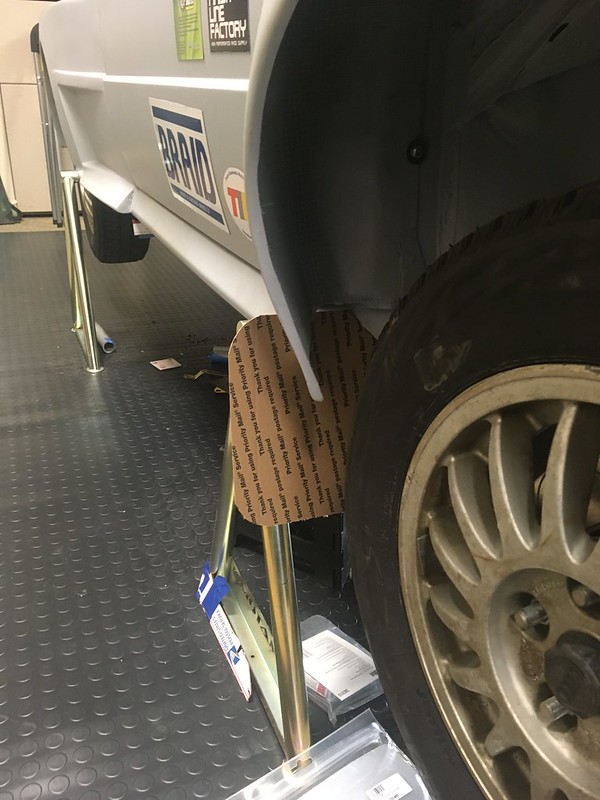

And are now much happier. They are now sitting about an inch inboard from the widest part of the fender (top) whereas before they were about an inch outboard. One could argue, on technical grounds, that they should be level with the widest part of the fender but we are happy with this result. Incidentally, it was quite difficult to get them lined up front to back. Like being level, we think it will be an important detail once the car is finished and took quite a bit of measuring and back and forth to achieve so we hope we are right. 
Paul Eddleston BRAID Wheels USA www.BRAIDUSA.com Team Illuminata Motorsport www.teamilluminata.com |
BRAIDusa Paul Eddleston Elite Moderator Location: Birmingham, Michigan Join Date: 09/06/2012 Age: Ancient Posts: 554 Rally Car: Subaru Outback Wagon EG33, 911 Carrera |
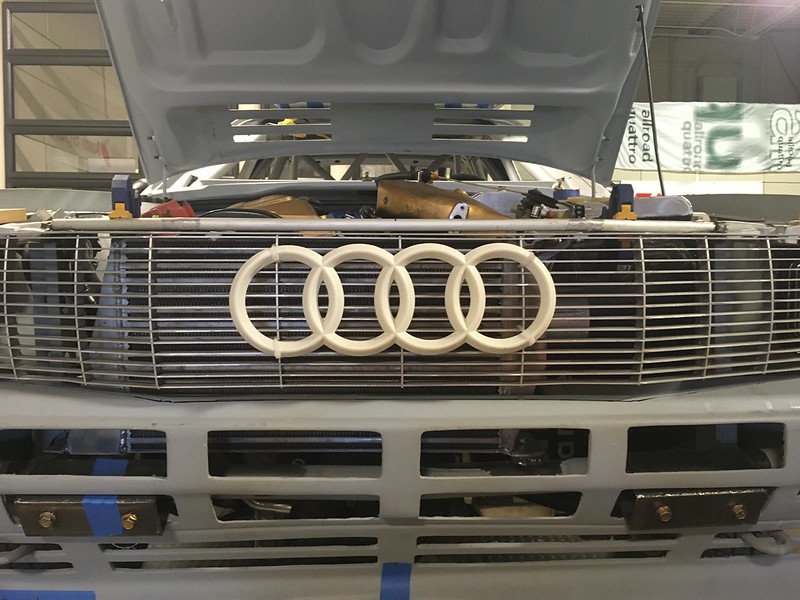
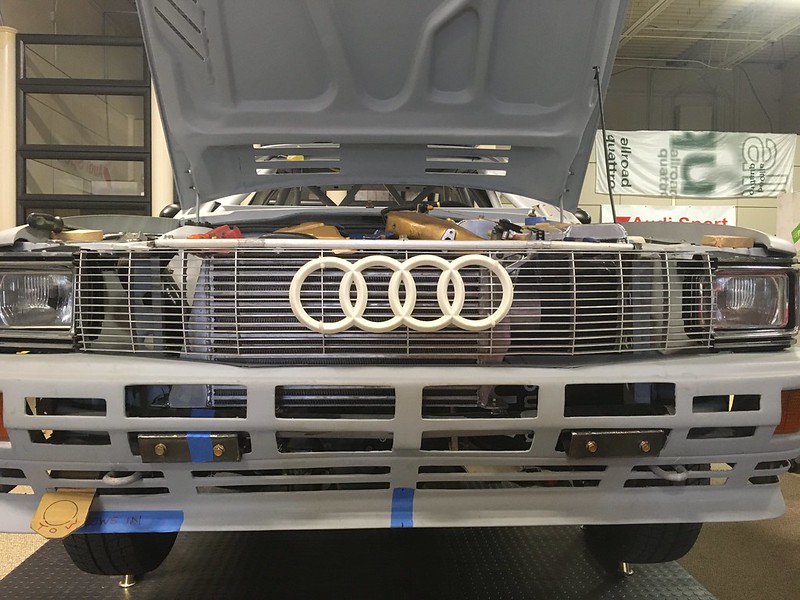
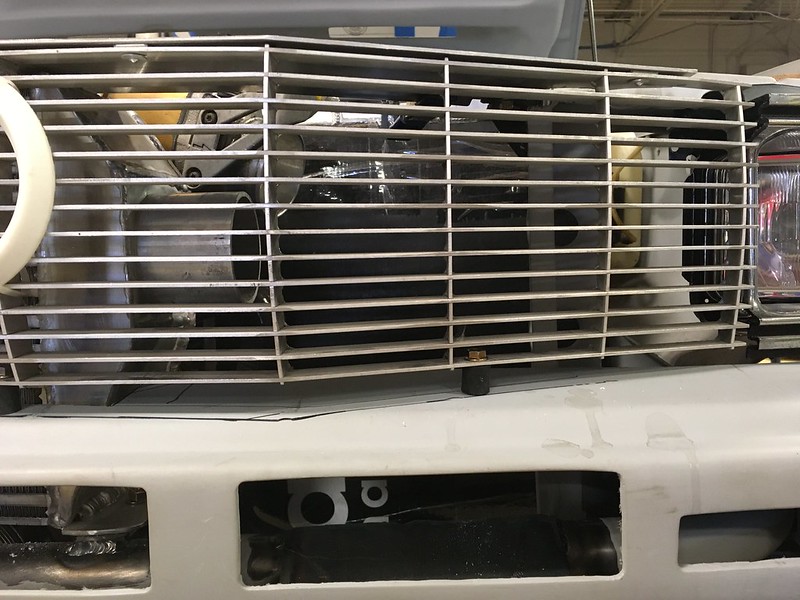
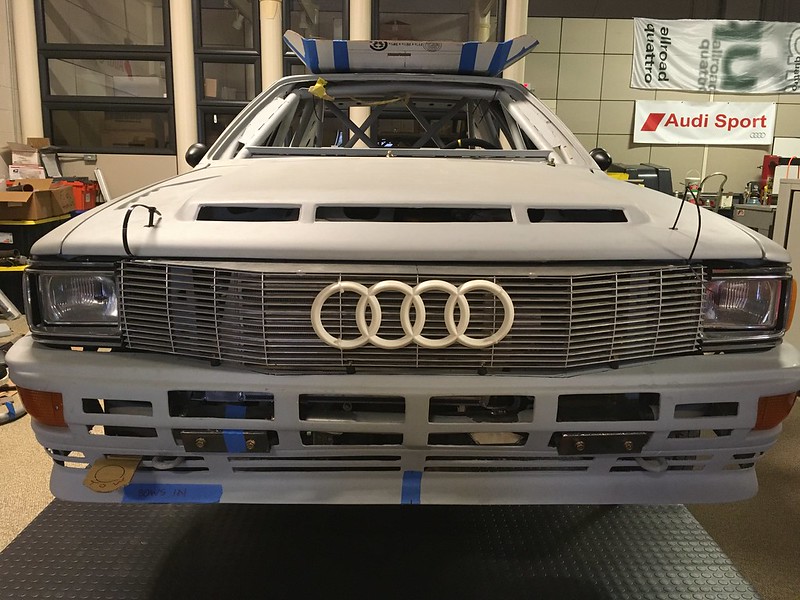
We took a break from cardboard engineering and decided it was time to grill, or attach the grill. This concoction of aluminium slats has been on and off the car for a while but, until now has never really been fully integrated into the front of the car. Sadly, we’ve just been wedging in in there and taking pictures of it. Ultimately it needs to be attached to the upper intercooler support in such a way that the two components can be removed as one. It also needs to be black eventually and we are thinking of having it anodized. Any thoughts on that? Also, part of this project is to attach the intercooler to the intercooler support bar. That way it will, er, support it.
The first thing to do was make it fit. Right now, the top plate is just wedged between the intercooler and the upper support bar but it didn’t go in far enough and was the wrong height. It also wasn’t parallel with the bumper, didn’t line up with headlight bezels and didn’t seem level! And we thought this would be simple. 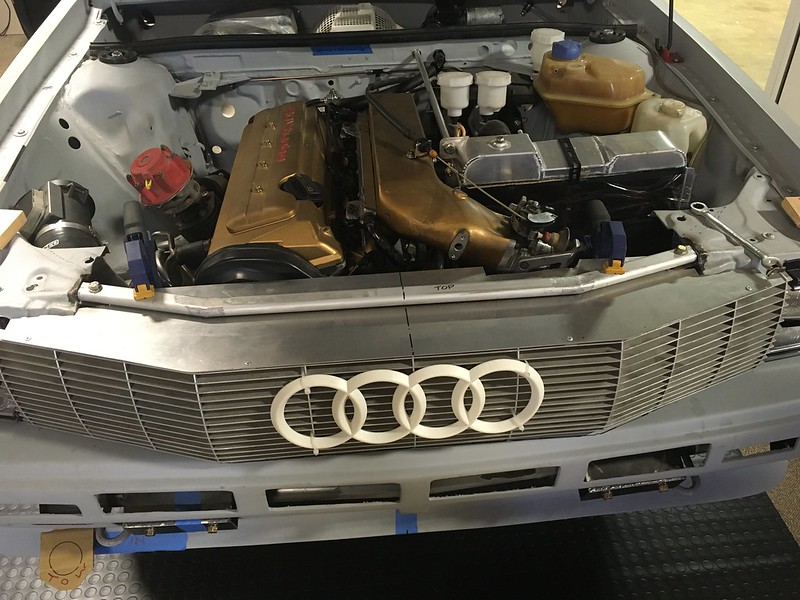
So, the first thing we did was remove some excess material from the back of the top plate. 
And then clamped it to the upper support bar and asses what we had to play with. The bolt head will be to attach the intercooler later. Stop getting ahead of yourself. 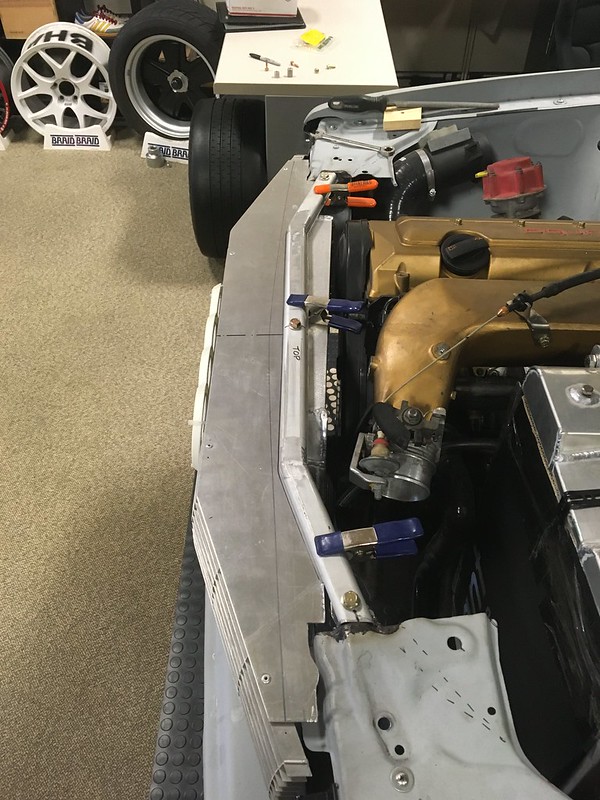
With a little bit of measuring, we determined that the bumper was level but a little warped and that the right side (left in the pics) headlight bezel was a little inboard. Otherwise, it looked good. We could have riveted the bar to the grill at this point but are not sure if we want the bar to also be anodized black so clamps will suffice for now. So how to fix the uneven bumper? We’ll tell you next time. (unless we fail) Paul Eddleston BRAID Wheels USA www.BRAIDUSA.com Team Illuminata Motorsport www.teamilluminata.com |
BRAIDusa Paul Eddleston Elite Moderator Location: Birmingham, Michigan Join Date: 09/06/2012 Age: Ancient Posts: 554 Rally Car: Subaru Outback Wagon EG33, 911 Carrera |
Smile. You’re on Cadded Camera!
See the problem? Get closer... big gap. 
Small gap (and a bent slat) 
After a bunch of measuring and head scratching, we determined that the top of the carbon/Kevlar bumper was less then perfectly flat. In retrospect we should have just looked at the pictures but we want this build to be engineering based so we got the football fields out and measured everything. No crashing probes into Mars for us! We tried warming it up with a heat gun and pressing on it but this only achieved marginal results. We also had another problem to solve. With the grill clamped to the upper support bar it was essentially just hanging in space (justified our Mars reference above) and was already bouncing up and down. So, we needed a way to support it. We turned to our shop pigeon, Grainger as we are going to kill two birds with one stone. Or four rubber isolators. 
These proved to be the perfect length (0.0001FBs) to push the high side of the bumper down and lift the low side of the bumper up while also stopping the grill from bouncing around. And, as they are mounted in the same plane i.e. vertically, as the upper fasteners, the whole assembly just lifts straight up off the car. To quote Marku Allen when asked about the last (as it turned out) evolution of his Delta S4. “…we are very happy mens”. 

The nuts are a bit fiddly to screw on but the ones on the grill can stay attached. Right now, we have to reach through the openings in the front of the bumper to tighten the lower nuts but those holes are supposed to be filled with mesh ultimately. Going to have to ponder this a bit. Put the kettle on and break out the Hobnobs. We still had to attach the intercooler to the support bar otherwise we’d have to rename it “grill support bar” and we didn’t want to have to go through the whole part name re-registering process again with the German Auto Part Registration Authority (GAPRA). So, we got out the taps, hack saw and hot metal glue gun and went to town. 


Now everything is as it should be and the grill is quite secure. Even though we still need to attach it to the upper bar it can’t go anywhere as the intercooler mounting boss goes through it. The bumper isolators seem to be supporting the weight quite nicely so all we need the grill to bar rivets to do is stop it rotating. To quote Harri Aardvark after winning the Detroit SCCA RallyCross championship in 2009 “HELL YES! Paul Eddleston BRAID Wheels USA www.BRAIDUSA.com Team Illuminata Motorsport www.teamilluminata.com |
BRAIDusa Paul Eddleston Elite Moderator Location: Birmingham, Michigan Join Date: 09/06/2012 Age: Ancient Posts: 554 Rally Car: Subaru Outback Wagon EG33, 911 Carrera |
We're Hooked On Quattros
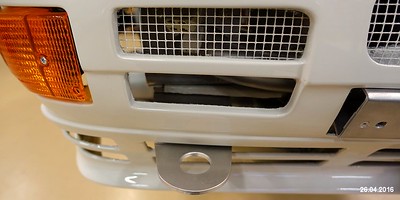
If you’ve been following this build, you’ll know by now that we have strongly resisted copying the works cars as much as possible. That is unless we can find an excuse to replicate what they did of course. So, it is with the front tow hook. Our car has perfectly good tow hooks that came from Audi. They work, we’ve used them to drag the car into the trailer more than once. They are a bit close to the bumper though and also make it harder to remove the bumper too as they protrude through it. They are also behind the lights when they are on. OK, they absolutely must go. Let’s see what the works cars used. 
Yes, we can do that. How hard could it be? Plus, we have this shiny new tow hook from Rennline, that is too short and the wrong shape. 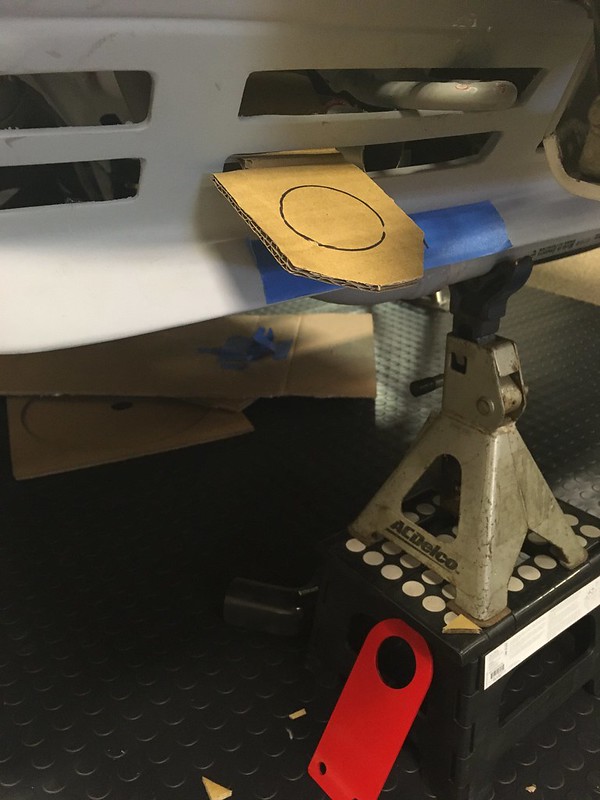
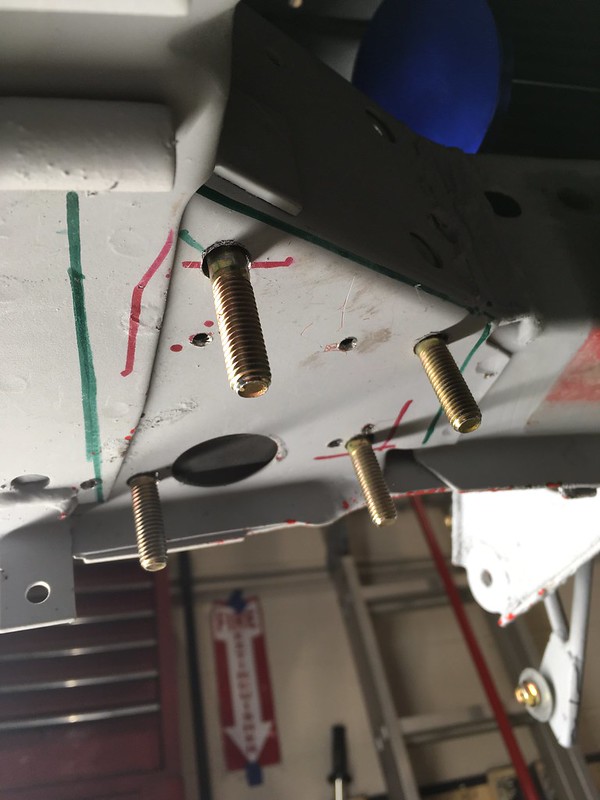
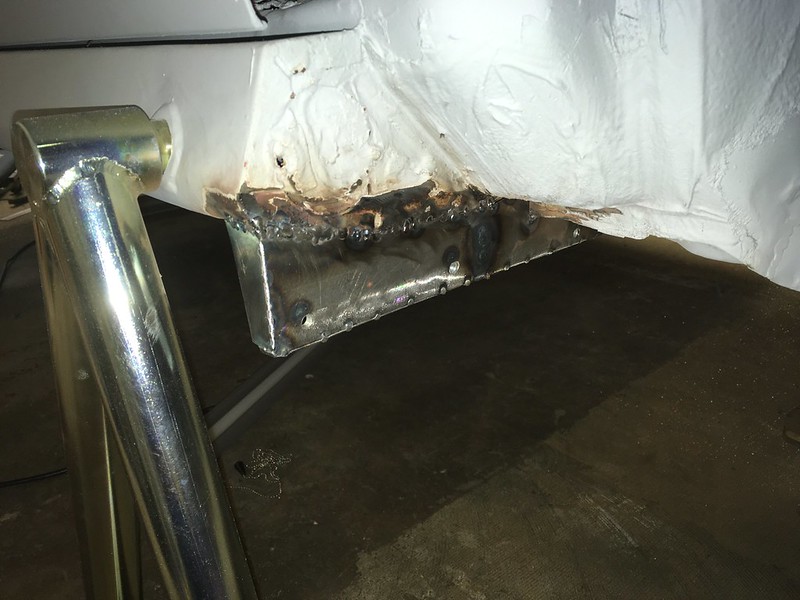
So, we bent it but it was still a bit short. We thought we could weld a 3/16” plate to it to make it longer and sandwich it between the chassis rail and the lower skid plate flange; just like the works cars. We made some nut (bolt) plates to help with this. 
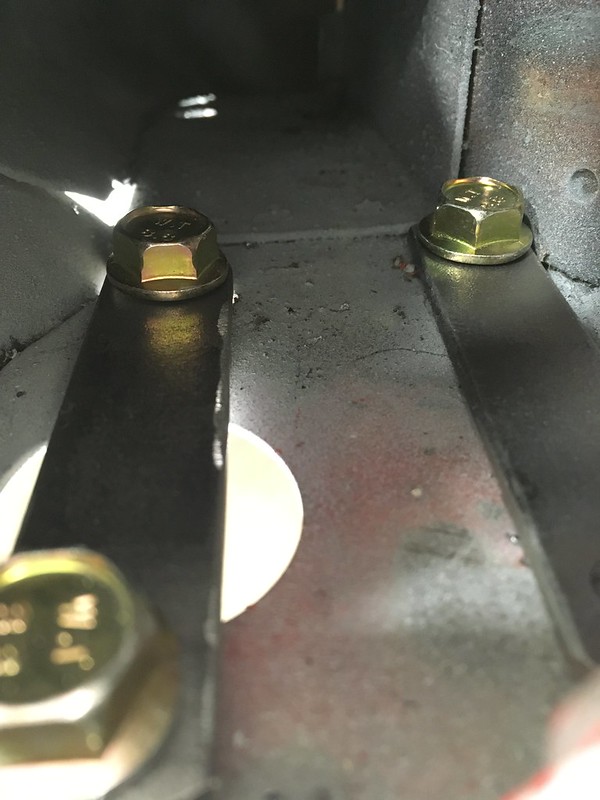
And some thin spacers to level off the underside of the chassis leg. 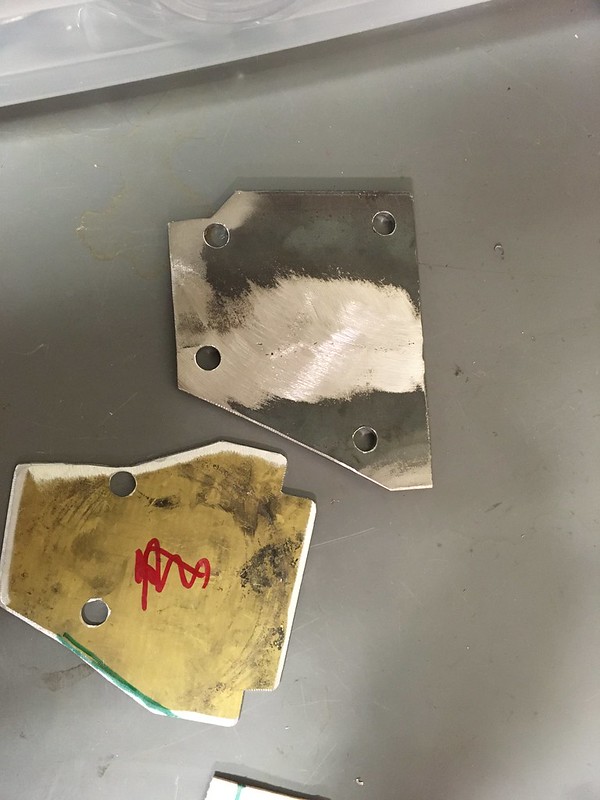
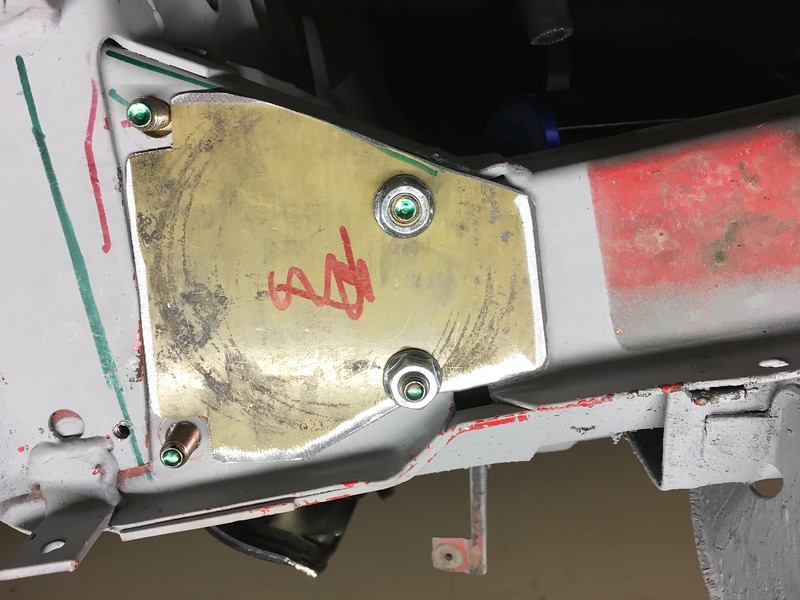
Then we made the extension for the tow hook and welded it on. 
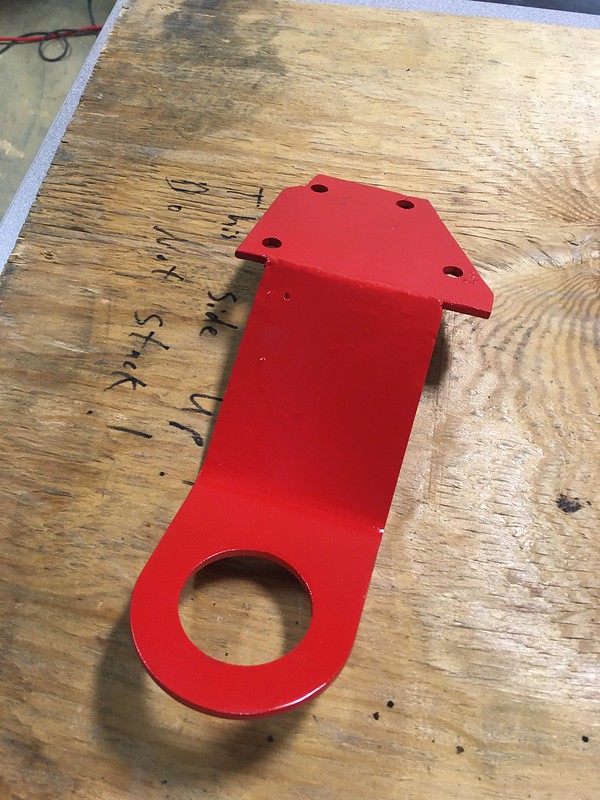
Of course, now we had our new, shiny tow hook we no longer needed the factory hooks so we got the grinder out. 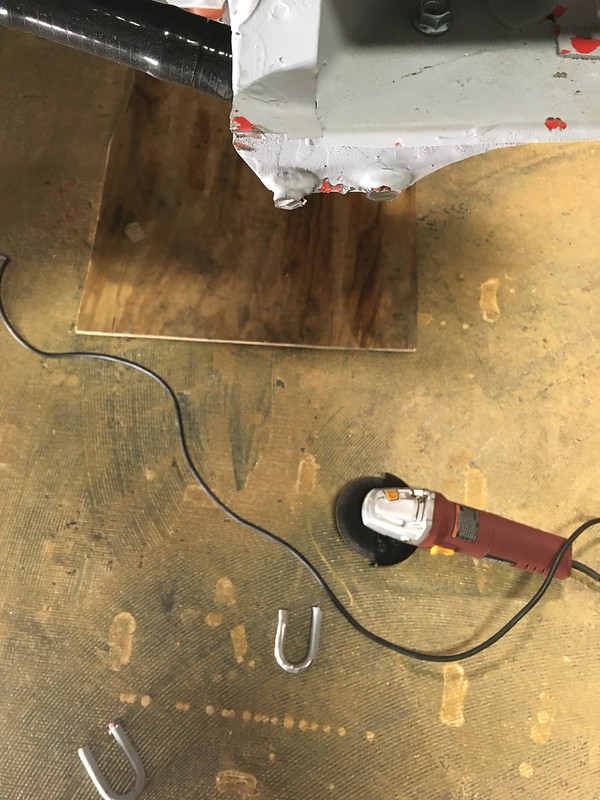

And then we were hooked. 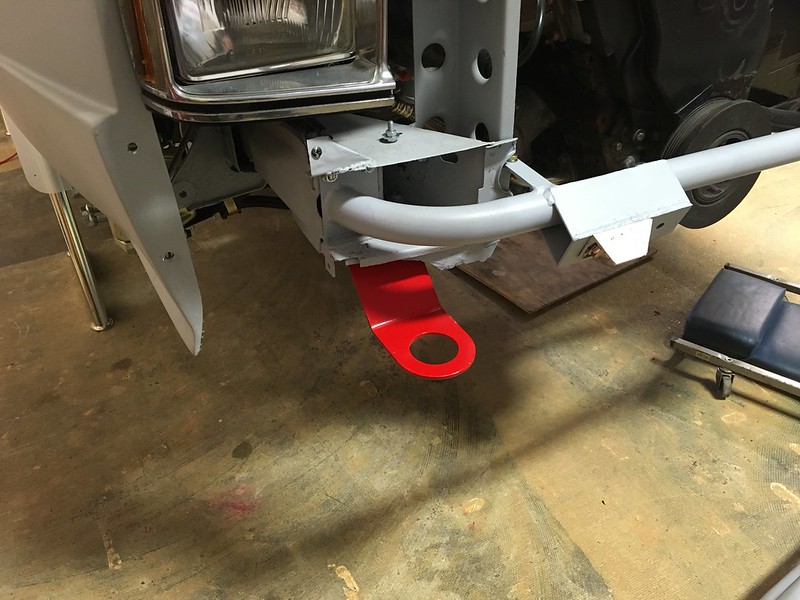


Yes, ours is red. So, therefore we didn’t replicate the works hook 
Paul Eddleston BRAID Wheels USA www.BRAIDUSA.com Team Illuminata Motorsport www.teamilluminata.com |
BRAIDusa Paul Eddleston Elite Moderator Location: Birmingham, Michigan Join Date: 09/06/2012 Age: Ancient Posts: 554 Rally Car: Subaru Outback Wagon EG33, 911 Carrera |
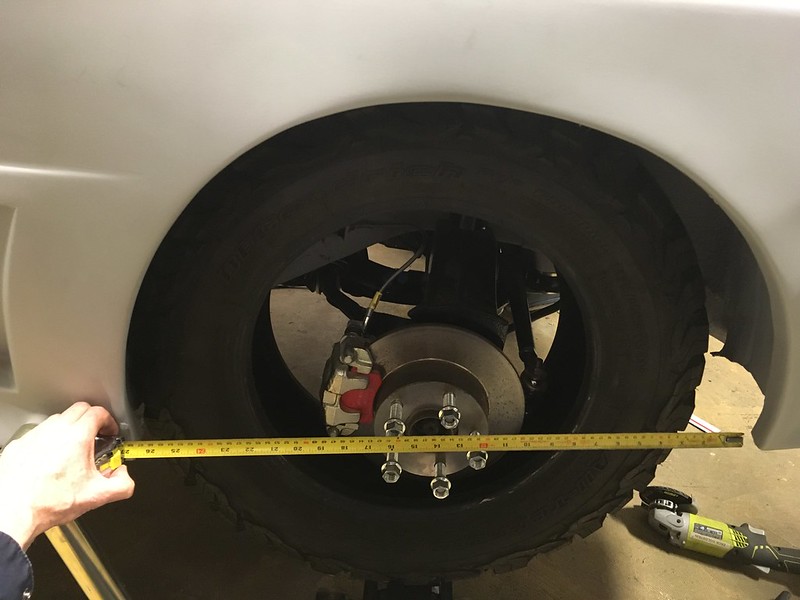
This week on "Will It Fit", we wanted to find out if a 215/65-15 BFG all-terrain tire would fit on a Quattro. Why? Because a customer wanted to know. Why? Because he put big-arse brakes on his quattro but now wants to go play in the dirt! We thought we could help especially as we had the exact same tire on our Allroad. Unfortunately we didn’t have any 16” wheels we could mount it on but we improvised.

We were very curious because, you may remember, we had trouble fitting 275/40-17 Hosiers on the rear of ours. Not because of the width but because of the diameter which was only 25.7”. It seems the rear arches are very small so unless the chosen tire stays inside them they will impinge on the lip when travelling upwards. The BFG is 27”OD! 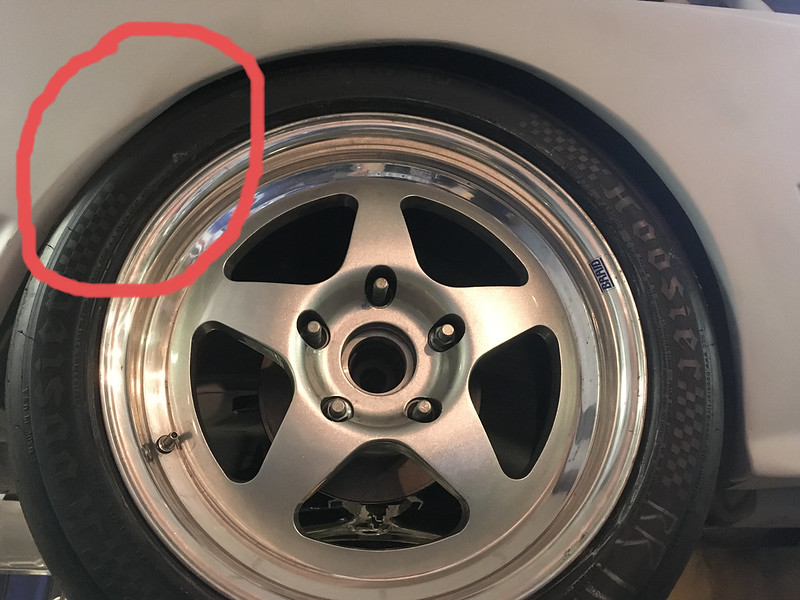
We’ve also seen that 205/65-15 rally tires (25”) will rub the underside of the spring perches but, fortunately, this customer’s car is already on coilovers. So, by balancing a tire on the jack we were able to determine that the BFG tire would just fit inside the arch lip and go up inside the wheel house, if the offset were selected appropriately. ~ET22 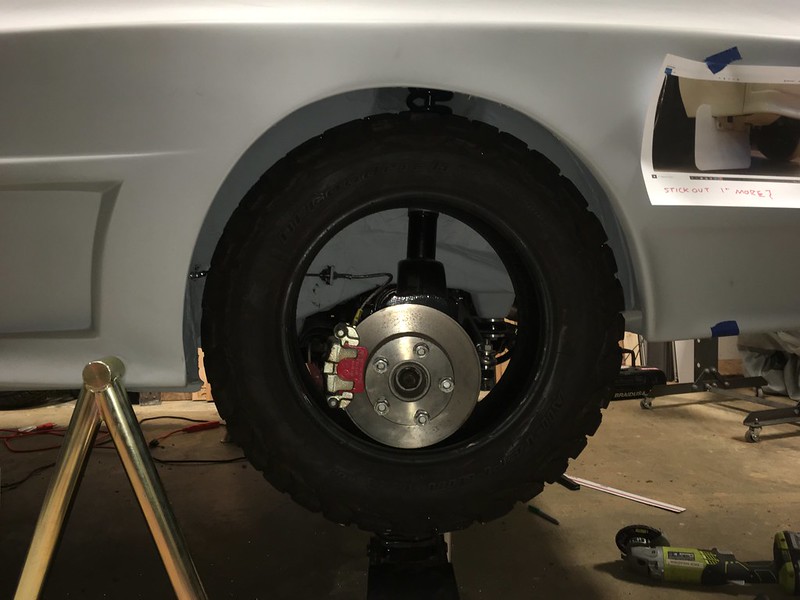
Then we remembered that our coffee table consists of four 225/55-17 (26.7”) tires on ET35 Allroad wheels and a glass top so we threw one of those on and it fit. 
Then we tried it on the front: 
Unfortunately this proved even tighter than the rear, for a couple of reasons. Firstly, it rubbed on the tie rod ball joint. 
and front and rear inner fenders at full lock and full compression. Rears first. 

The ball joint is not a problem as this tire is 10mm wider than the AT tires being considered but it is also 8mm smaller diameter which means clearing the inner fenders is going to be impossible without hitting them with a BFH! So what will fit? Turns out about 26.6” based on our jiggery-pokery. 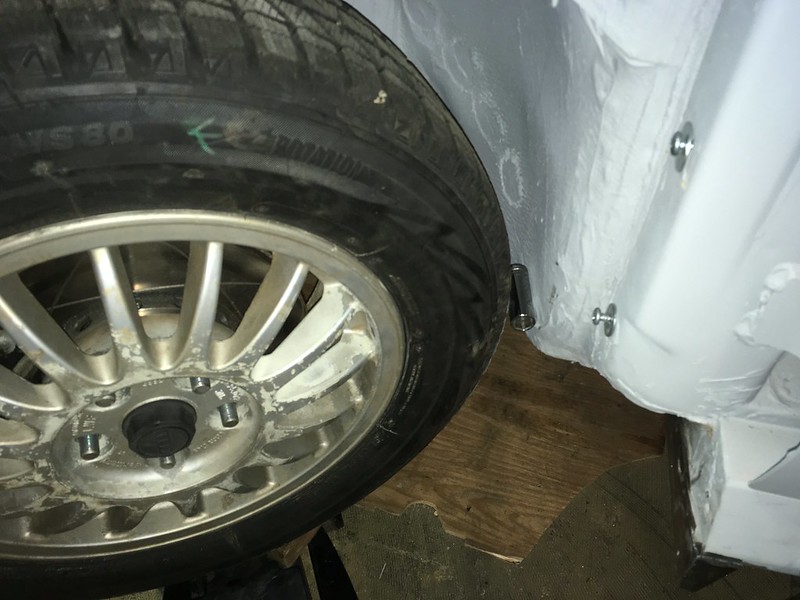
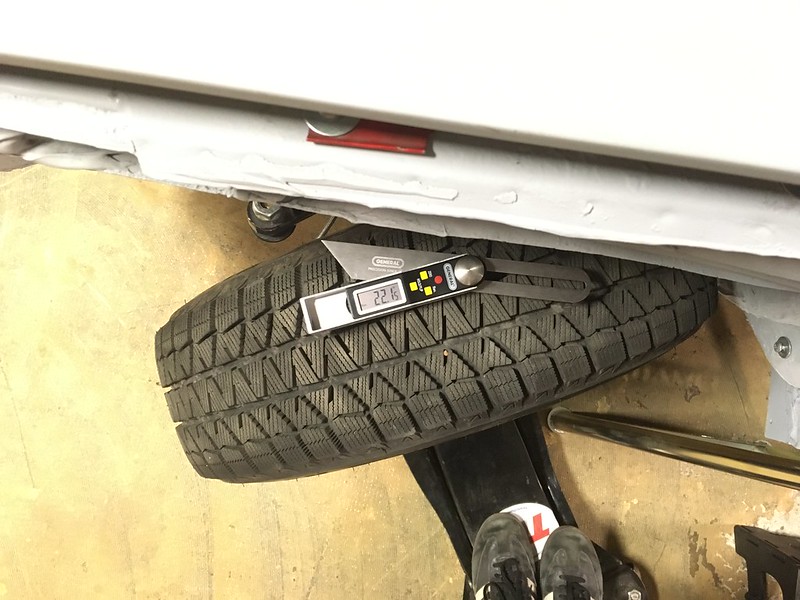
Yes, that’s a 25” 195/65-15 tire with a socket being used as a feeler gauge! Not very big but do bear in mind the OE tires were only 23.5” OD. Still, all is not lost. Yokohama make their excellent Geolander A/T G015 in 215/60-16 and it is “only” 26.1” OD. So this tire might be an option. 
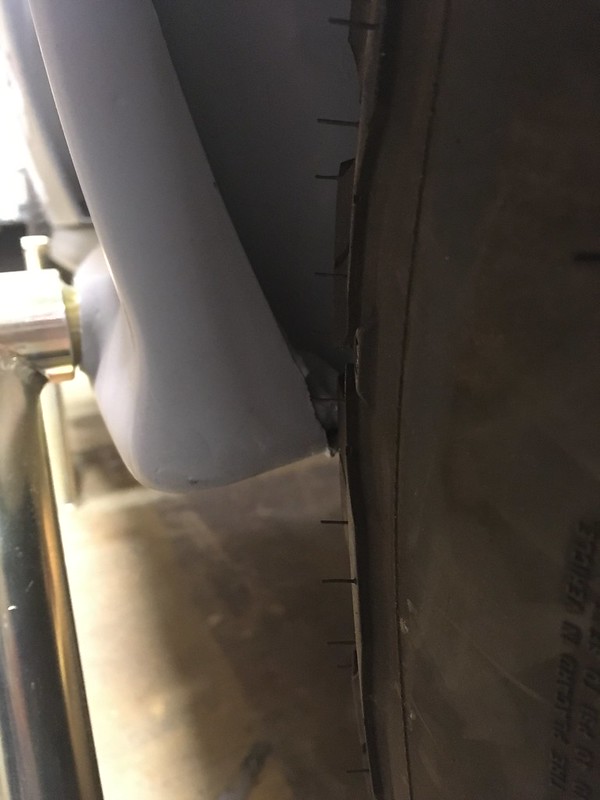
Still hopeful we could squeeze in the 215/65-16 we got creative. We investigated whether lifting the car would help. It is on coilovers after all. This is the 25” tire at full droop and, as you can see the center is about level with the bottom of the wheel house; the bit that rubs. So, unless you lift the car to the point that this is at full compression instead we don’t think a 27” tire will work. 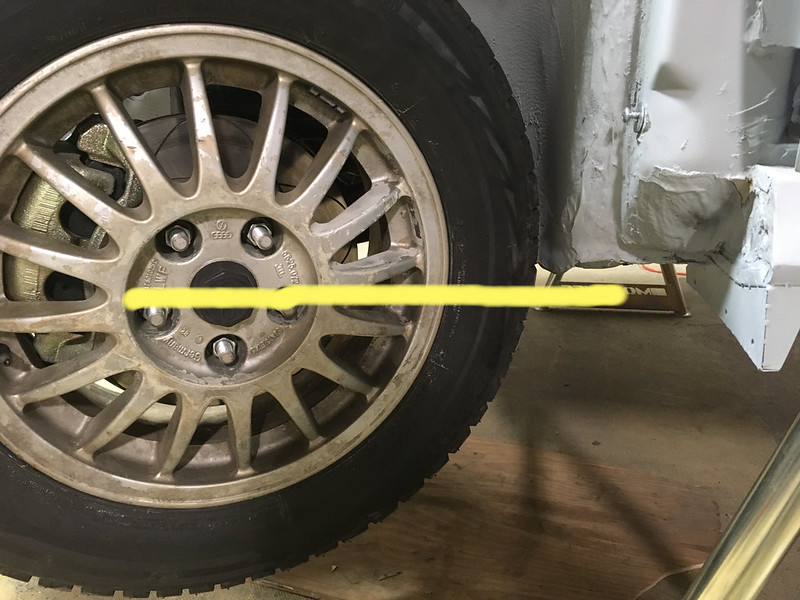
Then we investigated if restricting the steering angle would help. With the small tire on we determined that full lock is about 28 degrees. Then, with the big tire on we found it doesn’t start to rub until about 22 degrees. 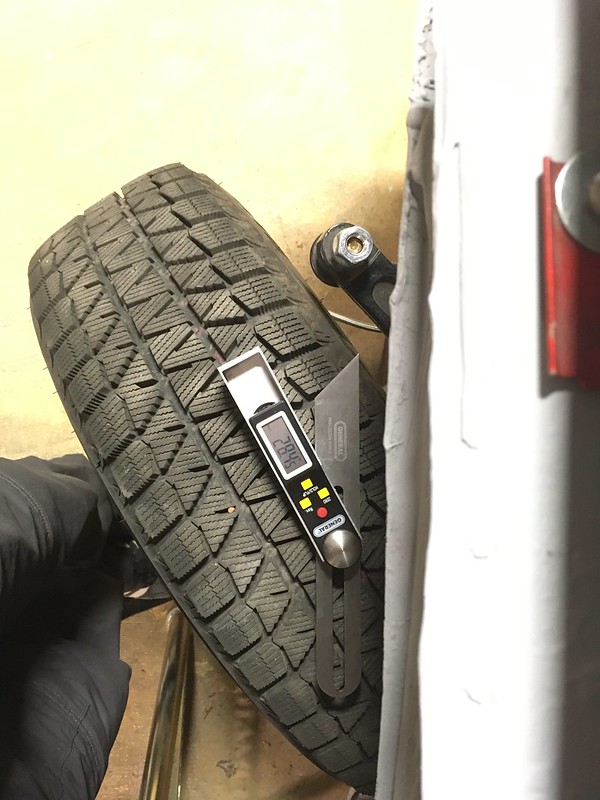
We are not sure if giving up 6 degrees of lock is a lot or how to restrict the rack but it might be a way forward. Alas, that is for someone else to figure out. We have a rally car to finish. Paul Eddleston BRAID Wheels USA www.BRAIDUSA.com Team Illuminata Motorsport www.teamilluminata.com |
BRAIDusa Paul Eddleston Elite Moderator Location: Birmingham, Michigan Join Date: 09/06/2012 Age: Ancient Posts: 554 Rally Car: Subaru Outback Wagon EG33, 911 Carrera |
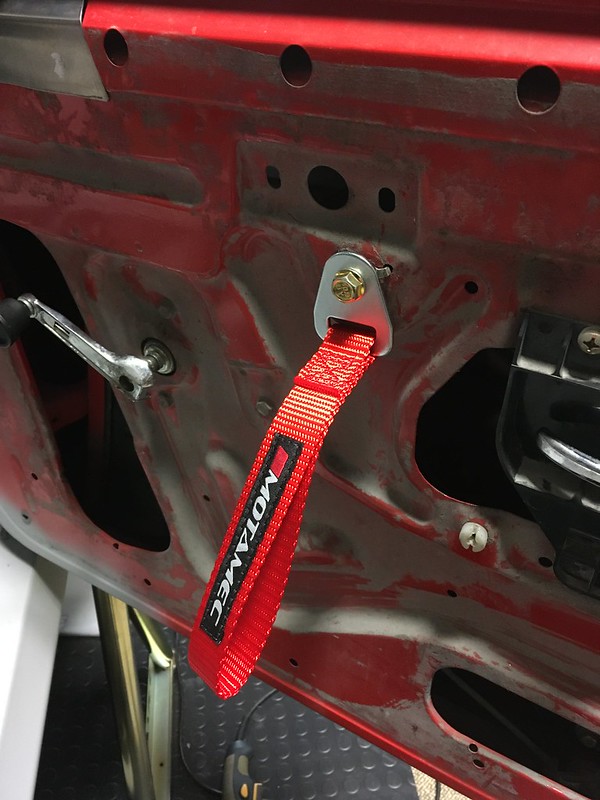
PULL THE OTHER ONE!
Ask any serious rally driver and they’ll tell you that it’s critical that your door pull straps match you pin stands. That’s why we bought these from MOTAMEC in the UK 
We wanted to mount them in one of the holes for the original door pull handle because we knew that area of the door would be strong enough and it was in the right place. That had a twist bayonet type arrangement to it so we drilled it out and used our very high-end tool to install metric (of course) rivnuts. 

They look even better with the snazzy cardboard door cards presented by Corbeau! 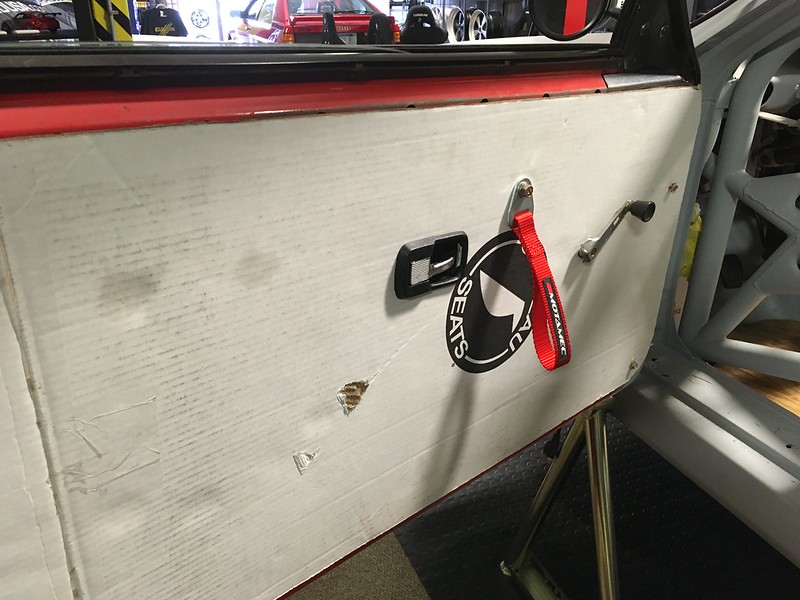
And finally, ask any serious rally driver and they’ll tell you that it’s critical that your door pull straps on your fridge match you pin stands. Guess we should have bought three! 
Next week TIM uses a Hibnob as a steering wheel. Paul Eddleston BRAID Wheels USA www.BRAIDUSA.com Team Illuminata Motorsport www.teamilluminata.com |
BRAIDusa Paul Eddleston Elite Moderator Location: Birmingham, Michigan Join Date: 09/06/2012 Age: Ancient Posts: 554 Rally Car: Subaru Outback Wagon EG33, 911 Carrera |
A continuation of our mud flap build... When we left off with mud flaps to go do some other stuff we had just finished making all the CAD templates for the brackets. Now we have formed them in steel, welded them to the car and even made an installed the actual mud flaps. Well, Sparco made them; we just trimmed them to fit.


Next episode: footrests! Paul Eddleston BRAID Wheels USA www.BRAIDUSA.com Team Illuminata Motorsport www.teamilluminata.com |
BRAIDusa Paul Eddleston Elite Moderator Location: Birmingham, Michigan Join Date: 09/06/2012 Age: Ancient Posts: 554 Rally Car: Subaru Outback Wagon EG33, 911 Carrera |
"Rest Your Weary Feet" - Rally navigators need somewhere to plant their feet and brace themselves. So, rally cars have sturdy footrests. We could easily have bought a generic one or made a simple one but we’d seen the ones employed on the factory cars, and of course thought “we could make that”.
As usual we started with a cardboard model to get the shape similar and then transferred that to some 1/8” thick aluminium plate and the floor bracket to some steel.

We then welded a bar of angle across the top and the plate to the floor at the angle we felt appropriate. 
Then we started to work on the holes. We didn’t have dimple die punches even close to the size the works car used and they are not cheap. We scaled the original photos to see if we could measure them. They seemed to come out at 1-3/4”, which seemed huge so we went conservative and ordered a 1-1/4” punch. 
Because we were using a smaller die, we altered the design a bit to include a few more holes which we made with a hole saw. 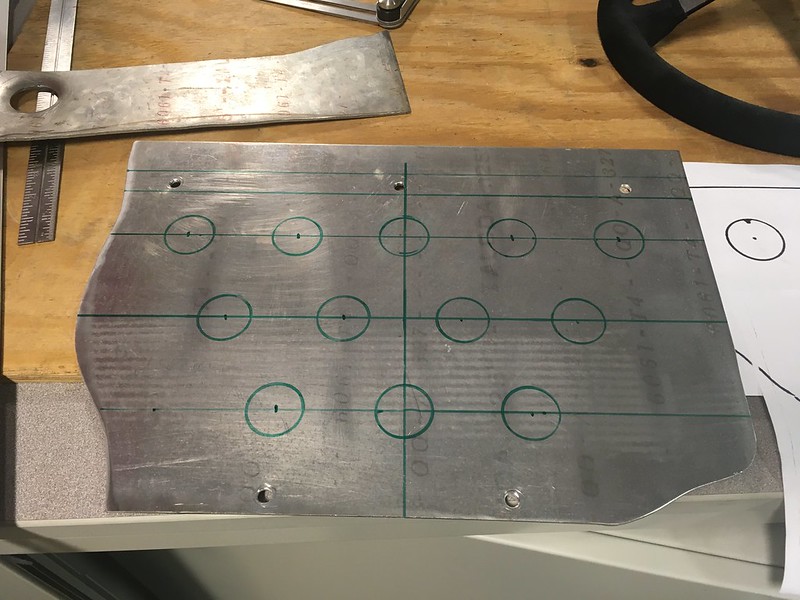

Then we dimpled them on the press. 
We discovered that the process did distort the plate a bit but added a lot of strength. So much so that we couldn’t flatten it completely even using the press! 

Not wanting to break it, we decided that it was flat enough and that the bracket would hold it at least a little flatter. 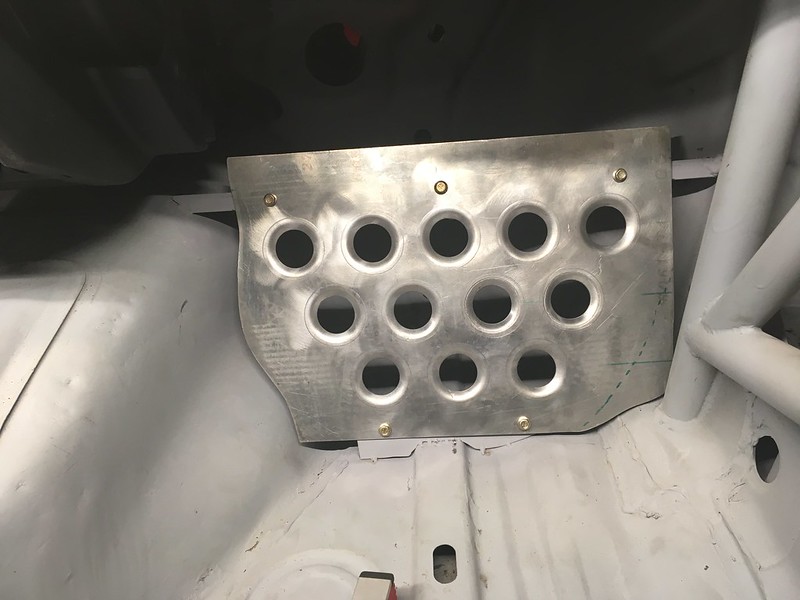
Finally, we trimmed off the excess and hit it with a wire wheel to remove some of the dimple die marks. We’re very pleased with the final result. 

Next, we’ll attempt to reproduce the driver side foot rest. Paul Eddleston BRAID Wheels USA www.BRAIDUSA.com Team Illuminata Motorsport www.teamilluminata.com |
BRAIDusa Paul Eddleston Elite Moderator Location: Birmingham, Michigan Join Date: 09/06/2012 Age: Ancient Posts: 554 Rally Car: Subaru Outback Wagon EG33, 911 Carrera |
Driver's Footrest: In case there’s a long straight between corners or for transits we thought we should have a nice foot rest for our clutch foot. Of course, we tried to reproduce the one on the factory cars because buying a perfectly good off the shelf one would make too much sense. First some auto CAD:
Followed by some 1/8” aluminium, with dimple holes: 
Then we cut it and welded it at what we thought was the appropriate angles. It’s just tack welded for now in case we don’t know what we’re doing. 
Then we temporarily fastened it in place with some self-tappers. These will be replaced with rivnuts once the shell is painted. 
Paul Eddleston BRAID Wheels USA www.BRAIDUSA.com Team Illuminata Motorsport www.teamilluminata.com |
Ascona73 Bob Legere Mega Moderator Location: Spofford, NH Join Date: 03/07/2007 Age: Possibly Wise Posts: 308 Rally Car: 1971 Opel Ascona |
I’ve found the grippiness increases exponentially when you flare the other way.
Opel is a 4-letter word... http://www.flickr.com/photos/10498579@N07/sets/ |
BRAIDusa Paul Eddleston Elite Moderator Location: Birmingham, Michigan Join Date: 09/06/2012 Age: Ancient Posts: 554 Rally Car: Subaru Outback Wagon EG33, 911 Carrera |
|

BRAIDusa Paul Eddleston Elite Moderator Location: Birmingham, Michigan Join Date: 09/06/2012 Age: Ancient Posts: 554 Rally Car: Subaru Outback Wagon EG33, 911 Carrera |
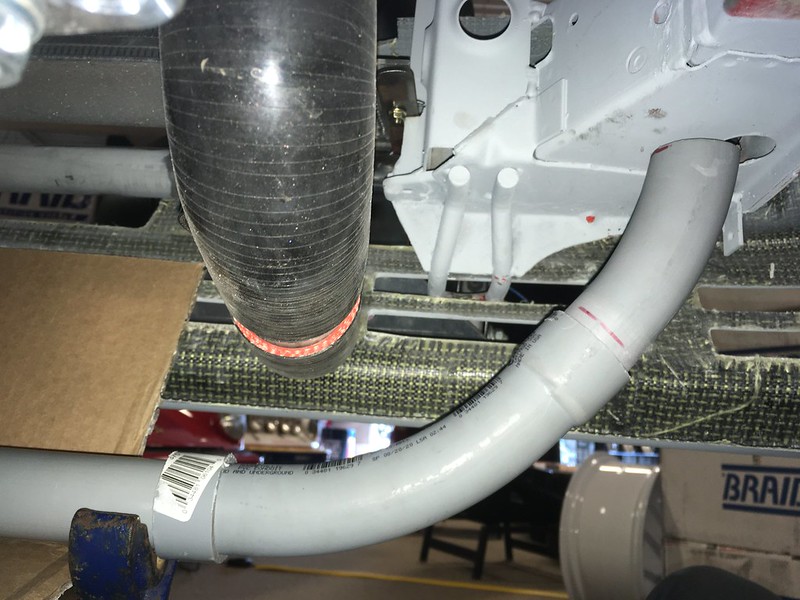
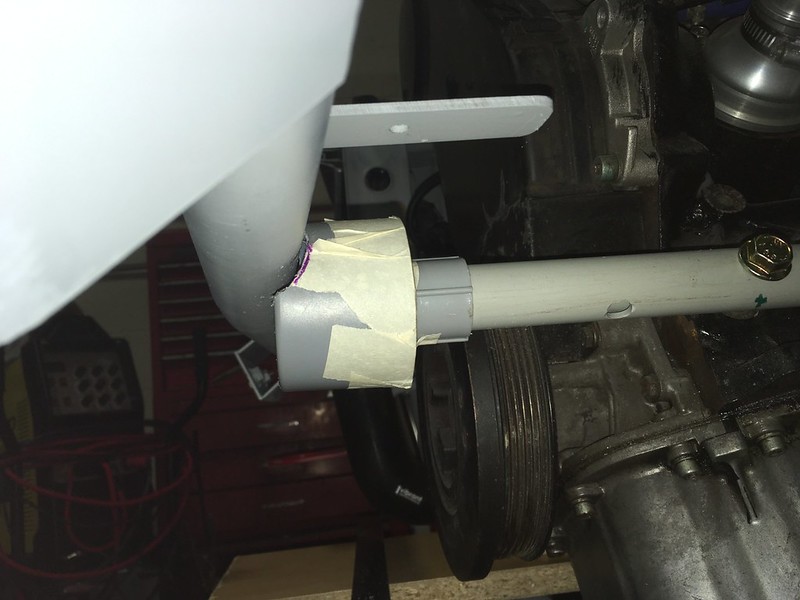
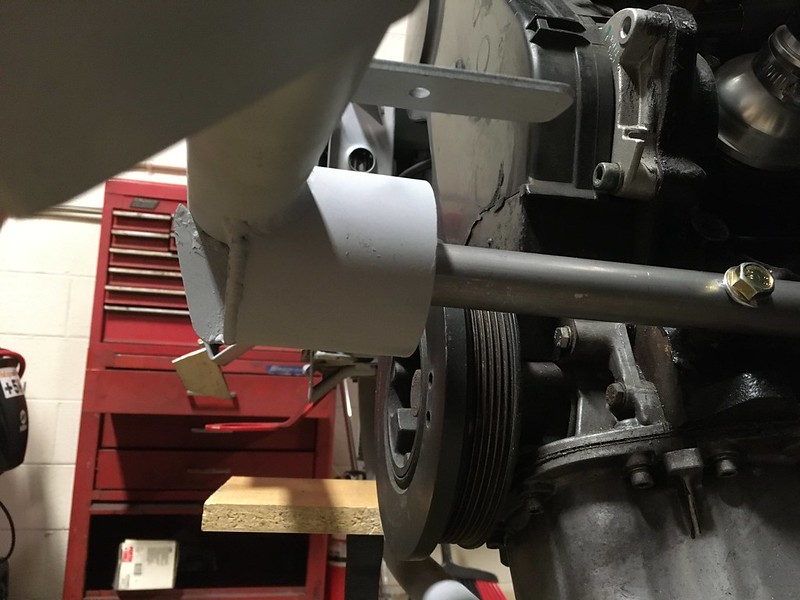
What’s this called? The Audi parts diagrams call it a “stop buffer” but what does it stop? Engine pitch perhaps? Well, it’s probably important so we should have one, exactly like the works cars of course. Oh boy! We’ll call it an Engine Pitch Stop or EPS.

It sits in a receptacle on the bumper bar and presumably stops the engine from pitching back and forth. Subarus have one on the bulkhead. We bought a performance one from ECS because who doesn’t want a big red nob sticking out of the front of their engine, even if it is mounted on a piece of PVC conduit! 
We did intend to mount ours on the right side of the engine like the factory cars and even designed a mounting plate for it but then we realized it might be a bit complicated to design an alternator bracket in combination with this so decided to put it on the left side instead. It helped that there were two threaded holes in exactly the right place. The EPS fits in a cup welded to the bumper bar so we needed to mock that up. Fortunately, we discovered that most paint can lids are the right size so a can of Rustoleum Self Etching Primer donated its lid. This intersects with the bumper bar about half way so we had to shape it carefully with a file. 
It also changed color during the process because of, well, fail. Undaunted we acquired some steel tubes in the appropriate diameters and proceeded to recreate our plastic EPS in metal. First attempt was a little long. 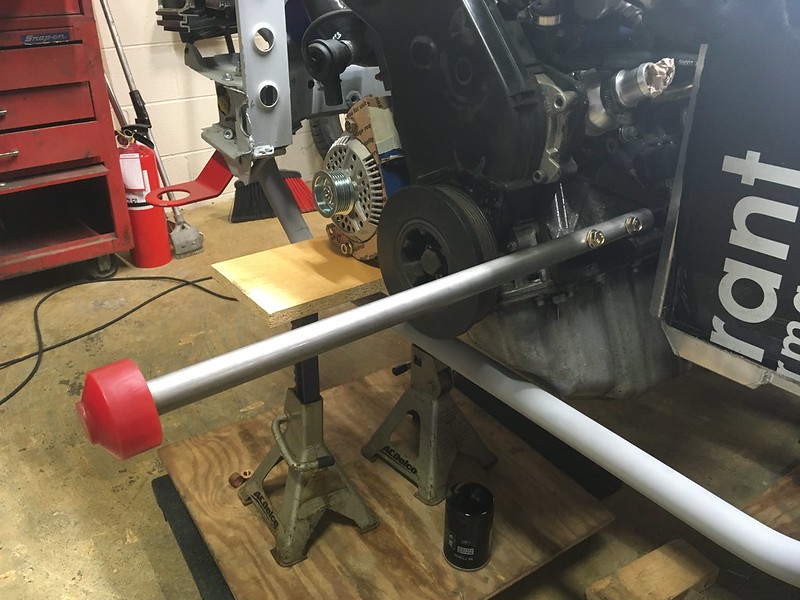
That’s much better. 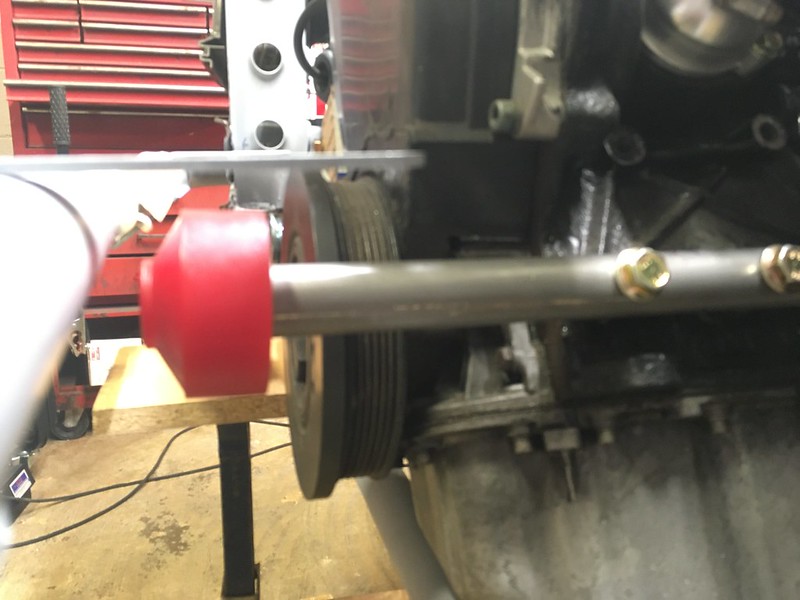
Now for the tricky bit. 
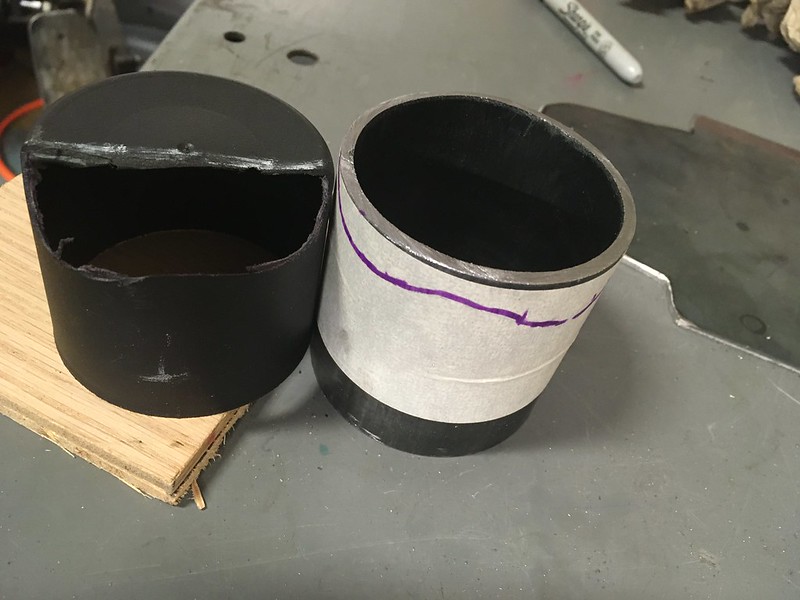

After about four days of filing, we had a fit. The cup fit on the bumper bar too. 


Happy with the way it looked we cut it to length, welded it up, added a brace and stood back and admired it. 
Can’t wait till its gold zinc plated. Paul Eddleston BRAID Wheels USA www.BRAIDUSA.com Team Illuminata Motorsport www.teamilluminata.com |
Sorry, only registered users may post in this forum.
Rally Anarchy © 2014 Corvus Digital –
Part of the AutoShrine Network –
Problems? Send an email to the Webmaster