Audi UR Quattro Rally Build
Posted by BRAIDusa


BRAIDusa Paul Eddleston Godlike Moderator Location: Birmingham, Michigan Join Date: 09/06/2012 Age: Ancient Posts: 554 Rally Car: Subaru Outback Wagon EG33, 911 Carrera |
Time To Get In The Groove
It recently occurred to us that if we ever get to drive this thing we might get a flat and need a spare tire. But what size and where to put it? The stock spare is a skinny donut that fits in the trunk up against the left quarter panel. Our car didn’t come with one and we doubt we’d wanna use a 35+ year old skinny tire anyway. No, we require something a bit more road worthy if not stage worthy. This is also complicated by the fact that we will be running two very different sizes of tire on the car. 195/65-15 gravel rally tires and snow tires and 23/59-15 tarmac rally tires. While we don’t feel the need to carry an exact match we would like something at least a similar overall diameter. Unfortunately the gravel ties is 25” OD while the tarmac tire is only 23”! And we’ll need a suitable wheel. There a lot of 195/60-15 tires on the market at 24.2” and a few 225/50-15 at 23.9” OD. Perhaps one of these would be the sweet spot. We also have a set of original 15x6 Quattro wheels we could mount one of these on. Well, the 195 anyway. 225 might be a stretch. Oh, did we mention, we’d also like to carry our emergency tool kit as well? Now, where to store it. Well it turns out that nothing much bigger than the OE donut will fit in the original location so that’s out. However, since we removed the US spec bumper extensions from inside the truck we do now have access to this angled groove in the trunk floor. We thought it was to aid getting the donut into place but now we are thinking it may have been intended for a full size spare all along, at least till they got too wide for one. Here’s a picture of the groove: 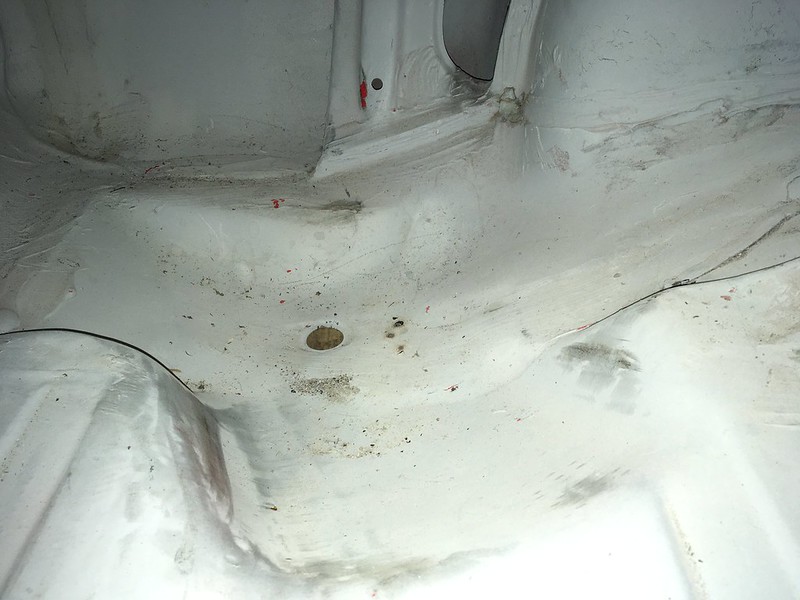
Let’s see what can get in the groove man! 215? Yes. 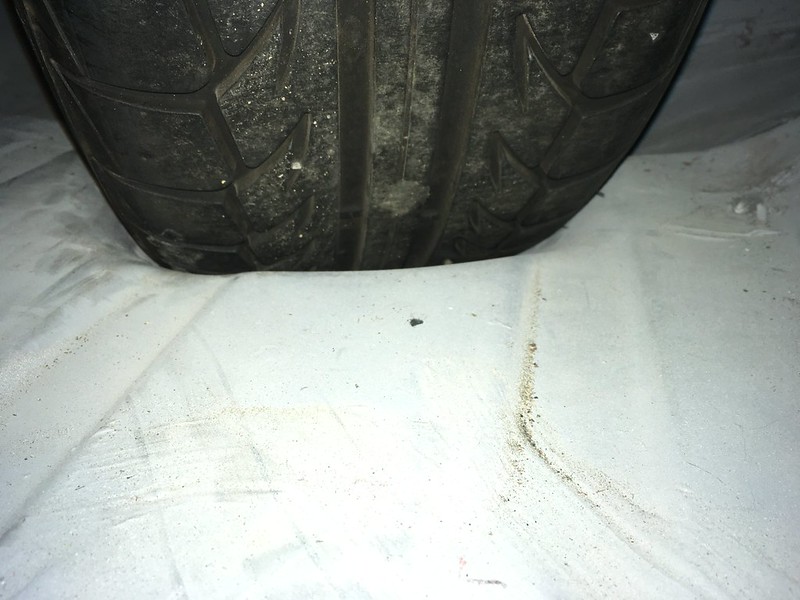
195/65 won’t fit in the spare’s location: 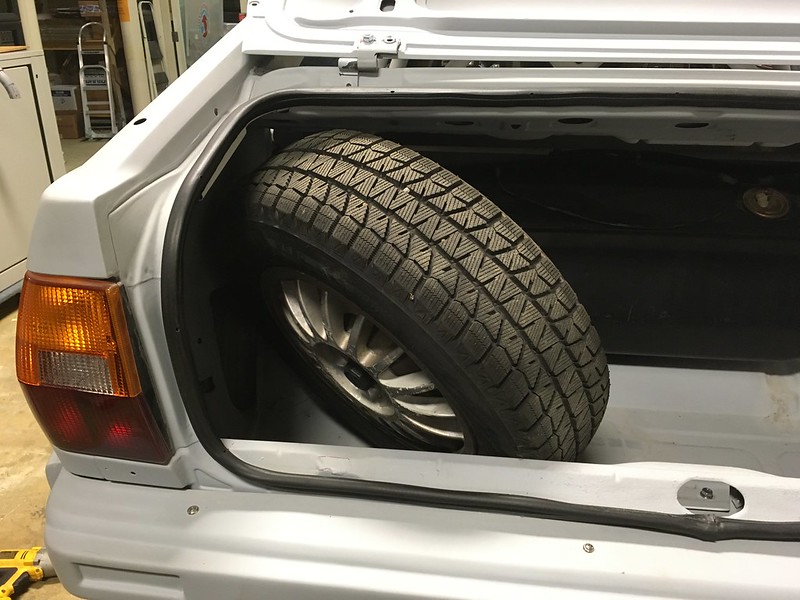
But will get in the groove dude: 
225? Nah, not really but could be made to work: 
195 and toolbox getting in the grove: 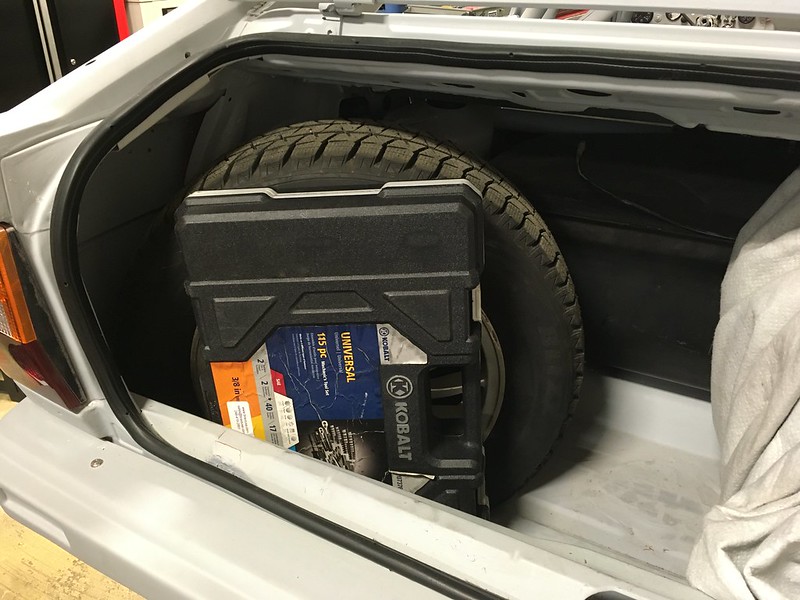
TB5 in the groove. Nah, don’t be silly. Fits in the trunk though, just: 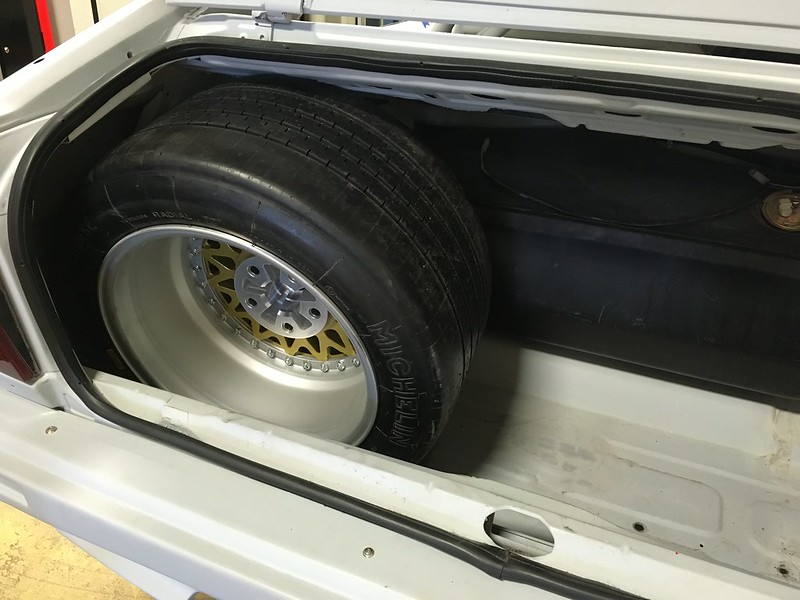
So still not finalized and we’ll still have to figure out how to secure it. Now, back to more serious matters.  Paul Eddleston BRAID Wheels USA www.BRAIDUSA.com Team Illuminata Motorsport www.teamilluminata.com |
BRAIDusa Paul Eddleston Godlike Moderator Location: Birmingham, Michigan Join Date: 09/06/2012 Age: Ancient Posts: 554 Rally Car: Subaru Outback Wagon EG33, 911 Carrera |
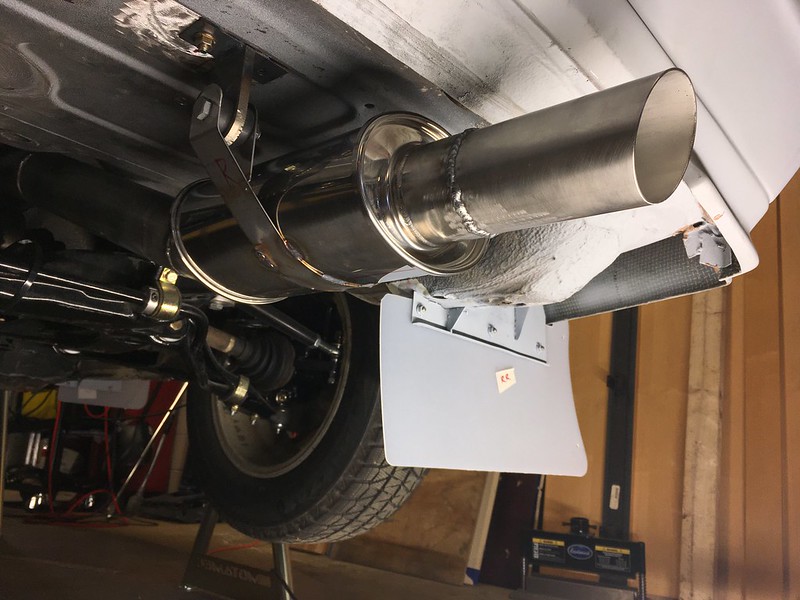
We’ve been frustrated by the rear muffler just hanging around but finally had some time to tackle it. We wanted to replicate the works cars even though it’s ridiculously over built.

How hard could it be? First find some bushings from McMaster and some cardboard: 
Guess the length and reproduce it in stainless: 

Then weld it to the car: 
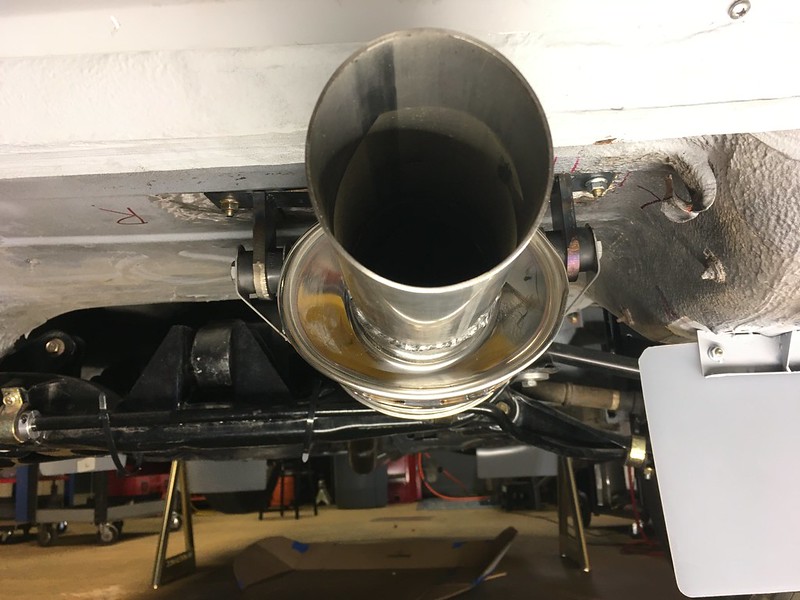
Actually, it’s screwed to the car for now. We’ll weld it once we get the car upside down. Paul Eddleston BRAID Wheels USA www.BRAIDUSA.com Team Illuminata Motorsport www.teamilluminata.com |
BRAIDusa Paul Eddleston Godlike Moderator Location: Birmingham, Michigan Join Date: 09/06/2012 Age: Ancient Posts: 554 Rally Car: Subaru Outback Wagon EG33, 911 Carrera |
ALTERNATOR-TIVE UNIVERSE
We all know that Audis are different and UR Quattros even more different. Well, we also tend to do things differently and that did not change when it came to installing the alternator for our rally car. We could have just used the stock alternator in the stock location on the stock bracket but that meant it wouldn’t be able to power our ridiculous number of lights, it would be right in front of the radiator and, after removing the power steering pump, be hanging on the end of a foot long appendage that just looked silly. So we said, “Let’s do something different”. 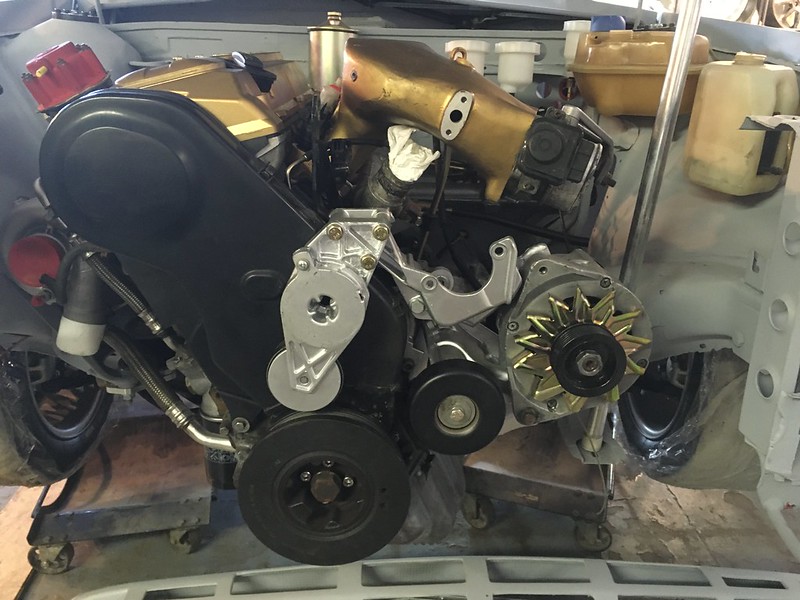
So we did two things. We found a relatively inexpensive 200 amp Ford alternator from a local supplier and we decided we could move the engine pitch stop to the left side of the engine. This meant we could mount the alternator on the right side of the engine with a custom bracket. https://live.staticflickr.com/65535/51281853451_e83147db6d_c.jpg Now some of you are probably saying, ”Why didn’t you just use a bracket from an Audi that had the alternator on the right side of the engine?” Well, we could do that but Audi didn’t use Ford alternators did they? Custom bracket it was then. How do you do that? You might ask. So did we! 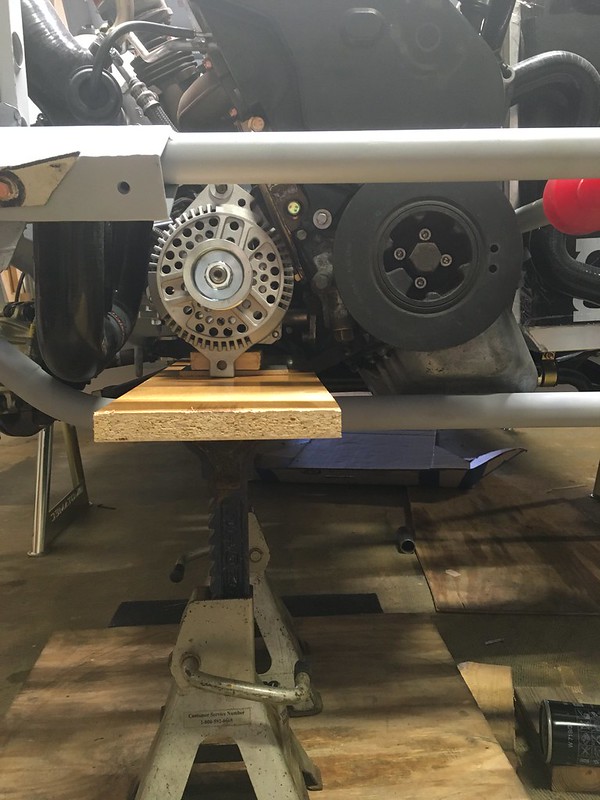
We started with a CAD template, of course. 
Which we cunningly fashioned into a front bracket looking thingy. 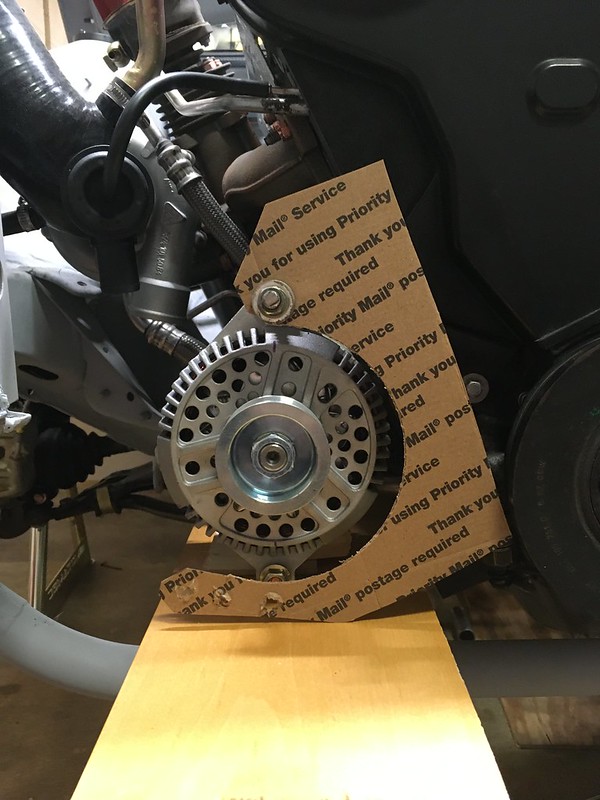
Then we made a base plate that would bolt to some existing holes on the block 
Then taped the two together 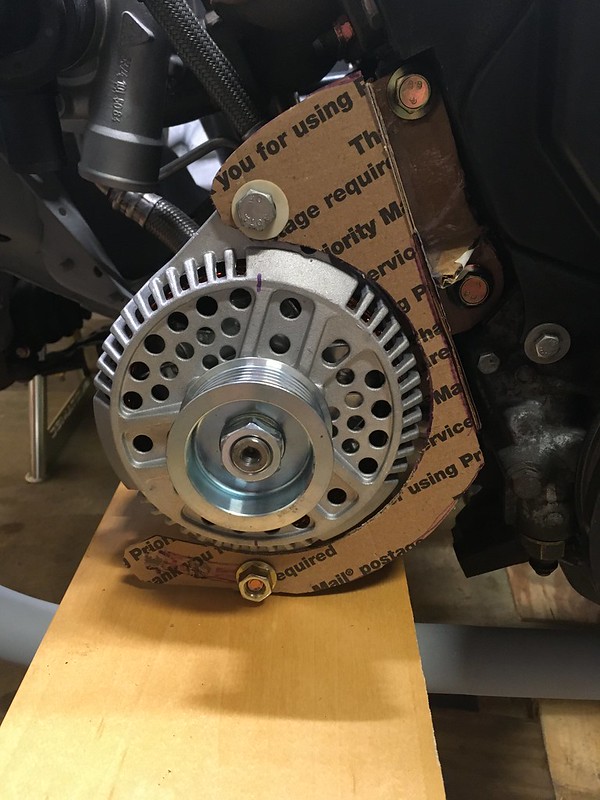
Once we were happy with the design, we cut the pieces out of 3/16” and 1/8” steel plate. 
In order to ensure (hopefully) that the two pullies were lined up in every conceivable axis we decided to clamp them together using a very stiff piece of angle iron before welding everything up. This seemed to work, much to our surprise. And yes, we checked, with measury things. 


Then came the tricky bit: Finding a belt the right length. 
Piece of cake (actually, we prefer Hobnobs thank you) Paul Eddleston BRAID Wheels USA www.BRAIDUSA.com Team Illuminata Motorsport www.teamilluminata.com |
BRAIDusa Paul Eddleston Godlike Moderator Location: Birmingham, Michigan Join Date: 09/06/2012 Age: Ancient Posts: 554 Rally Car: Subaru Outback Wagon EG33, 911 Carrera |
Committing to Front Bars
The last time we referenced the front skid plate bar was back in May when we were installing the front tow hook which is sandwiched between the chassis rail and the skid plate bar mounting flange. At that time, it was mocked up from PVC conduit. Now we felt it was time to commit it to steel and even connect it to the front bumper bar. How hard could that be? Pretty tricky actually. We don’t have a pipe bender but have access to one but it would be a one shot deal. However, it proved difficult to make the compound bends in the same plane and end up with the bar at the correct length. When we got it back to the workshop what we had was a wrong length bar with a 90 degree bend at each end! Both bends were in the same plane but, as you will see, that didn’t matter in the end. It was a bit disappointing to be honest so we put the kettle on and had a think over some Yorkshire Tea and Hobnobs. They did the trick as by the last sip and crumb it dawned on us that we had all the right pieces, just not necessarily in the right order! If we chopped up the continuous 90 bends we could configure them in the right way and make the bar any length we wanted and we wanted it the correct length. So that’s what we did. 

We even got it to “make the noise” (be level if you’re watching in black and white) 
The next part of the project was to connect the skid plate bar to the bumper bar with a couple of brace bars in such a way that either bar could be removed separately. Fortunately, we had a model for this from MAT’s restoration, which we are not copying in any way shape or form, honestly. 
So, we squished some pipe: 
It took ages to grind the correct angle on the top but once we were happy with it we tacked the braces in place with the bars in situ: 
Then a few issues revealed themselves. Firstly, the right-side brace bar interferes with the intercooler inlet pipe so that will need to be modified 
But also, and more fundamentally, we couldn’t remove either bar from the car! We were perplexed for a few minutes as we had the configuration just like the MAT restoration bars but then we realized we had mounted our bars with studs and nuts and they had uses bolts! Once we removed the studs from the bumper bar flanges it fell away elegantly. We will be attaching it with bolts from now on. DUH! So here are the two bars tacked together and removed and primed later. 

We’d like to see a Norwegian Blue muscle up to these bars and try to bend them apart with its little pecker! Paul Eddleston BRAID Wheels USA www.BRAIDUSA.com Team Illuminata Motorsport www.teamilluminata.com |
BRAIDusa Paul Eddleston Godlike Moderator Location: Birmingham, Michigan Join Date: 09/06/2012 Age: Ancient Posts: 554 Rally Car: Subaru Outback Wagon EG33, 911 Carrera |
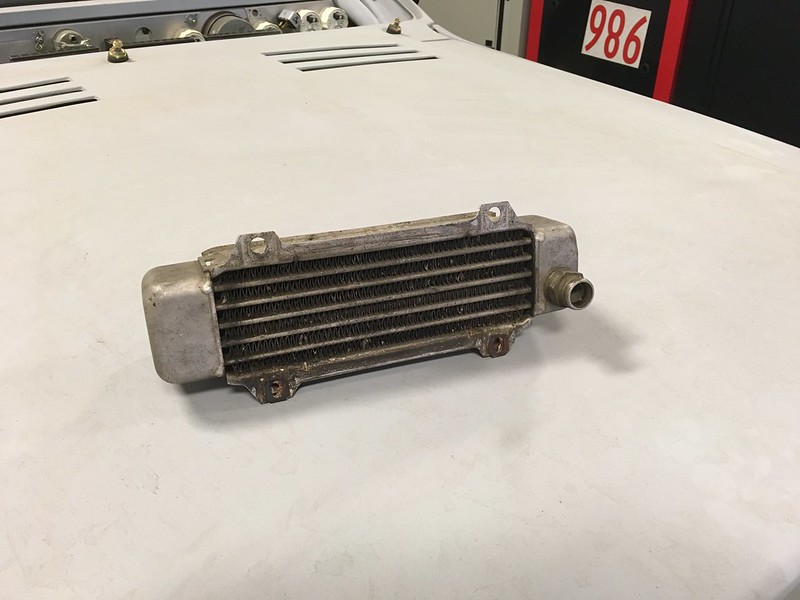
The Quattro rally cars all had a very iconic and loooong oil cooler tucked under their large, trunk mounted rear spoiler but we never wanted or needed the expensive dry sump oil system that goes with it so we are going to use a more traditional, front mounted oil cooler on this build. The stock oil cooler that came with our AAN engine is quite small, some would even say tiny, so we didn’t want to use that either.
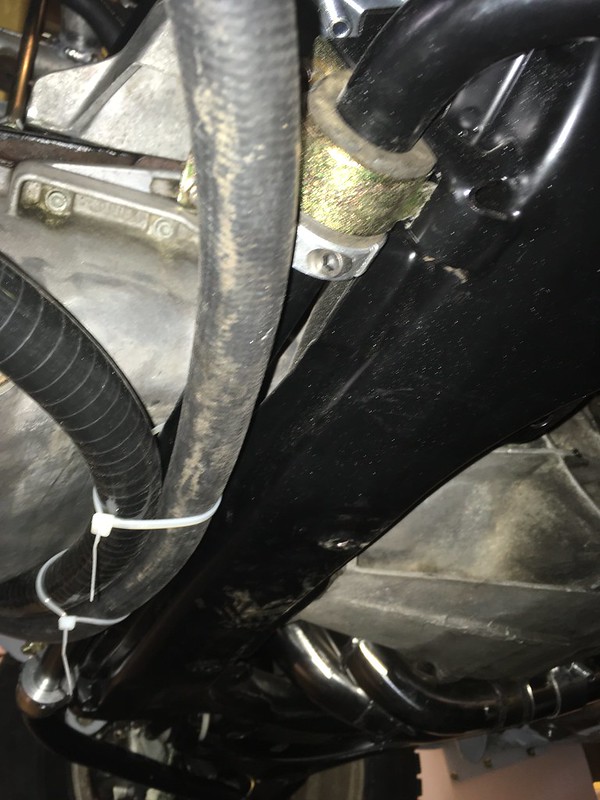
So we had always assumed we would use something from the aftermarket but what to use and, more importantly, where to put it? We looked for some free space that would be visited by cool air and also be accessible by some oil lines. The oil system and consequently the oil cooler inlet and outlet, are on the right side of the AAN engine but there was no room there now we had relocated the alternator and added the bars for the skid plate. It seemed the only place for it would be in front of the radiator on the left side of the engine. Lots of room there but no obvious route for the lines was present. We couldn’t go round the front of the engine as that’s already full of alternators, bumper bars, intercoolers and other stuff and round the back of the engine is full of pipes, wires and steering arms. After mocking up the skid plate in cardboard (see previous blog) we thought there was possibly room to squeeze two braided stainless steel oil lines under the engine between the back of the oil pan and the front sub frame and anti-roll bar then squeeze them under the radiator to the oil cooler if, and only if, we mounted the oil cooler with the connections underneath AKA upside down. 

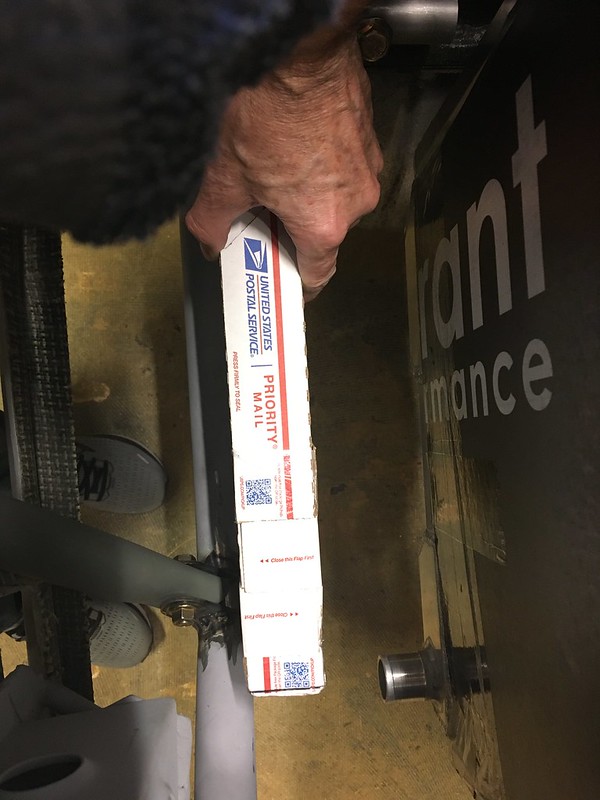
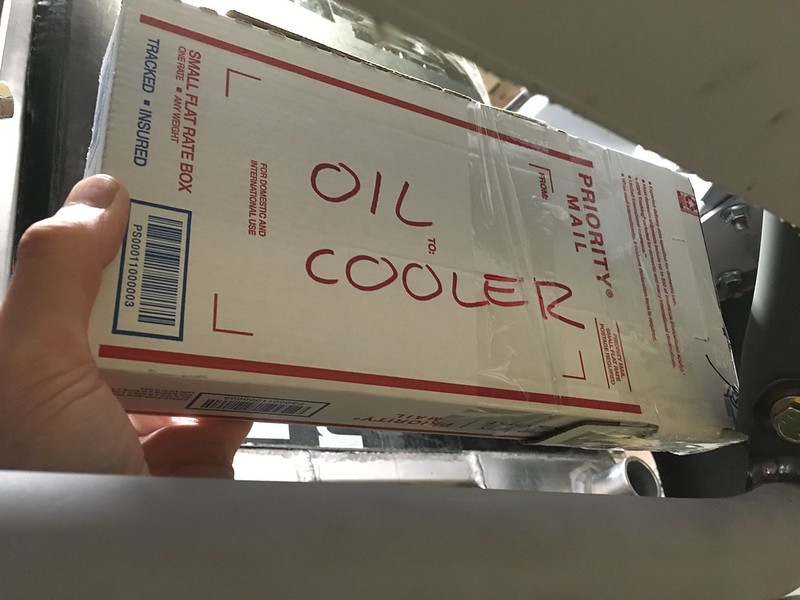
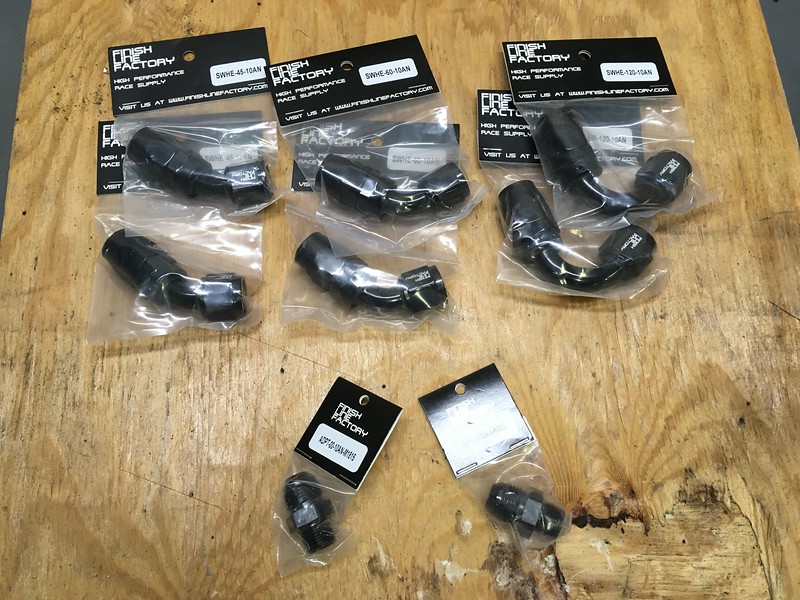
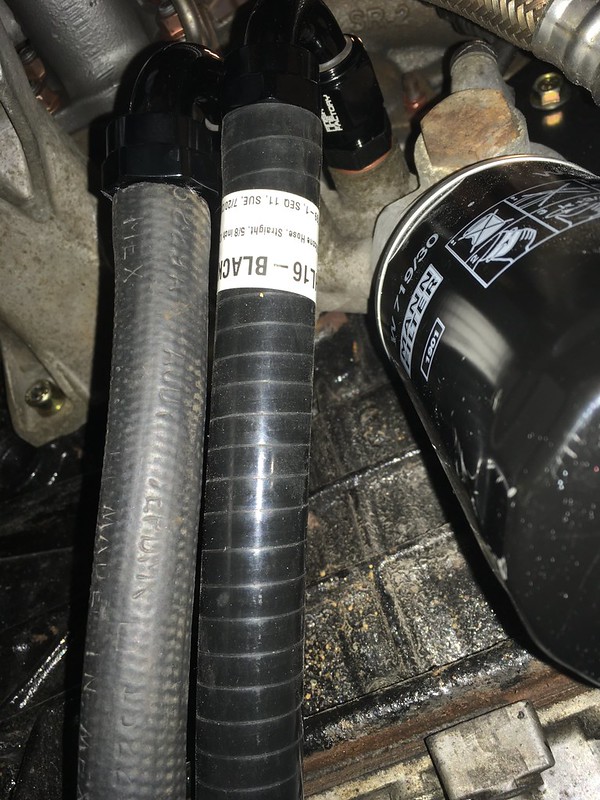
We were skeptical of this because we were concerned that the oil would drain out once the engine was turned off and, if still hot when started again, would cause a small delay in flowing oil to the engine as it would have to fill the oil cooler first. We are not sure if this is a genuine concern but didn’t want to find out the hard way. After a short session with a tape measure, we determined that most of our oil cooler would be below the oil cooler inlet and outlet on the block and therefore oil would not drain out YAY! So, we started mocking it all up. Cardboard was required of course. We selected a cooler from Mishimoto but built a CAD model before placing the order; you know, just in case. We also ran some stainless-steel hoses under the oil pan to test that our intended route was indeed feasible. It was. So, we broke open the piggy bank and ordered some parts. AN fittings from Finish Line Factory, said Mishimoto oil cooler and some stainless steel lines. 


We were happy to be able to easily remove the OE fittings from the block and replaced them with AN adapters. We thought they might fight us but it seemed that they wanted out of there... 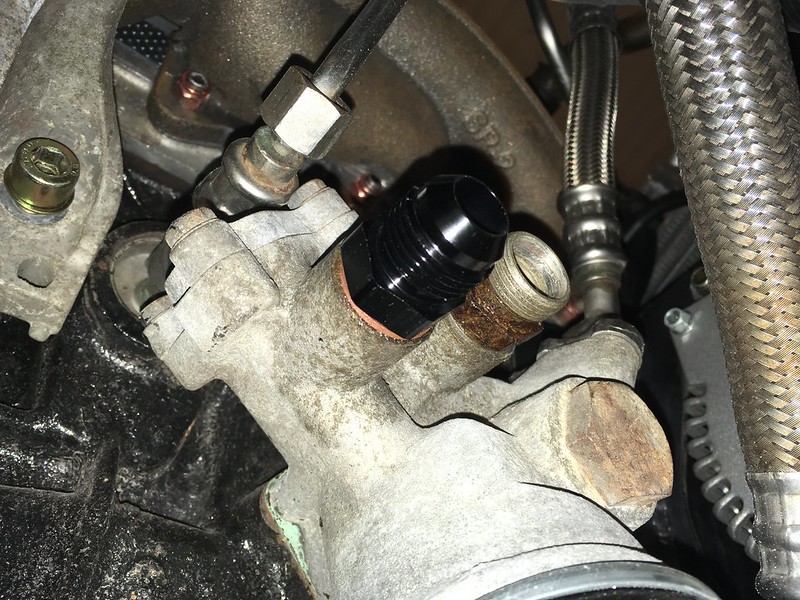
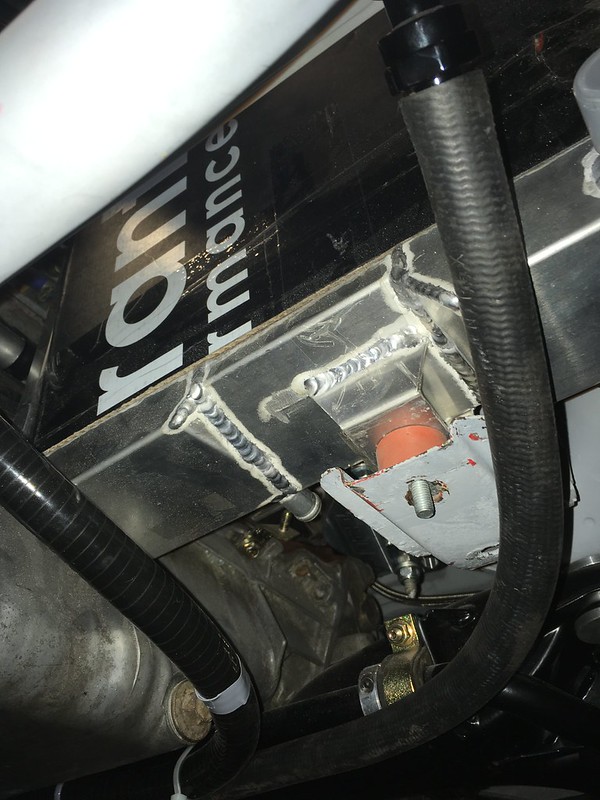
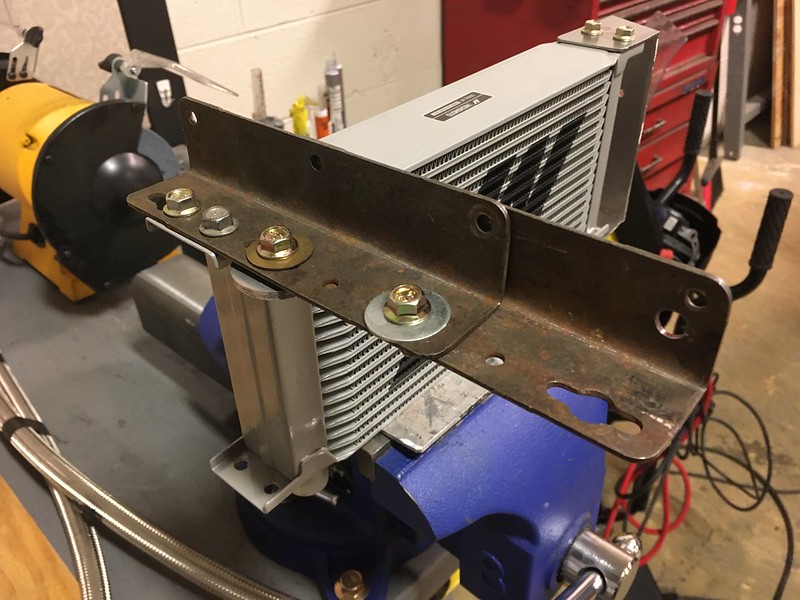
Then we set about mounting the (WISHIMOTO?) oil cooler. We fabbed up a bracket for the left side that bolts to the frame rail (currently with self-tappers but ultimately with rivnuts and screws of course.) For the right side we mocked up some steel angle we had lying around and attached that to the intercooler mount on the bumper bar as they were coincidentally at the same height. We’ll make a nicer aluminium version during final assembly. 


We’d order some 60* and 45* AN fittings from Finish Line Factory so could figure out which ones would line up best with the oil lines. We mocked all this up than realized we should secure the lines somehow as it didn’t seem like a good idea to have them sawing their way through the skid plate or worse, the oil pan. This bracket and (of course) a rally zip tie should do the trick. 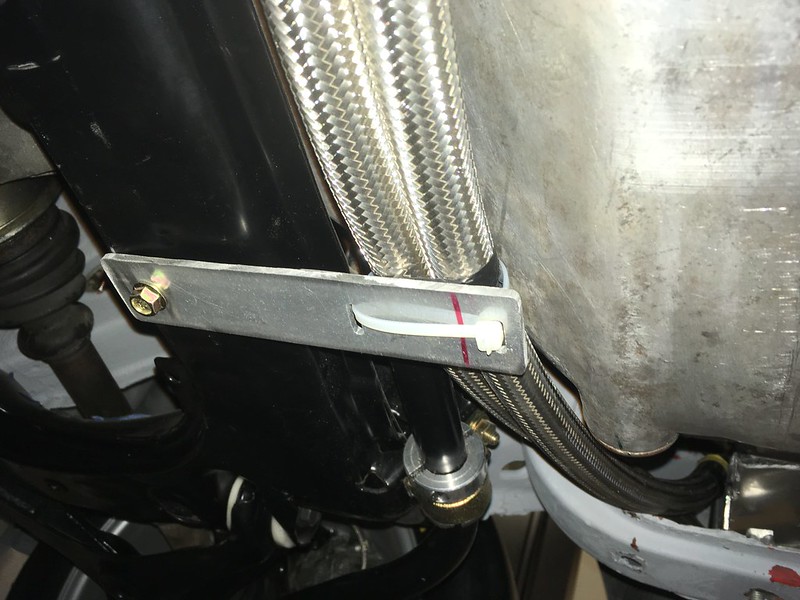
So now, if we ever get this beast finished, we can be sure our engine oil will remain chill. Paul Eddleston BRAID Wheels USA www.BRAIDUSA.com Team Illuminata Motorsport www.teamilluminata.com |
BRAIDusa Paul Eddleston Godlike Moderator Location: Birmingham, Michigan Join Date: 09/06/2012 Age: Ancient Posts: 554 Rally Car: Subaru Outback Wagon EG33, 911 Carrera |
Twice As Cool
We know we said we weren’t going to “use” a rear mounted oil cooler but we never said we weren’t going to “install” one did we? The rear oil cooler on rally Quattros is so iconic that we couldn’t not have one. There are plenty of tribute cars out there that don’t bother with this touch but we just couldn’t give up on this detail. Soon, we started to wonder if we’d made the right decision however. We knew we didn’t have the skills to create this wondrous icon so we dragged our trunk lid complete with spoiler over to nearby Four Seasons Radiator who made our custom radiator a while back. We told them what we wanted and they came back with two quotes. They would make a fully function oil cooler for us for around $650 or a non-functional one for around $450. After mulling over the idea of spending thousands of Dollars to build a dry sump system one day we decided that the extra $650 we’d need for a functional oil cooler would seem like a pittance so we opted for the more frugal path. Yes, we ordered a purely ornamental oil cooler; a fake, a pretender. Please don’t hate us. 
When we picked it up though we noticed it had AN fittings at each end. Turned out the fab guy couldn’t bring himself to make a fake oil cooler so made a functional one for the same price. We are forever in his debt. We’re still not installing a dry sump system though. 
Now to slap it on. Oh, if only it were so simple. It had to be centered on the trunk. It had to be centered in the void under the spoiler. It had to have holes under the spoiler wing for the locating pins and it had to be bolted to the trunk. How hard could that be? Surprisingly actually. Getting it centered on the trunk was pretty easy and transferring that to the spoiler also not too challenging. 

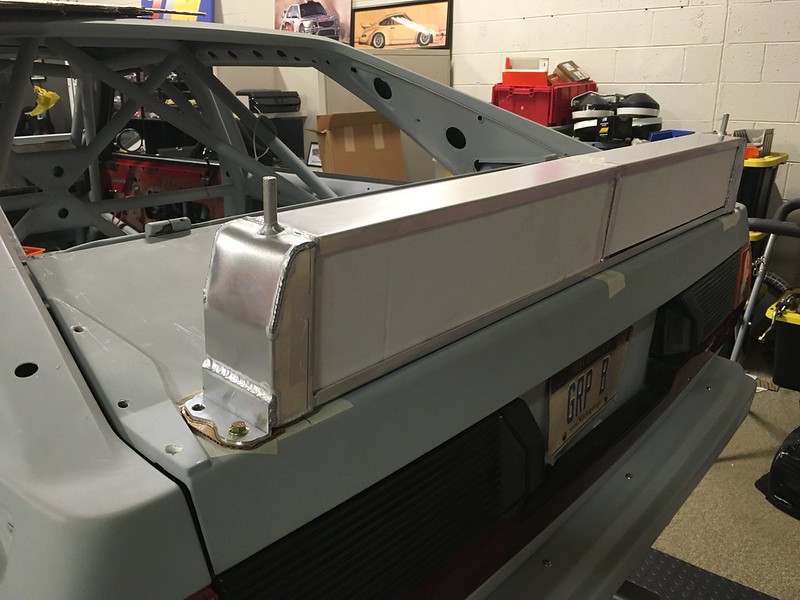
Although we had the locating pins marked side to side getting them located front to back was a bit more tricky. So we pulled out our 40 year old Steadtler dividers and transferred their distance from a known point on the trunk and drilled two small holes, with bated breath. They fit perfectly and we could then, for the first time, bring the spoiler down onto the trunk with the oil cooler in place. 


Once the elation waned, we noticed that the gaps either side of the oil cooler header tanks and the spoiler sides were not equal. How could this be? We’d measured everything so carefully. We checked again. The oil cooler was definitely in the center of the trunk. After quite a bit of head scratching and remeasuring we came to the conclusion that the spoiler itself was not centered on the trunk. It was not out that much that we ever noticed but now, with the old cooler in place you could clearly see it was a few millimeters out. We decided that we needed to fix this but we were not willing to move the spoiler. Rather, we thought, we’d move the oil cooler, a little. Just enough so that you wouldn’t notice. It’s a fake one after all. Or not. This left us with another problem. The mounting holes for the cooler were always going to be tight and getting a nut or screw in there would be a challenge that we’d just made easier at one end but harder at the other. We did manage but had to make a custom wrench to do it. 

This just left one more task remained. Adding some isolators to the upper locating pins. We though a bit of hose would do the job so cut some to length and enlarged the holes in the spoiler till they just fit snugly. We were happy we hadn’t installed these before we found out is wasn’t actually centered. 


Finally, we slapped a couple of VIBRANT stickers on the protective cardboard covers we’d made and called it a (long) day. 
Hopefully our next job will be a bit simpler. Paul Eddleston BRAID Wheels USA www.BRAIDUSA.com Team Illuminata Motorsport www.teamilluminata.com |
BRAIDusa Paul Eddleston Godlike Moderator Location: Birmingham, Michigan Join Date: 09/06/2012 Age: Ancient Posts: 554 Rally Car: Subaru Outback Wagon EG33, 911 Carrera |
Did we do anything in 2021?
Oh boy, another year has gone by and we still haven’t finished this car! We have photo albums on Flickr going back as far as 2016. That’s seven albums, if you include the new one for 2022! To be fair, the 2016 album and the project itself only started in September of 2016. We actually got the car in December of 2015 but didn’t know what to do with it for quite a while. Also, in our defense, we did move into a new building after spending most of 2020 working on it in a storage unit, there was and still is a pandemic going on and the business experienced a dramatic sales growth during 2021 which sort of limited time to work on the car. So, what did we get done during 2021? Quite a lot, though not many transformational things. Perhaps that’s why it didn’t feel like a very productive year. In January, we finally got the car established in its very own build room on its pin stands. This allowed us to work on a lot more areas of the car simultaneously and is so much nicer than the storage unit where it spent most of 2020. 
Not a big leap but figuring out a throttle cable for the car was troubling us. We were very relieved when we found a way to utilize the stock Quattro cable with the AAN throttle body on the Wagner manifold. Yes, the same one Ken Block’s Quattro has! 
Gotta stay cool so we refurbished the heating and vent panel and found some suitable aftermarket vents too. We also sourced a European only short center console just like the works cars used. Not seen here is the way we managed to snake the stock vent tubes behind the custom dash. 
Tow Hooks - More little things but they needed doing and we figured out how. The rear is a stock RENNLINE unit whereas the front is the same but modified to exit where the works cars hook did. 

While we didn’t make the actual skid plate in 2020 we did figure out how to make a mockup of the factory Kevlar plates in aluminium sheet by first making one in cardboard sheet. 

At last, a biggy. Local Subaru guru (Suguru?) Scott Banes made this beautiful custom exhaust, mimicking many details of the original, except the catalytic converter of course. The rear muffler hanger took a lot of work but worth every ounce of effort and is completely over the top. 

Not yet finished but our door cards are mocked up in cardboard and the door pulls figured out too. Easy to make in ABS during final assembly. 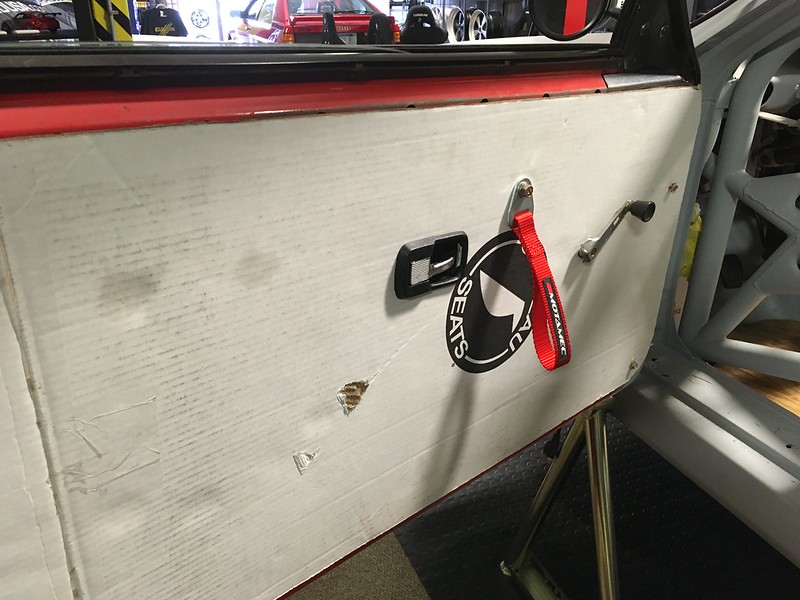
This was a biggy too. Just simple Sparco mud flaps you might say but the brackets were a lot of work and getting everything lined up and level was far more work than anticipated. 

We managed to cobble together some rather period looking footrests for the navigator and driver. At one point we were measuring pictures on the computer screen and scaling them to figure out what size holes they had. We could have just bought some but we are so glad we made these now. 

The front support for the skid plate was way more work than anticipated. Getting the shape and location correct from pictures was a challenge, as was making the connection tubes to the bumper bar. But we did it and now can fab up a skid plate. 
A long time ago we had committed to using a high output Ford alternator and mounting it on the opposite side from where the AAN one went. This meant fabricating a custom bracket that had to be stiff enough and hold the alternator in the correct position and orientation. We think we nailed it but time will tell, hopefully soon.
More cooling stuff. This might be classed as a another “biggy”. Well the rear one is and that’s fake!. The front one is what we’ll actually be using to cool the engine oil. Once we realized we could pass oil lines under the engine we able to locate it in front of the radiator in good airflow.
We also mocked up some ¼ panel cards in ABS. These have to curve over at the top so were a little more involved that the door cards. We’ll make the final panels during final assembly. 

At the end of the year, we also started to work on the rear bulkhead, which is not a small project. Unfortunately, we didn’t finish it so that’s a job for 2022. So what else is in store for this year? Well, ideally, we’ll finish the bloody thing. Hopefully we get plenty of time to do so. For this current “dry build phase we still have such large items as the entire wiring loom, electric power steering pump and lines, diff lock actuation, making the doors fit, fabbing a spare wheel holder, floor mats, finishing the dash panel and a myriad of smaller things. Then we’ll strip it all down and work on getting the body painted. Then final assembly. Maybe 2022 is the year we finally finish it! Stay tuned to find out. Paul Eddleston BRAID Wheels USA www.BRAIDUSA.com Team Illuminata Motorsport www.teamilluminata.com |
BRAIDusa Paul Eddleston Godlike Moderator Location: Birmingham, Michigan Join Date: 09/06/2012 Age: Ancient Posts: 554 Rally Car: Subaru Outback Wagon EG33, 911 Carrera |
It’s 2022. Car Is Not Finished.
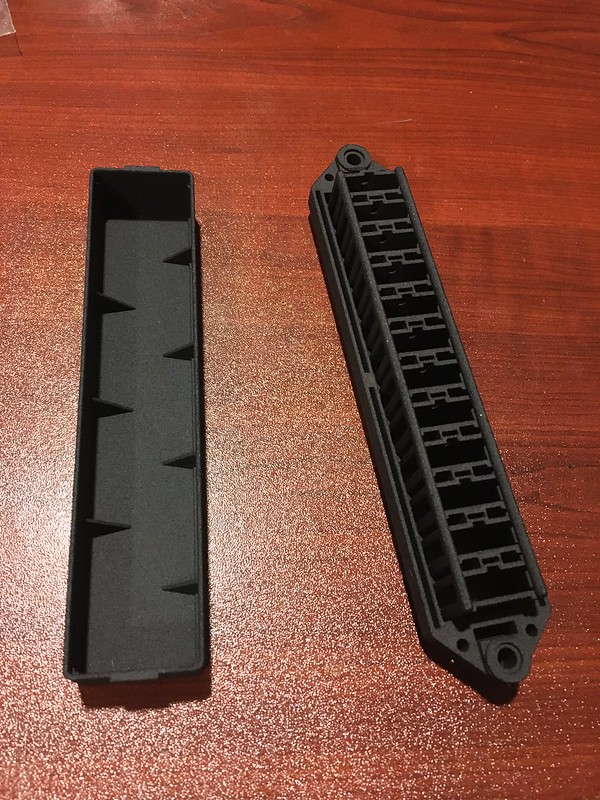
We started 2022 full of enthusiasm with a clear goal for the car: finish it. Well, now it’s late March and sad to report that not a ton of progress has been made. On a brighter note it’s probably because the build is getting us so much publicity that we are overwhelmed with orders, maybe. We did go on a bit of a spending spree however. We bought some snazzy, 3D printed, reproduction fuse panels from a fellow Quattro enthusiast in Ireland. These look just like the originals but these use modern blade fuses instead. 

We also picked up some seam sealer for the next big project. Hopefully to be revealed in the next update. 
and an intercom and rear-view camera/mirror because some plonker stuck a bloody great real/fake/real oil cooler on the trunk lid. 

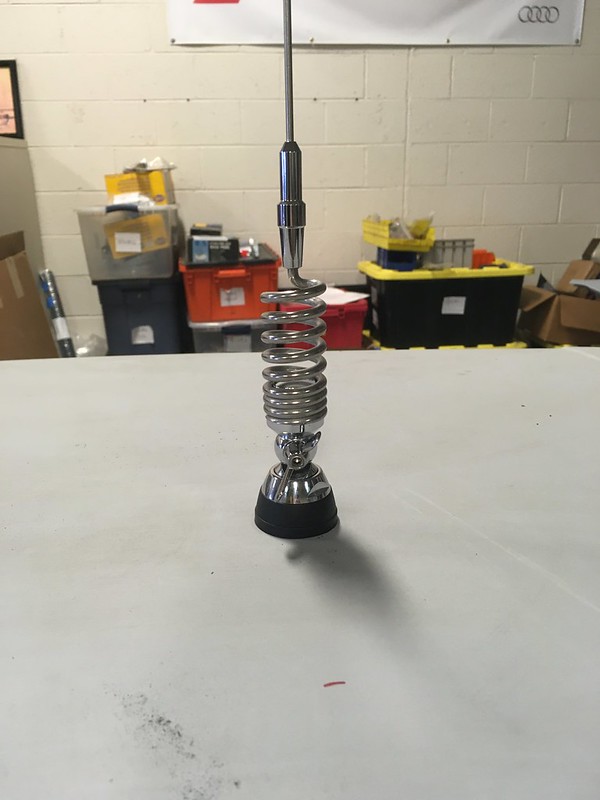
Equally crucial to the project though not, apparently, worthy of photographing, we also ordered some Hella horns, a map light and a period correct, roof mounted antenna that is about 5 feel long! The astute among you, or readers who are not bored yet, may have noticed that we are acquiring quite a lot of electrical equipment. Could we be ready for wiring? If this sparks your attention then stay tuned to find out. Paul Eddleston BRAID Wheels USA www.BRAIDUSA.com Team Illuminata Motorsport www.teamilluminata.com |
BRAIDusa Paul Eddleston Godlike Moderator Location: Birmingham, Michigan Join Date: 09/06/2012 Age: Ancient Posts: 554 Rally Car: Subaru Outback Wagon EG33, 911 Carrera |
REAR BULKHEAD
We finally installed and sealed the rear, aluminum bulkhead that we have had in and out of the car quite a few times. It’s never coming out again now though. The bulked, supplied by TRF, is in two parts. One is essentially a parcel shelf and the other the more bulkhead-like vertical divider between the passenger compartment and the trunk, that contains the fuel tank. For this reason, we thought it was important to seal it up as much as possible. Not only that, we felt it necessary to seal all the cavities in the body that provide passageways between the two compartments. Turned out there was a lot of them so our first job was to seal them up with fire resistant expanding foam. 
Then we moved on to the lower bulkhead. This piece rest against the strut brace bar of the cage which is by default totally sealed off from the trunk. For this reason, we were able to rivet the it in place, but only with a couple of rivets for now as it gets overlapped by the parcel shelf piece. The bottom edge rests up against a small flange left when TRF cut the original bulkhead out. This flange is also a hollow section sealed off from the trunk so we felt comfortable using rivets there too. The side however, rests against flanges that are not sealed off from the trunk so we used self-tapping screws along these edges so fuel could find its way through the holes in the rivets, should we be unfortunate enough to end up upside down with a damaged tank. We sealed the sides and bottom edges with a bead of seam sealer before synching it down with the rivets and screws. We didn’t need any sealer along the top as that edge would be lapped by the parcel shelf next, with a layer of seam sealer between the two. 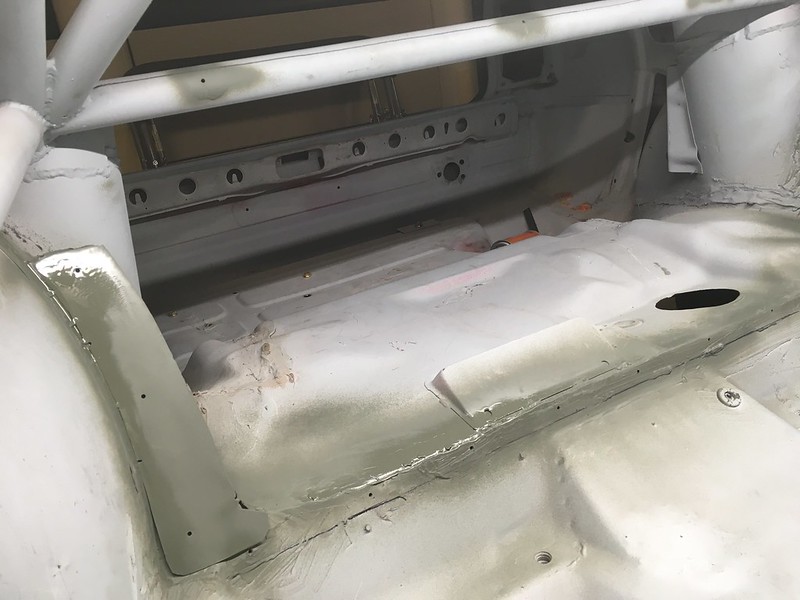


The parcel shelf portion was more complicated however. Apart from the front, which as mentioned overlaps the lower bulkhead, it sits on a flange left by the original bulkhead on three sides. However, these flanges are not flat so we had to build some spacers, particularly along the rear or the sheet would be deformed. We used small set screws and nuts around these areas as they were not sealed from the trunk. We could have used self-tapping screws again but we felt they might have posed a hazard to anyone reaching into the trunk with their hands so opted for the screws, spacers and nuts instead. As we were using a bead of seam sealer along the front edge, we had to test fit everything first as we knew we would only get one shot to install it. So, we ran the bead of seam sealer, lowered the plate into place, riveted it to the strut bar and then added the screws, spacers and nuts to secure it in place. This left a lot of voids under the other three edges so we filled them with more fire-resistant foam. Then we ran seam sealer around all the edges on the inside of the passenger compartment. 
You might think this would complete the bulkhead project but we had one detail we really wanted to incorporate from the works cars: bracing bars on the lower bulkhead. We had these pieces formed out of sheet aluminum and cut them at 45 degrees to form an upside down V. Then we attached them with self-tapping screws as they protrude into the trunk. We felt it was safe to use the self-tappers as they will be shielded from prying hands by the fuel tank. Yes, we checked to make sure they wouldn’t screw into that too. 
 Paul Eddleston BRAID Wheels USA www.BRAIDUSA.com Team Illuminata Motorsport www.teamilluminata.com |
BRAIDusa Paul Eddleston Godlike Moderator Location: Birmingham, Michigan Join Date: 09/06/2012 Age: Ancient Posts: 554 Rally Car: Subaru Outback Wagon EG33, 911 Carrera |
Securing The Hood
As we are using motorsport hood pins from Sparco we won’t be needing the OE bump stops so we also won’t be needing this bit of metal were they live. We cut them off and tidied up the area. Looks much neater and very Group B now. 

Adjustable Strut Tops We were never quite confident in the no-name strut tops that came with the car originally so we bit the bullet and order some proper adjustable versions from CompBrake in England. 
But first we had to weld up the holes our previous ones required. 

Front is eccentric so has camber and castor adjustment. 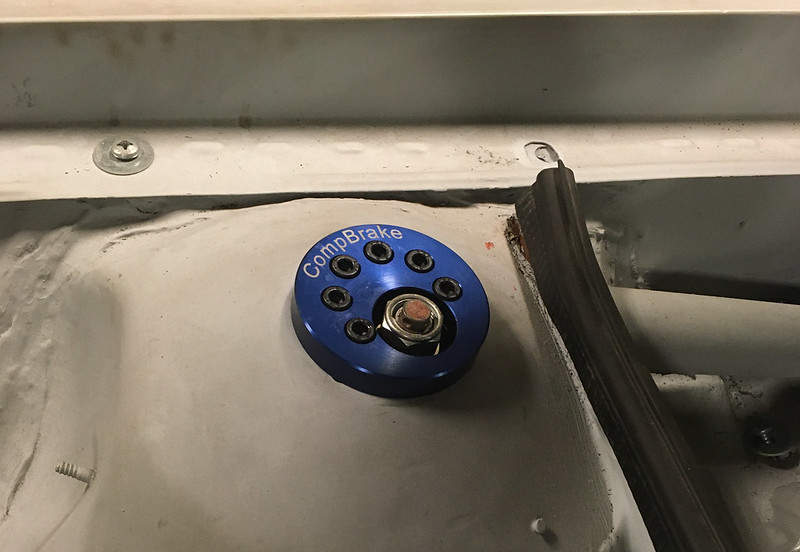
Rear is non-adjustable be we could have used the front ones here too.  Paul Eddleston BRAID Wheels USA www.BRAIDUSA.com Team Illuminata Motorsport www.teamilluminata.com |
BRAIDusa Paul Eddleston Godlike Moderator Location: Birmingham, Michigan Join Date: 09/06/2012 Age: Ancient Posts: 554 Rally Car: Subaru Outback Wagon EG33, 911 Carrera |
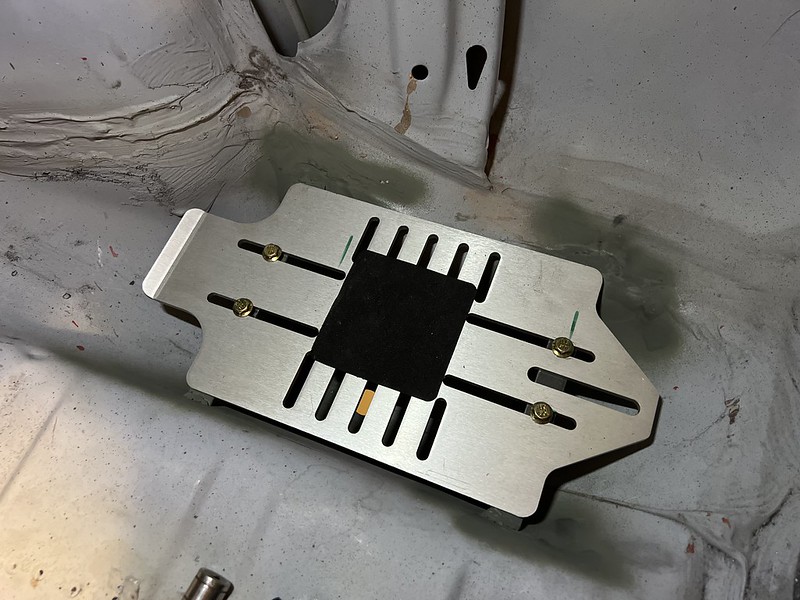
As there’s no carpet anymore and the floor is pretty uneven we took another cue from the Group B cars and built what we’re calling a “heel plate”. This raises the drivers feet a bit and gives a lip for the heels to rest against. Of course we tried to copy the Group B version as much as possible. We only hope it’s in the right place!
First some Cardboard Aided Design, of course, followed by copying the shape in ally sheet. 

Then the tricky bit; bending it up without a brake. The template we made helped. 

And the finished article. We have a little fore and aft adjustment so it’s just on two self tappers for now. 
We also installed the Sparco trunk latches. We were surprised to see the works cars put them right in the corners but we couldn’t put ours there because of the bumper brackets we’d had installed. So we put them more inboard by adapting some existing holes 


 Paul Eddleston BRAID Wheels USA www.BRAIDUSA.com Team Illuminata Motorsport www.teamilluminata.com |
BRAIDusa Paul Eddleston Godlike Moderator Location: Birmingham, Michigan Join Date: 09/06/2012 Age: Ancient Posts: 554 Rally Car: Subaru Outback Wagon EG33, 911 Carrera |
While we were in there (the trunk) we decided to mount the battery. We selected a medium sized AGM version from Odyssey and a battery mount from Rennline. We just needed to create a platform for them to site on. There’s a spare tire sorta depression on the right side so we welded some bars across that to mount the bracket too. Looks like it belongs there.


We also got the horns mounted and the period correct roof antenna, which we won’t be needing but wanted anyway. It’s 5 feet long? 
Paul Eddleston BRAID Wheels USA www.BRAIDUSA.com Team Illuminata Motorsport www.teamilluminata.com |
BRAIDusa Paul Eddleston Godlike Moderator Location: Birmingham, Michigan Join Date: 09/06/2012 Age: Ancient Posts: 554 Rally Car: Subaru Outback Wagon EG33, 911 Carrera |
More Power! (steering)
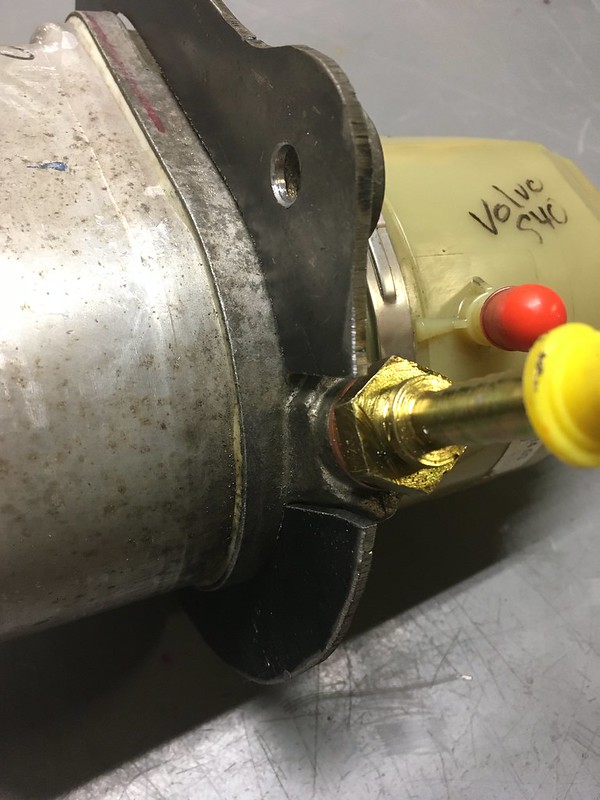
We may have mentioned, some time ago now, that our engine packaging approach left us without power steering and that we planned to solve this issue by installing an electric power steering pump from a Volvo. Well we recently got around to actually installing it. This is our pump: 
And we need to install it behind the radiator which, in these cars, is off to the side of the engine not in front of it, where there is a surprising amount of room. As it’s going to sit above the left engine mount we hit upon the idea of supporting it vertically on stilts cunningly fashioned from threaded rod and bracing it off the inner fender with some sort of bracket arrangement. The pump gives a savage kick when starting and weighs quite a lot so there are some serious forces to be controlled. We procured some OE Volvo bushings and said threaded rod and starting mocking things up. 

Then we thought “This might have legs” and carried on with trying to brace it from the inner fender. At first we tried one arm that we thought we’d bolt to the fender or chassis leg. 
But we soon realised the twisting forces this thing develops would easily overwhelm this so we mocked up what might be considered more of a cradle and figured out ways to attach that to the inner fender. 
This was obviously much better so we committed it to metal and forged ahead with figuring out the attachment points. 

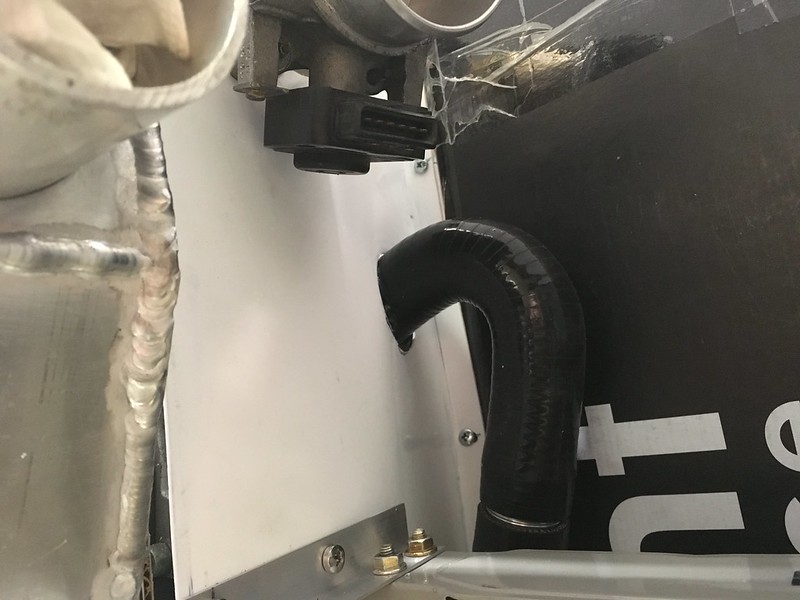
We soon realised that our cradle would interfere with one of the oil line fittings so we cut a slot out and bridged it with a bend. 


Job done. We only hope it works. Paul Eddleston BRAID Wheels USA www.BRAIDUSA.com Team Illuminata Motorsport www.teamilluminata.com |
BRAIDusa Paul Eddleston Godlike Moderator Location: Birmingham, Michigan Join Date: 09/06/2012 Age: Ancient Posts: 554 Rally Car: Subaru Outback Wagon EG33, 911 Carrera |
Light at the End of the Tunnel, or Hood...
We have been picking away at this project fairly consistently this year and we are beginning to sense the end is nigh. At least in terms of the dry build phase. If we are feeling generous, we could probably convince ourselves we that we only have two things left to do: all the wiring and all the bodywork! Plus, this stuff below. 2023 got going with a visit from Ryan Thompson, owner of TRF, one of the country's premier rally car builders and the chap that built our cage. We wanted to move the driver's seat forward and up and Ryan insisted he do the bracket welding. We did not argue with him. 

Next, we thought we'd have a go at the hood pins. We'd been holding off on these as we’ve been using the slots to hold our makeshift work light so before we could begin on the pins, we had to buy a proper under hood work light. 


We like speed holes. Who doesn't? So, we added some; first to the B-pillar gussets and then to the A-pillar gussets. 


Next, we finally removed the ugly residue of the handbrake bracket. We drilled out all the spot welds and then welded up the hole. I wonder what we'll install on this newly flattened surface. Cup holders? 
 Paul Eddleston BRAID Wheels USA www.BRAIDUSA.com Team Illuminata Motorsport www.teamilluminata.com Edited 1 time(s). Last edit at 03/02/2023 09:16AM by BRAIDusa. |
BRAIDusa Paul Eddleston Godlike Moderator Location: Birmingham, Michigan Join Date: 09/06/2012 Age: Ancient Posts: 554 Rally Car: Subaru Outback Wagon EG33, 911 Carrera |
Radiator Shrouds!
The ancient art of ducting cold air through the radiator is shrouded in mystery. We were fresh out of mystery so we used ABS sheet instead as it's malleable and we had a lot of it lying around.. 
With a bit of heat and some persuaders it can actually be formed into 90 degree bends! 


We were pleasantly surprised how it came out, except the top piece looked too white so we covered with a piece of faux carbon fiber film for now while we come up with a better solution.. 
Paul Eddleston BRAID Wheels USA www.BRAIDUSA.com Team Illuminata Motorsport www.teamilluminata.com |
Sorry, only registered users may post in this forum.
Rally Anarchy © 2014 Corvus Digital –
Part of the AutoShrine Network –
Problems? Send an email to the Webmaster