
PNW E36
Posted by LooseEntry
LooseEntry Sage Van Tilburg Mod Moderator Location: Seattle Join Date: 02/05/2021 Age: Party Animal Posts: 5 Rally Car: E36 |
Howdy,
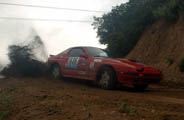
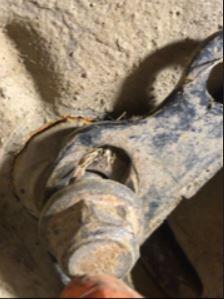
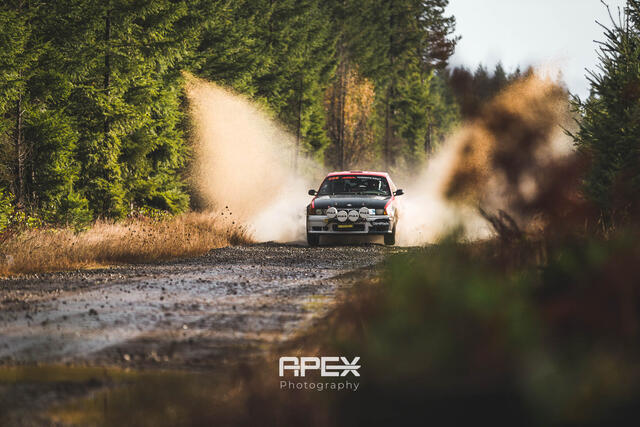
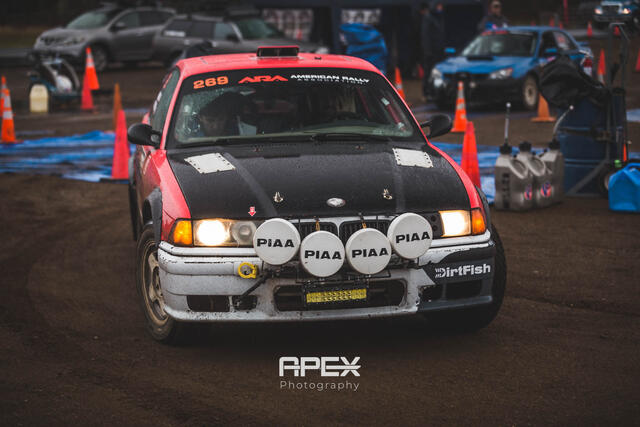
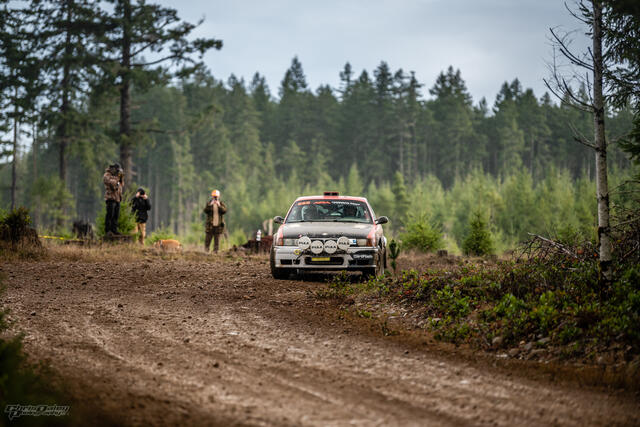
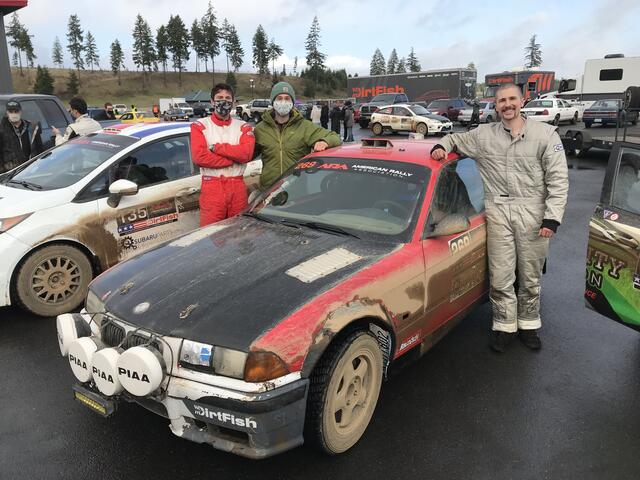
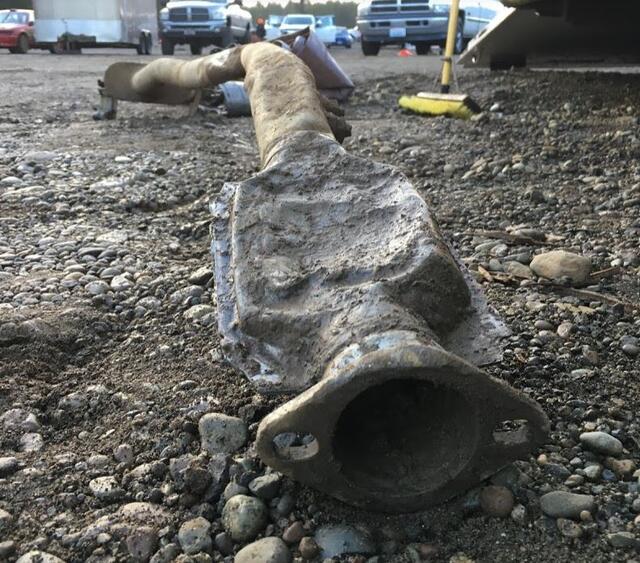
I have learned a lot from other people's build posts and forums are a great way to document things, so here I am! This will also get some other eyes on what I'm doing, which is always appreciated. Quick background: This is Dave Kern's old car, which I bought in 2020 from the guy he sold it to. I didn't get too deep into anything that year, just updated some safety gear, fixed some basic items, ran a few RallyXs at dirtfish, before running (and finishing!!) Olympus! So from here on out the plan is to conduct some reprep, repairs, and maybe some choice improvements. Tentative plan is to run at least Olympus and TDF this year, and I'm thinking a bit about a few others... Big ticket items so far coming out of Olympus: -Alignment, fluids, new rear pads, etc. etc. -LR wheelbearing is very loose -Famous E36 trailing arm threaded insert failure (the crack has realized it's full propagation potential, and the insert is now completely separate from the rest of the car). I will reinforce both trailing arm mounts and the 4 subframe mounts while we are in there -Fabricate a new exhaust. Ours came off on the first running of Nahwatzel. My crew chief effected a successful repaired with a spare exhaust flange, steel wool, and chicken wire as pictured below (which actually quieted the car down a TON inside). Suspected root cause: I am pretty good about getting bolts tight (knock on wood), and this flange was no exception... before Olympus, the exhaust was out while I did the throw-out bearing, and I noticed the cat was COMPLETELY hollowed out and gutted. So in the (foolish?) interest of rules compliance, I cut that one off and had a friend weld a new one on. Unfortunately, the flanges ended up just a few degrees off after, which seemed fine once I stacked a few more exhaust gaskets in between the flanges, and it appeared adequate (if slightly leaky) and everything felt tight and sturdy. I think what happened is that, as we were hitting yumps and bumps and catching a bit of air, the exhaust was bouncing and pivoting in such a way that the previously gapped flange ends met, removing preload on the bolts and causing the nuts to vibrate off. I know for a fact the muffler hangers were still attached while the front of this exhaust section was dragging on stage, and eventually the whole thing ripped off. I'm pretty if I had used Nylocs instead of re-using the old nonlocking hardware, this could have been avoided. There is actually quite a bit I have already fixed, so I will trickle some of those pictures in as I update this thread with more "current" events. -Sage Edited 2 time(s). Last edit at 02/06/2021 11:00PM by LooseEntry. |


RALLYRS Mike Ball Junior Moderator Location: Simi Valley,Ca. Join Date: 07/15/2011 Age: Ancient Posts: 466 Rally Car: Nope...I wish...RWD 2 Door Jeep XJ 4.0 5-spd Dirt-o-cross car(we have no grass!)2.3 ZX3 rallyx car(sold) |
Thanks for posting.
Yes that's some sad looking exhaust! Haven't logged in a long time here ..of course everyone is on farsebook(I hate it but signed up because that is where everyone is-but the format/layout of that place fucking sucks ass)... Anyway..post some more pics of the car when you can. ................................................. ..................... Support your Local North American Rally Forum!! While they are still around-and get the hell off Farsebook!! We still have Specialstage & RallyAnarchy. Post up Here: https://rallyanarchy.com/phorum/posting.php and here: https://www.specialstage.com/forums/forum.php |
LooseEntry Sage Van Tilburg Mod Moderator Location: Seattle Join Date: 02/05/2021 Age: Party Animal Posts: 5 Rally Car: E36 |
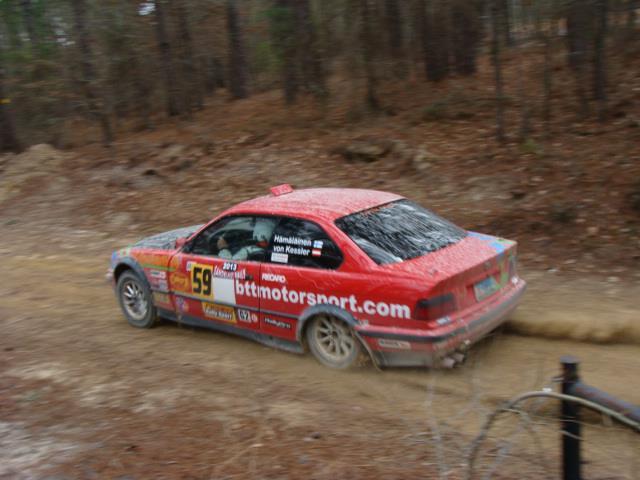
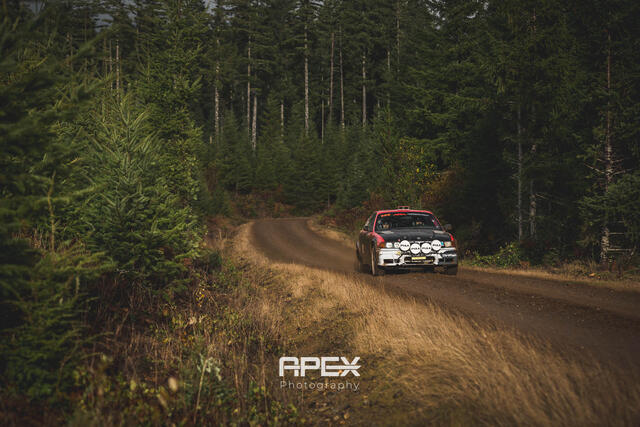
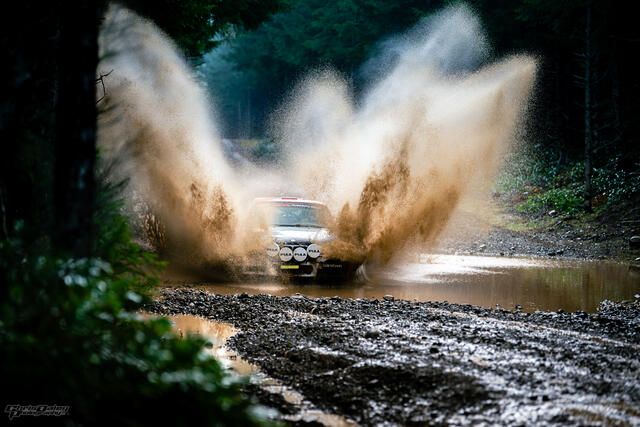
Mike, pics attached! All from Olympus (the Apex ones are posted w/ permission).
I agree on all counts regarding FB. Beyond the normal "social media" difficulties, I really detest the way info gets stored on the site (it's easy for convos to get lost, hard to follow comment threads, poor searchability, lots of riff raff, etc.). I know it's pretty quiet around here, but hopefully it's still valuable to post, even if people aren't directly engaging. Maybe some of this stuff is getting read and people can learn form the mistakes I end up making! In addition to the pics, here is some footage from Olympus for all my loyal Rally Anarchy fans: I make no claims that any of that is very exciting, but at least around 3 mins you can see us hit a bump at triple digits and land on the front bumper which should be somewhat entertaining. |


Mad Matt F Matt Follett Junior Moderator Location: La Belle Province, Montreal Join Date: 03/13/2006 Age: Midlife Crisis Posts: 645 Rally Car: Don't Laugh, the Justy is Fun! |
|

aj_johnson A.J. Johnson Ultra Moderator Location: Pendleton OR Join Date: 01/07/2011 Age: Settling Down Posts: 1,381 Rally Car: 88 Audi 80 |
|
Rallymech Robert Gobright Infallible Moderator Location: White Center Seattle Join Date: 04/27/2008 Age: Possibly Wise Posts: 1,292 Rally Car: 91 VW GTI 8V |
|
LooseEntry Sage Van Tilburg Mod Moderator Location: Seattle Join Date: 02/05/2021 Age: Party Animal Posts: 5 Rally Car: E36 |
@AJ: Hi AJ!! Don’t tempt me… You should make a thread and throw up a few pics of your current project (was it a Z-car?)! I know it won’t be for stage, but I remember you mentioning maybe taking it to a hillclimb or two so perhaps it qualifies… you won’t exactly be clogging up these wildly active, bustling forums either way
 Regarding the suit, luckily Peter was able to get outside the car when he lost that morning’s breakfast (after the first loop) so your gear suffered no biological contamination. Regarding the suit, luckily Peter was able to get outside the car when he lost that morning’s breakfast (after the first loop) so your gear suffered no biological contamination.
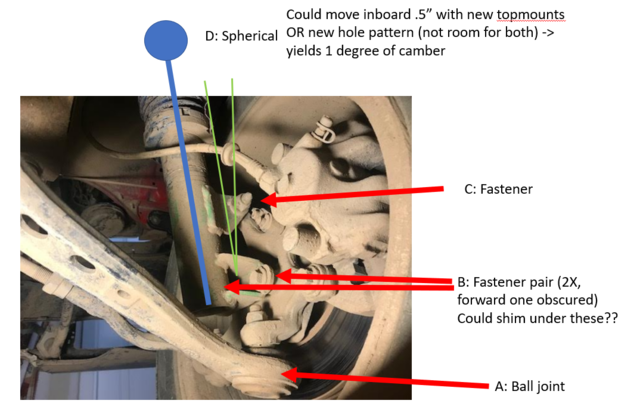
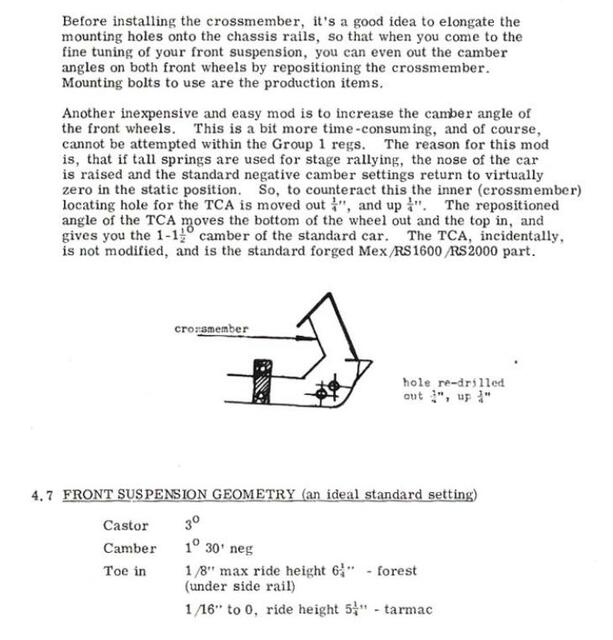
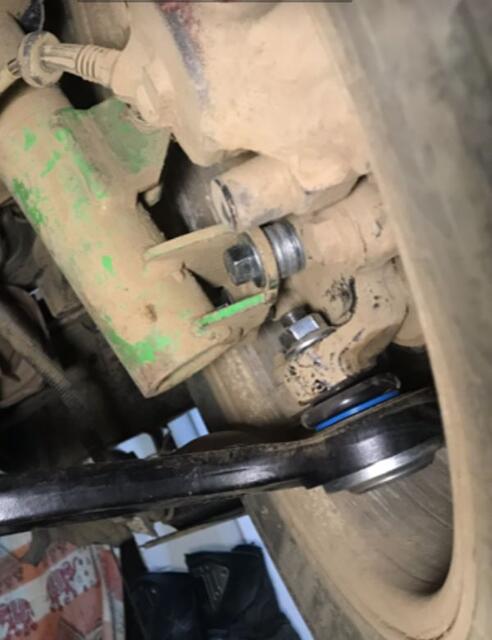
@Robert, you were codriving for Larry Clark? We were right behind you in the running order all of Sunday! I would have said hi, but we had a lot on our plates and were usually scrambling to figure out one thing or another when we were waiting before each ATC. How was your Olympus?? My first few progress updates will mostly be getting caught up to current times, but I only really started reprep in late December, so at least what follows isn’t completely ancient history: One of the first things I did was start evaluating the alignment. The car drove pretty straight before and seemed to handle ok, so I don’t have any pre-Olympus figures (I was solely focused on safety stuff, passing tech, and avoiding mechanical issues at the time). All alignment units that follow are in degrees. Rear camber (using a string and a socket) looked good (0.00 left, -0.30 right). I didn’t check rear toe as the trailing arms were coming out anyway for chassis repairs and reinforcements. Front camber was.. not so hot... (+0.74 left, +2.30 right!!). I measured the LCAs to see if that was the culprit. Side to side was off by 2.4mm (from frame to pickup point on the upright). Noticeable, but that should’ve only accounted for 0.2 degrees discrepancy, and the sides differed by 1.56 degrees in total! Well, I figured the first step was to replace the LCAs anyway. But, I figured absolute best case is: that will shift everything more negative, and the sides will be closer together, but still likely off to each other by 1.36 degrees (long story short I was correct, new LCAs did not make a big difference). The top hats both looked very even with respect to the shock towers, certainly negligible camber-wise. With the cause still unknown, the only other options for adjustment I'd thought up were: 1) Shift the top hats inward. Either get new ones milled, or drill a new hole pattern in the tower. Both towers already have a welded plate reinforcement on the bottom. However, I was limited on both the top from the spherical housing and the bottom from the weld plate to shifting the sides around 12.5mm, which would garner -1.00 degrees of camber. I could get creative with material removal on the top hat and weld plate to try and get more.... 2) Modify the lower pickup points on the shock somehow... seems like a pain, not adjustable 3) Shim the bolts at "B" (see “Advanced Diagram 1” below) to change the kingpin angle. 5mm of shimming here would yield -1.85 degrees of change in static camber, which is not too bad. My concern was that, where previously there was a nice parallel bolted joint, I would lose the parallelism as now the mating surfaces would be around 2.7 degrees off, which made me a bit nervous (joint stiffness might suffer, meaning less longevity in the alignment, and possibly fatigue issues in the bolts). I should also note that I only considered this option given that the JVL tophats have a proper spherical with enough angular travel, as this approach seems extra unwise for other “stock” strut mounting styles I have seen with just a thrust bearing and bushing. At this point, I decided to reach out to my local Volvo advocate and suspension manufacturer, who suggested I consider moving the rearmost LCA mount as prescribed in some old Escort documentation - snippet attached. Unfortunately the way the arm is positioned I wouldn’t gain much camber (if any), mostly just caster and the mount would be a biiiiiig bear to relocate. So, option 3! I had already sketched things out to figure out some of the above, so I did a quick check on tire clearance (looked good) then proceeded to shim the bejesus out of the lower right mount, and used longer fasteners. The left side needed much less adjustment. CAD (screenshots below) may seem like overkill, but this is my first time digging into McPherson suspension so it was a good learning experience and super useful for me to play with adjustments and see the effects, and also look at the camber gain through the travel and play with adjusting the top mount location vs. shimming. I just made some rough overall bump travel estimates. I don’t remember if I accounted for the helper spring, and I don’t know when the internal bump stop will engage, but it’s moot as the minimum tire clearance against the spring happens at full droop. There isn’t any noticeable gapping in my shim stack on account of the angle change of the mating surfaces, but I will monitor as I drive around town and I can switch to aluminum for more deformability, or machine something that matches the exact angle if I need, but I will plan to run with this as-is for now. Thus concludes the camber debacle I hope. The root cause of why everything was so positive is still unknown. If anybody has other clever ideas or thinks this enormous stack of washers is a ticket to suspension failure, please make yourself known! -Sage |


wvonkessler Wilson von Kessler Mega Moderator Location: Lookout Mountain, GA Join Date: 02/28/2006 Age: Possibly Wise Posts: 1,127 Rally Car: Colts are in Finland; now '87 325i, '89 325i |
Sandblast 2013 - Jari built that car. It's got M3 cams and an M50 intake. Diff broke on us.
"Talk about drugs. Driving a car like that, going that fast, it’s like all the drugs at once." - Tommy Byrne "Now, Pinky, if by any chance you are captured during this mission, remember you are Gunther Heindriksen from Appenzell. You moved to Grindelwald to drive the cog train to Murren. Can you repeat that?" - The Brain |
Have you checked the lower strut brackets to see if they're a bit off when compared to a stock strut? Seems like that's the first thing to check. Also, are you using 40 or 50mm inserts in the struts? The large stack of washers is a little excessive, but it's not hurting anything as long as the knuckle bolts stay tight. That's probably about double the stack compared to what I usually see on E36s... On the front end, replacing the FCAB (front control arm bushing/bearing) with a rubber filled offset one will gain you a bit more camber, and then using M3 top mounts will allow for more caster so the car will track straighter and the tire will gain slightly more camber on turn-in. The FCAB mount in the chassis likes to tear out when a spherical or delrin bushing is used. The giant rubber ones are cheap-ish and allow for enough shock absorption to keep things happy, look s like you have the "small" rubber mounts or something aftermarket. For the rear, keep the camber as close to zero as possible, and run a smidge of toe-in so the car will actually accelerate when the back end is out and you pick up the throttle. If you want to get real nerdy on what makes a e36 chassis fast in rally, talk with Derek Nelson. |
Sorry, only registered users may post in this forum.
Rally Anarchy © 2014 Corvus Digital –
Part of the AutoShrine Network –
Problems? Send an email to the Webmaster