
Evo Build
Posted by DaveK


DaveK Dave Kern Professional Moderator Location: Centennial Join Date: 07/11/2008 Age: Midlife Crisis Posts: 1,085 Rally Car: Compact M3 & Evo IX |
Jumping forward in the build log to things we're doign for the 2012 race:
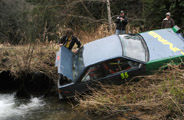
With Pikes Peak finally being a 100% paved race this year, we thought it might be time to try and make room for some bigger rubber under the car. Of course also helping make the decision was the fact that the rear quarter panel was still damaged after last year's hit into the guardrail. Read on for what I've been up to over the last 4 weekends. So, lets start off with one last picture of the car with the 2011 livery, and if you look closely, you can see that rear quarter punched in: 
New rear panels were selected so that they'd allow for more tire, not be too wide should we want to run rally tires again, and bonus points for covering up that damage without requiring that the damaged get fixed first: 
After some more careful test fitting we determined the body panels aren't going to fit nicely to the car. Since I'm only concerned with getting temporary fitment, I want to be able to counter sink screws into the body panels. They're thin, so that's not really possible. My idea was to add some material to the hollow back side so I can then counter sink the screws. Here you can see pics of the resin I added: 
Sanding begins and the project is underway: 
Here's how day one ended. Panels screwed and glued onto the car: 
I didn't like the way the kit ended a two different heights on either side of the door opening, so decided that I'd just blend it all in together. I must officially be the slowest person ever at doing body work. Here's what it looked like after the first few applications of bondo: 

I started with regular bondo, then as I got closer to being happy with it, I switched over to glazing compound. Much smoother stuff and doesn't feather nearly as bad during the spreading process. Here's what it looked like as I ended the day:
My buddy Josh suggested that once I was pretty happy with what I'd done, I should hit it with a coat of paint to see if there were any imperfections. Damn...this technique works well...too well. 
So, it was time to get back to work: 
And after being pretty happy, it was time for another bit of paint: 
More body work...I'll admit this was way more work than I'd been bargaining for. Oh well, gotta finish it, there's no turning back, gotta make it look good: 


I think this ones sorta interesting as you can see that now I've just got a few spots I'm still cleaning up vs. the first pic in this post where there were lots of fixes: 
And, here's where I ended the weekend. Looking much better, but still a few spots needing some more TLC: 
Another day and more work: 
Was pretty happy with how it turned out on the last coat, so figured it was time to try a quick wet-sand. It may not be perfect, but I think I'm going to call it good enough for a race car. 
Haven't snapped any pics of the passenger side, but I've been working on that as well. Here's a shot where I've done the primer, then gone back and circled any of the problem areas with a sharpie. 
The body looked good in primer, so I went ahead and broke out the red paint once again. 
Turned out ok, but painting in a garage isn't the same as painting in a paint booth. Ended up with little bits of dust in the paint, so to smooth the surface I started with 800 grit and moved up to 2500 to finish it off. Ended up pretty smooth, so lets hope its good! 
I need to send a big THANKS to Josh for swinging by to help out numerous times and for all the tips/tricks. Turns out that building two custom Redbull SoapBox cars from scratch makes for an expert. So, that wraps up the body work portion of this project, check back later for updates on the next part of the project or if you want to get your hands dirty and see how it all gets done, give me a shout. Dave |
DaveK Dave Kern Professional Moderator Location: Centennial Join Date: 07/11/2008 Age: Midlife Crisis Posts: 1,085 Rally Car: Compact M3 & Evo IX |
Hopefully you've already checked out part 1 where I showed just how much work went into getting the Evo's body all cleaned up. This installment will cover what is involved with building the mold.
First I filled the door jams with foam and taped it all off: 
Then the whole area got waxed and buffed - 8 times!?! Thanks Allison! Next we lined the area we'd be working with using clay to keep the resin from getting everywhere. Finally PVA mold release was sprayed across the whole area. 
Fiberglass work begins: 
Just about done with the first layer: 
Finishing up the fourth and final layer: 
After letting it dry for a week, we set about removing it from the car. Just one little hiccup, and it fell off onto the ground: 
Got the rough edges trimmed up and spent some time washing off the mold release and any leftover bits of clay: 
Last step is to make sure the mold doesn't try and twist when we're actually making parts, so we built a frame for it and bonded it right to the ouside of the mold. This picture is about half way done, we put more glass down so its on there rock solid now: 
Thanks for checking it out - next up - making lightweight parts! Dave |
DaveK Dave Kern Professional Moderator Location: Centennial Join Date: 07/11/2008 Age: Midlife Crisis Posts: 1,085 Rally Car: Compact M3 & Evo IX |
Even with all the work in the last writeup, the molds still needed a little bit of TLC before we could make parts. More sanding was done on the surface of the mold and I laid down some primer and then did a wet sand to get it smooth again. Here it is all done:

After realizing that the sharp edges were prone to catching the dry cloth, we taped up all the edges. We also determined that the molds weren't really suitable for vacuum bagging, so we decided it would make life much easier to cut the carbon cloth into several pieces so it'd be easier to work with and ensure it contoured to the surface. Here's a shot of the cloth pieces all laid up in the spots where they'll end up: 
And here's the inside layer: 
Here's a shot of us just about finished up. We've laid in some peel ply, so if the panel isn't stiff enough, we can go back later and add some more material. 
So, how'd it all turn out? Its not perfect by any means, but its a panel in the correct size and shape which is lighter than what it's replacing. We'll probably end up covering it up with vinyl and/or graphics, so fitment is more important than looks. 
Thanks for reading! Dave |
Rallymech Robert Gobright Super Moderator Location: White Center Seattle Join Date: 04/27/2008 Age: Possibly Wise Posts: 1,292 Rally Car: 91 VW GTI 8V |
Looks good!
A few tips: I use high build primer in a spray can to check surface finnish. Never try to paint over Sharpie marker! You acutually have to sand it all the way off first. Compressed air works good for realeasing a part from it's mold. Robert. "You are way too normal to be on Rally Anarchy." Eddie Fiorelli. |
phlat65 Sean Medcroft Infallible Moderator Location: Edmonds, Washington Join Date: 02/12/2009 Age: Possibly Wise Posts: 1,802 Rally Car: Building a Merkur |
|
john vanlandingham John Vanlandingham Senior Moderator Location: Ford Asylum, Sleezattle, WA Join Date: 12/20/2005 Age: Fossilized Posts: 14,152 Rally Car: Saab 96 V4 |
Except its fine to spray over Sharpie, it comes thru the finish coat quite legibly.. When I worked on fiberglass I'd but the primer for boats. Boats are big and gotta do a large area and need to look good, shit sprayed on like interior latex enamel, sanded quick, looked good, hide a multitude of sins. John Vanlandingham Sleezattle, WA, USA Vive le Prole-le-ralliat www.rallyrace.net/jvab CALL +1 206 431-9696 Remember! Pacific Standard Time is 3 hours behind Eastern Standard Time. |
DaveK Dave Kern Professional Moderator Location: Centennial Join Date: 07/11/2008 Age: Midlife Crisis Posts: 1,085 Rally Car: Compact M3 & Evo IX |
One of the areas I'm really trying to focus in on this year is improving the Evo's handling. Last year we swapped to some road race dampers but got rained out on our one planned testing day, so when we showed up for Pikes Peak week, the car was far from ideal. We managed to make it work reasonably well, but I know there's more time locked up in optimizing our setup.
After our crash last year on race day, I knew there was alot of stuff that needed to be fixed: 
I got all the dampers fixed and/or replaced last fall, so now to order up some parts to compliment the shocks. First up is some new springs: 
Next up is a larger rear sway bar. Factory is a 22mm unit, and this one is about 25mm and its got 3 different positions to choose from. I also installed adjustable end links: 
The front sway bar is a bit more of a chore. To do it the "easy" way, you drop the front subframe a few inches. Having a lift really makes this much simpler: 
With the subframe out of the way and giving a little extra clearance, the OEM bar slides right out. Here it is next to the new Tanabe hollow sway bar: 
Subframe brace added which ties the front and rear mounting points of the control arms together: 
Next up was to install the Whiteline Steering Precision Kit. Fancy words for replace rubber bushings with urethane. A few of the OEM bushings needed to get pressed out, but rather than remove the whole steering rack from the car, we worked up a makeshift press: 
One of the things I didn't like about the shocks is that they didn't allow for as much adjustment at the hub spindle as my Ohlins rally shocks, so after a trip to a buddies machine shop, the Ohlins eccentric washers fit in there perfect: 
Camber plates + camber adjustment at the hub mounting points = this much maximum camber: 
Hmmm, looks to me like we've got plenty of room to stuff more rubber under the front end since that's last year's setup with a 20mm spacer. 
Thanks for reading! Dave |
Dazed_Driver Banned Super Moderator Location: John and Skyes Magic Love liar Join Date: 08/24/2007 Posts: 2,154 |
|
DaveK Dave Kern Professional Moderator Location: Centennial Join Date: 07/11/2008 Age: Midlife Crisis Posts: 1,085 Rally Car: Compact M3 & Evo IX |
|
fiasco Andrew Steere Elite Moderator Location: South Central Nude Hamster Join Date: 12/29/2005 Age: Possibly Wise Posts: 2,008 Rally Car: too rich for my blood, share a LeMons car |
Hahahahaha!!! Well, to do it right, he'd need to put some C4 Corvette wheels on it and some 195/35 tires on it to be properly "stanced." Andrew Steere Lyndeborough, NH KB1PJY |
DaveK Dave Kern Professional Moderator Location: Centennial Join Date: 07/11/2008 Age: Midlife Crisis Posts: 1,085 Rally Car: Compact M3 & Evo IX |
Realizing that running a full flat bottom on the car presents some hurdles from the exhaust heat side of things and recognizing the freedom of the Pikes Peak International Hill Climb rule book meant that we needed to revisit the exhaust routing for 2012. I decided the easiest way to deal with the exhaust routing over the flat bottom panels would be to simply remove the exhaust from those areas. Some races require that the exhaust exit out the back, some specify that you must have it exit behind the driver...Pikes Peak has no such rule and simply states "Exhaust System - Open", so...what to do, what to do?
Ordered up parts for the new shorter exhaust: 
Got the turbo all bolted back up to the engine after having it checked out by sponsor TiAL Sport. Figured after the guard rail hit and the fact we run hard piping might've meant turbo damage, but it seems we dodged a bullet on that one: 
Here's Scott doing some TIG welding: 
Knowing that heat management is important for a turbo exhaust, I've taken a few precautions. Up first is covering most of the piping in a ceramic/aluminum heat barrier: 
I've also added reflective tape to the top of the splitter in any spots where the exhaust is less than 2" away. And finally, here's a view looking up the pipe - yes, that is the exhaust wheel you can see and boy does it sound rowdy! 
Thanks for reading! Dave |
DaveK Dave Kern Professional Moderator Location: Centennial Join Date: 07/11/2008 Age: Midlife Crisis Posts: 1,085 Rally Car: Compact M3 & Evo IX |
|
DaveK Dave Kern Professional Moderator Location: Centennial Join Date: 07/11/2008 Age: Midlife Crisis Posts: 1,085 Rally Car: Compact M3 & Evo IX |
Guys at MotoIQ.com did a writeup on the car:
http://www.motoiq.com/magazine_articles/id/2900/nerds-eye-view-the-kerns-pikes-peak-evo-ix.aspx Not a ton of new info, but they take much better pictures than I do. 
Dave |
DaveK Dave Kern Professional Moderator Location: Centennial Join Date: 07/11/2008 Age: Midlife Crisis Posts: 1,085 Rally Car: Compact M3 & Evo IX |
Bit of a dreary Monday here in Denver, so what better time than to release the video of my run up Pikes Peak. LOL It wasn't the 9:5x run that we'd been shooting for, but I can say without a doubt this was probably one of the sketchiest things I've ever done in a car. This year's run was about a full minute faster than Allison and I ran back in 2009 under similar weather conditions...so its a testament to a car that keeps getting faster and faster.
Have to give a huge shout out to the companies that helped make the car what it is today - AMS Performance, Turbo By Garrett, Continental Tire, TiAL Sport, ShepTrans, COBB Tuning, Manley Performance Products, Inc., Essex Parts Services, Inc., ENKEI WHEELS, Kelford Cams, Revolutions Performance |
DaveK Dave Kern Professional Moderator Location: Centennial Join Date: 07/11/2008 Age: Midlife Crisis Posts: 1,085 Rally Car: Compact M3 & Evo IX |
I've got some catching up to do with this build thread, but for anyone curious on details of how PPIHC week 2013 went, here's the writeup - (click the link if you want to see pretty pictures, or if you're the reading type, the same text is pasted in below):
http://racekern.com/lucky-number-7-pikes-peak-2013/ Preparations for Pikes Peak went well – we didn’t have a lot of adjustments and what was slated came together without much issue. I always wonder if that is a precursor for what Peak Week will be like, or simply the calm before the storm. I suppose it was a bit of both. It certainly wasn’t our worst year on the mountain, but the week also did not pass without its share of complications. The good news is you learn to expect the unexpected at Pikes Peak and after 7 years we’re officially assimilated. Come prepared, roll with it, work your ass off and hope for some luck is the formula. The week started as it always does with technical inspection. We breezed through. The schedule changed a bit this year. As I understand it, competitors were requesting at least 1 practice day before they had to qualify. I was indecisive on the added day – more practice always sounds good, but it was just 1 more day we had to get up miserably early to get up on the mountain. In the end, it was mostly a cluster. Instead of the typical groupings created for practice days that lends to at least 2 practice runs, all cars were grouped together and vied for a spot on the start line for practice. We got just 1 run. There was something good that came from this day. It was Dave’s first time in the car without me as co-driver at Pikes Peak. The transition was more than both of us had expected. Dave knows the road well, but it’s just a different approach to racing. He used Tuesday practice to re-adjust his mindset to run it solo. Our illustrious tuner Mitch rolled into town Tuesday morning (regular morning, not “Pikes Peak†morning). The Evo went on the dyno for a little tune up. The car was running great. Wednesday was Qualifying for the Time Attack class. We qualified 4th which is where we had expected to be. Dallenbach was in RMR’s Genesis which beat us by a healthy margin last year. Donner and Zwart were both in Porsche Cup cars, and Zwart’s was “snail-enabledâ€. Not to mention all 3 are very talented and experienced drivers. It’s so great to see manufacturers take interest in the race, but it also relegates folks like us to expecting and being happy with a 4th place position. Props to Pikes Peak rookie David Rowe whose fast Evo and skilled driving made us really worry about securing that 4th position! Thursday we were up in the middle section. Nothing to report there, things went well. Possibly of some interest, I did notice that Dumas’s Norma was struggling a bit with clearance (there was a bump in the asphalt at the start of the mid-section practice). While the name of the game is “get low†on the tarmac, Pikes Peak is still a road and not a track. Last day of practice was the top section. I wish I could say Friday was uneventful. After the first run Dave came down confused and displeased. The car had a developed a misfire. The Evo had been running a little lean, and our first thought was that at the higher altitudes it had worsened; Mitch adjusted the air/fuel ratio. This didn’t have much of a positive effect. Not only was the misfire still happening, but it was erratic and not providing any clues to help narrow down the source of the issue. We came down off the mountain and spent a little time trouble shooting, but the car had to be at Fan Fest by 3 pm. It’s always great to see everybody and hang out, but the issues we encountered that morning loomed. A storm rolled in and poured down rain … Fan Fest was almost fan-less by 9 pm. The crew was up and at it early (regular early not “Pikes Peak†early). We set up shop behind the hotel (I love our new tent!). The team scoured the engine looking for possible issues leading to the misfire. The wiring harness was scrutinized and Mitch tweaked the ECU map. This went for about 15 hours straight. Dave isn’t one to give up. After the residents of the hotel were no longer captivated by race cars and were instead annoyed, he loaded the car on the trailer and went to a remote location to see if the latest round of tweaks had made things better to make a go, no-go decision. The misfire had in fact gotten worse, and as we went to bed on Saturday night before the race, the prevailing opinion was that the car shouldn’t be raced on Sunday. The car was supposed to be on the mountain in our pit location by 6 pm on Saturday, we didn’t make it. This didn’t preclude us from racing, but it meant we had to contend with all of the spectators trying to get on the mountain on Race Day. If I called first day of practice a cluster, this would have to be a supermassive blackhole. We sneaked in behind the ambulances that happened to arrive at a similar time and followed them up to the pits. It was about 3:30 AM at this point and we slept a little bit in the truck. The thought was we’d get up at day break and thrash as long as we could before Time Attack had to take the start line. The bikes were supposed to run, and then be paraded down before the cars. We had been working all morning still trying to locate and kill the misfire. As always, many folks in the pits were extremely helpful and knowledgable, but nothing was making a material improvement. Then we got news they weren’t bringing the bikes down, meaning our time to get on the start line was getting very close, only Unlimited preceeded the Time Attack class in run order. I was sitting in the front seat of the car, acting as B.B. (blipping the throttle on demand to see if whatever shimmy or tweak that just took place had made an improvement), when Mitch literally shook part of the wiring harness and it seemed to effect the idle. Mitch narrowed down the culprit wires and we cleaned those up. We revved it a few times and it honestly sounded better. Where the engine was laggy at lower RPMs and continued to be through higher RPMs, it was now primarly misbahving only at the higher RPMs. No one was particularly satisfied, but we shut the hood, and agreed it was race-able. No sooner than we had breathed a sigh of relief the clouds starting rolling in. Though it was looking genuinely nasty near the top (you have a spectacular view of the top of the mountain from the pits), based on the weather where we were Dave rolled out onto start line staging area with his Continental dry slicks. I had joked with Dave that since I wasn’t in the car I would be his umbrella girl at the start line. I got like 3 minutes of umbrella time, my career was over before it started. The rain started shortly after Dave left the start line. It got worse steadily as he gained elevation and at about the half-way point the hail started. That was about the time he tells me he really started wishing for our back-up rain tires (in our truck, mounted and ready). Cold slicks and standing water on the course meant by the time he neared Devils Playground the steering wheel stopped being effective. Luckily our Evo started life as a rally car and has a hydraulic hand brake. Any corners steeper than about 90 degrees required the gentle use of the handbrake to help coax the back end of the car around and help the car get pointed down the next straightaway. By Boulder Park all that extra work inside the car meant the windshield started to fog up. With a head restraint seat and HANS device there’s really no slack in the system to try and see out the middle of the windshield, so Dave said he had to start paying attention to “color blobs†for directional input. Luckily (or unluckily) there’s some fresh pavement as you near Cog Cut and as the grey road surface turned to black (indicating the recently poured asphalt), he started counting down…3…2…1…brake!…and then the hairpin left appeared out the open window. Not exactly scientific but desperate measures were in order, and realizing the conditions wouldn’t allow for a personal best, finishing his 7th consecutive run up the mountain was the priority. Stay tuned for the video to be released later this week to see how bad the weather got. p_top_foggyWe finished 4th out of 20 competitors with a time of 11:13. For the misfire to creep up after qualifying and for really sketchy conditions for majority of the course, we’re happy with our result: secured our same qualifying spot on race day, got a decent time all things considered, and made it to the top! Huge thanks to our crew! (L-R) Josh McGuckin, Sterling Chase, Ted Atencio, Zach Williams Special Thanks goes to Adam Kennedy for use of his garage and Scott Krugman for being a good sport when he thought he was just going to sit back and watch some racing. Also, this post is filled with amazing photos, thanks to all the photogs out there who include: Rebecca Greek, Colin Brandt, Mike Newbry, Travis Tollett (Tollett Designs), Val and Savannah Ivanitski (Fingers Crossed Racing), Mike Rogers (Driven Imagery), Rupert Berrington, Joel Yust (Do you want me to shoot you?), Ryan Schnell, Connor Harrison, Yukio Taira, Remi Salva, Teri Lyn Dean, Jason Hahl. Last but never least because we can’t do it without them, thank you to our awesome sponsors: AMS Performance, Turbo By Garrett, Continental Tires, TiAL Sport, Manley Performance Products, Shep Trans, Essex Parts, Kelford Cams, Enkei Wheels, Revolutions Performance, Wright Group Event Services, Guru Graphics. |
Sorry, only registered users may post in this forum.
Rally Anarchy © 2014 Corvus Digital –
Part of the AutoShrine Network –
Problems? Send an email to the Webmaster